Spooky Mummy Brownies with Candy Eyes
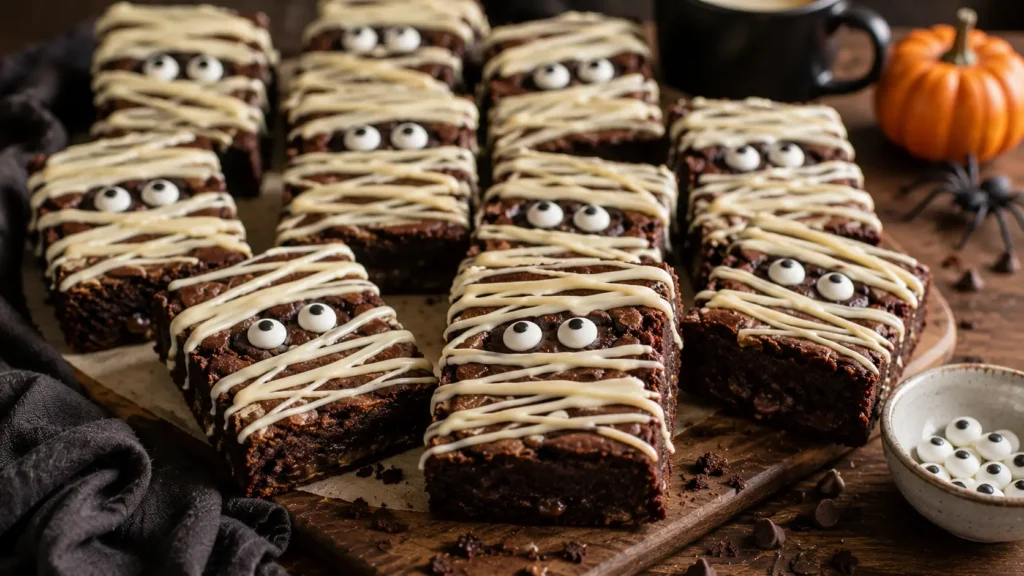
Halloween desserts don’t need complicated decorating techniques to look impressive. These Spooky Mummy Brownies with Candy Eyes start with rich, fudgy homemade brownies and turn them into little edible mummies using irregular ribbons of white chocolate and candy eyes.
The brownies are intentionally dense and chocolatey rather than cakey, which matters for this recipe. A fudgy brownie holds its shape better when cut into rectangles and gives you a sturdy surface for decorating. The white chocolate “bandages” add just enough sweetness while leaving plenty of dark brownie visible underneath.
They’re a particularly fun choice for Halloween parties, classroom treat tables, movie nights, or a Halloween dessert board. Better still, the brownies themselves can be baked ahead and decorated later, so you aren’t trying to bake and decorate everything immediately before your party.
Easy Halloween Mummy Brownies
The mummy effect looks detailed, but the decorating technique is actually very forgiving.
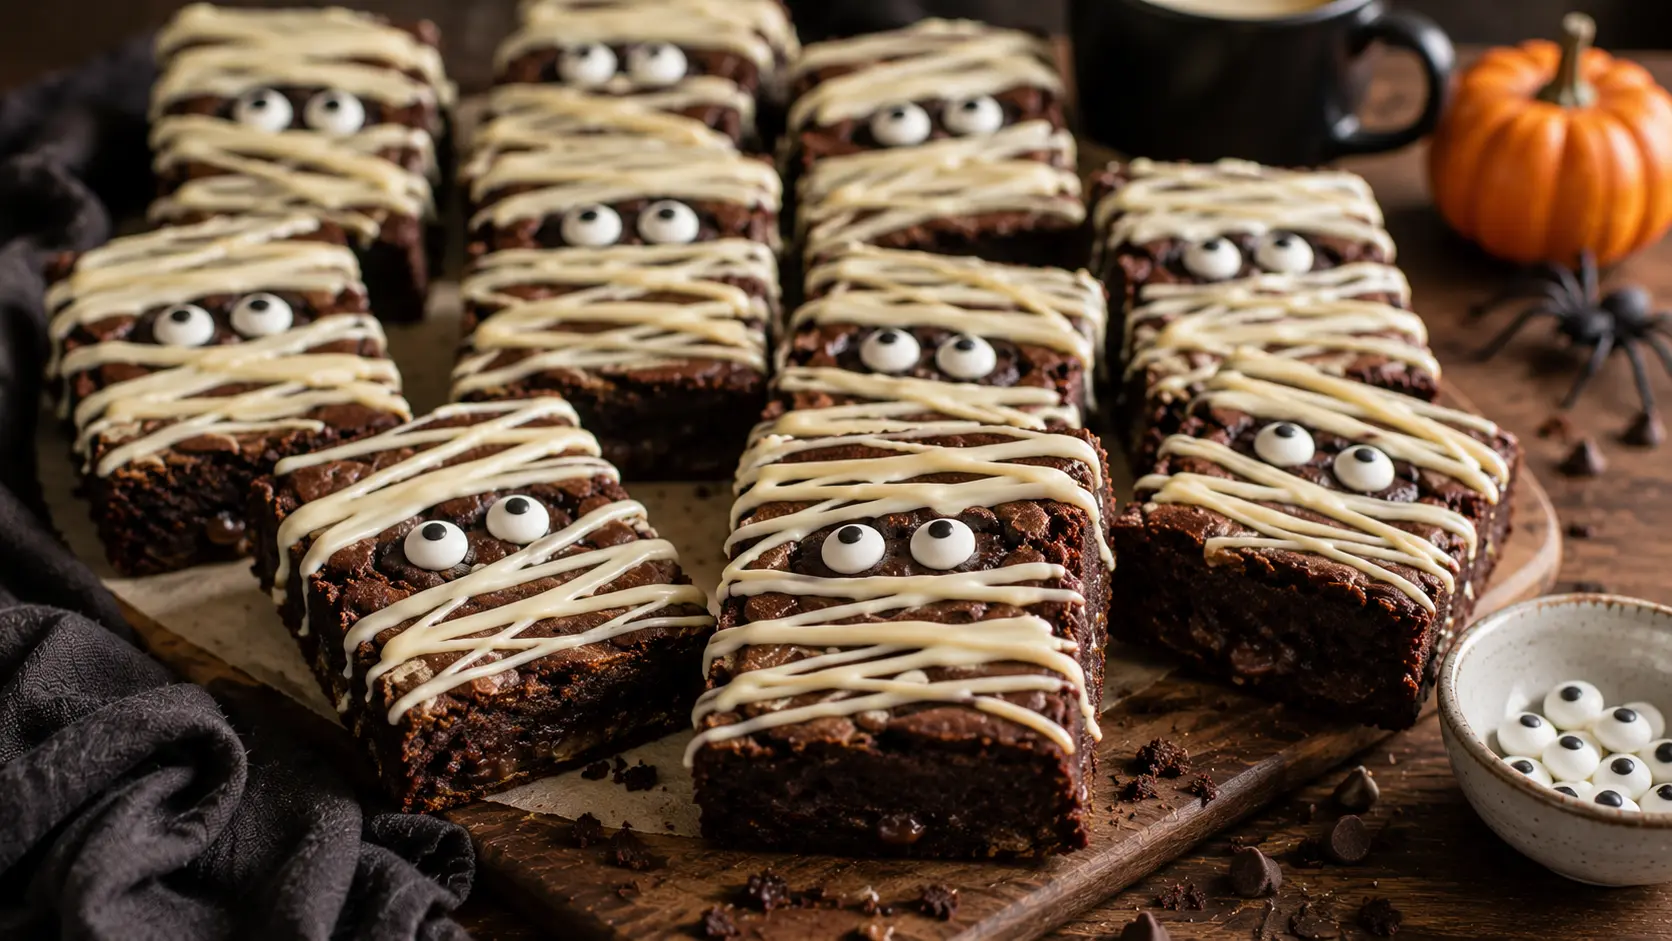
That’s because mummy bandages shouldn’t be perfectly straight or evenly spaced. Once the brownies have cooled and been cut into individual rectangles, melted white chocolate is drizzled back and forth across each brownie in thin, overlapping lines.
Two candy eyes peek through the white chocolate, and that’s essentially the entire design.
The contrast is what makes them work: nearly black chocolate brownies, pale mummy bandages, and bright little eyes.
But appearance isn’t the only thing that matters. A Halloween recipe still needs to taste good after the novelty wears off, so we’re making the brownies from scratch with cocoa powder, melted butter, brown sugar, vanilla, and chocolate chips.
The result is a brownie that can stand on its own even without the Halloween decoration.
⭐ Why You’ll Love This Recipe
👻 Easy Halloween Decorating
There’s no piping bag full of complicated buttercream and no advanced decorating technique. Irregular lines actually make the mummies look better.
🍫 Rich and Fudgy
These are designed to have a dense, moist chocolate center rather than a dry, fluffy cake texture.
🎃 Perfect for Halloween Parties
Individual brownie rectangles are easy to arrange on a Halloween dessert table and easy for guests to pick up.
👀 Kids Will Recognize Them Immediately
A couple of candy eyes and white chocolate bandages transform ordinary brownies into obvious little mummies.
🕸️ Easy to Make Ahead
Bake the brownies the previous day, then decorate them once they’re completely cool.
🔪 No Special Mummy Mold
Everything is baked in one ordinary square pan and cut afterward.
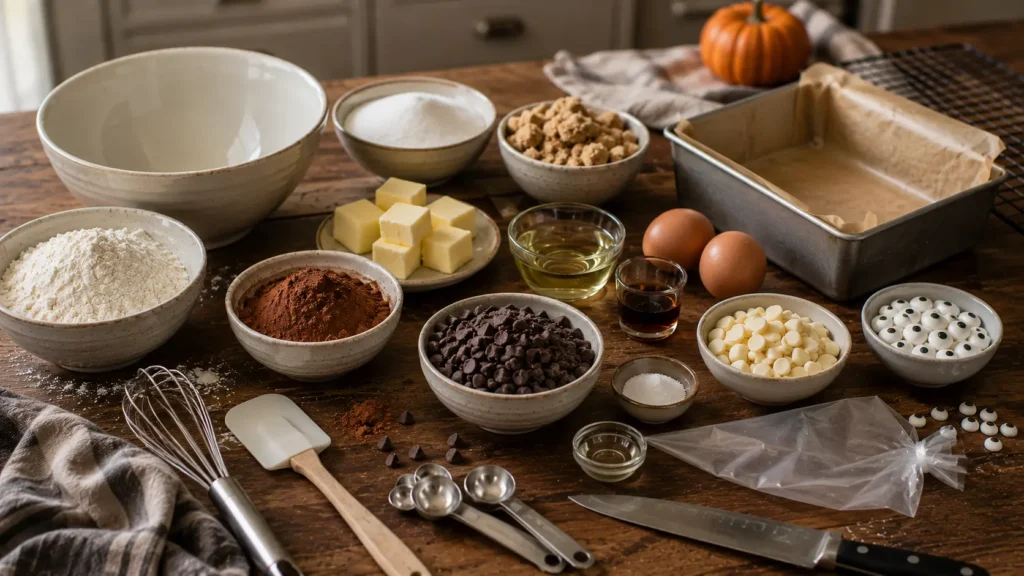
🛒 Ingredients
Unsalted Butter — ½ cup (113 g)
Melted butter provides richness and contributes to the dense brownie texture.
Neutral Oil — ¼ cup (60 ml)
A small amount of oil helps the brownies stay soft even after they’ve cooled completely for decorating.
Granulated Sugar — ¾ cup (150 g)
Provides sweetness and helps create the characteristic brownie texture.
Light Brown Sugar — ½ cup (100 g)
Brown sugar adds moisture and a subtle caramel depth that complements the chocolate.
Large Eggs — 2
Eggs provide structure while helping create that dense, chewy interior.
Use room-temperature eggs when practical.
Vanilla Extract — 2 teaspoons
Vanilla rounds out the cocoa flavor.
Unsweetened Cocoa Powder — ¾ cup (65 g)
Use good-quality natural or Dutch-process cocoa powder. Either can work here because the recipe’s primary leavener isn’t dependent on cocoa acidity.
All-Purpose Flour — ¾ cup (95 g)
We’re deliberately keeping the flour relatively restrained. Too much flour is one of the fastest ways to turn fudgy brownies into cakey ones.
Fine Salt — ½ teaspoon
Chocolate desserts need salt. It balances sweetness and makes the cocoa taste more pronounced.
Chocolate Chips — ½ cup (85 g)
Semisweet or dark chocolate chips create small melted chocolate pockets throughout the brownies.
White Chocolate — 6 oz (170 g)
This creates the mummy bandages.
Choose white chocolate designed for melting when possible. Real white chocolate can be thicker when melted, so we can adjust the consistency if necessary.
Neutral Oil — 1–2 teaspoons, if needed
This is optional and is used only to thin overly thick melted white chocolate.
Candy Eyes — Approximately 24
You’ll need two eyes for each brownie if making 12 mummy brownies.
Buy a few extras because candy decorations have a remarkable ability to disappear while you’re baking.
👩🍳 How to Make Mummy Brownies
1. Prepare the Baking Pan
Preheat your oven to 350°F (175°C).
Lightly grease an 8 × 8-inch baking pan, then line it with parchment paper.
Leave some parchment extending above two sides of the pan so you can lift the entire brownie slab out after baking.
2. Melt the Butter
Melt the butter gently and allow it to cool for several minutes.
It can remain warm, but it shouldn’t be extremely hot when you add the eggs later.
3. Combine the Sugars and Fat
In a large mixing bowl, whisk together:
- melted butter
- neutral oil
- granulated sugar
- brown sugar
Whisk until well combined.
4. Add the Eggs
Add the eggs one at a time, whisking well after each addition.
Continue whisking for roughly 30–45 seconds after the second egg.
This helps dissolve some of the sugar and contributes to a better brownie surface.
5. Add Vanilla
Whisk in the vanilla extract.
6. Combine the Dry Ingredients
In a separate bowl, whisk together:
- cocoa powder
- flour
- salt
Break apart any large cocoa lumps.
7. Fold Everything Together
Add the dry ingredients to the wet mixture.
Switch to a silicone spatula and fold gently.
Stop once only a few dry streaks remain.
8. Add Chocolate Chips
Fold in the chocolate chips just until evenly distributed.
Avoid continuing to mix once the flour has disappeared.
9. Transfer the Batter
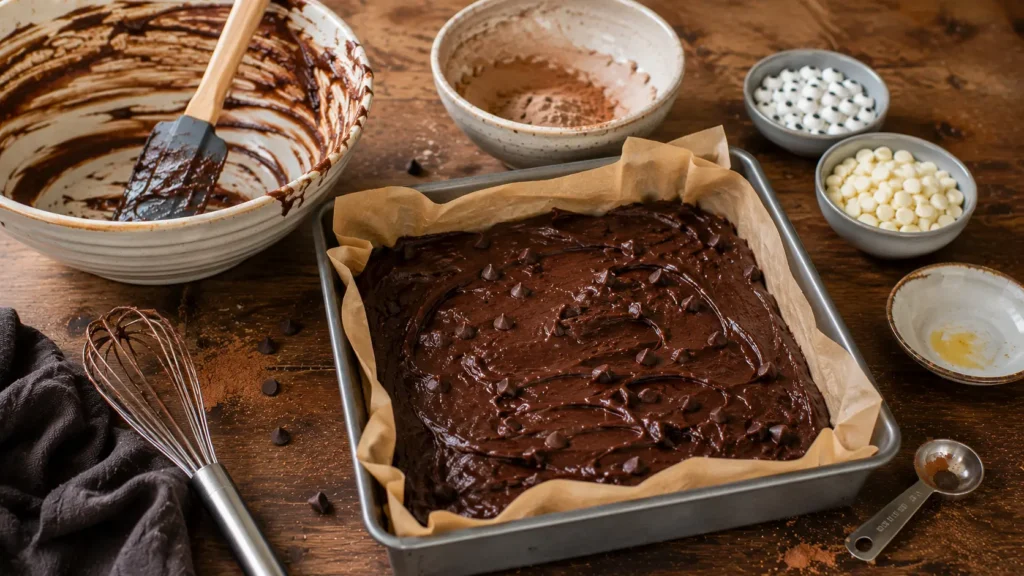
Scrape the brownie batter into the prepared pan.
The batter will be fairly thick.
Spread it gently into the corners and level the surface without aggressively working it.
10. Bake
Bake for approximately 24–30 minutes.
Start checking around 23–24 minutes.
A toothpick inserted near the center should emerge with moist chocolate crumbs, rather than completely clean.
Wet batter means the brownies need additional time.
11. Cool Completely
Leave the brownies in the pan for approximately 20 minutes.
Then use the parchment to carefully lift the entire slab onto a cooling rack.
Allow it to cool completely before decorating.
This is important. Warm brownies will cause the mummy bandages to melt and disappear.
12. Chill Briefly for Cleaner Cuts
Once completely cool, you can refrigerate the brownie slab for approximately 20–30 minutes.
This isn’t mandatory, but slightly chilled fudgy brownies are much easier to cut neatly.
13. Cut Into Mummy Shapes
Use a large sharp knife to cut the slab into 12 rectangular brownies.
Wipe the blade clean between cuts.
Don’t worry if every rectangle isn’t exactly identical. Slight differences actually make the finished mummies feel more homemade.
14. Melt the White Chocolate
Place the white chocolate in a microwave-safe bowl.
Microwave for 15–20 seconds at a time, stirring thoroughly between intervals.
Stop heating once almost all the chocolate has melted, then continue stirring until smooth.
This reduces the chance of overheating it.
If the white chocolate is too thick to drizzle, stir in ½ teaspoon neutral oil at a time until it flows more easily.
15. Add the Candy Eyes
Place two candy eyes toward the upper third of each brownie.
Use a tiny dab of melted white chocolate underneath each eye if necessary to keep it in place.
Don’t position every pair exactly the same way.
A little variation makes the mummies more playful.
16. Create the Mummy Bandages
Transfer the melted white chocolate into a small piping bag or zip-top bag.
Cut a very small opening at the corner.
Drizzle the chocolate back and forth over each brownie using irregular diagonal and horizontal lines.
Leave enough dark brownie exposed that the bandages remain distinct.
Let some lines overlap.
Avoid making perfectly parallel stripes.
17. Keep the Eyes Visible
Drizzle several white chocolate lines close to and partly around the eyes, but don’t completely cover them.
The eyes should appear to be peeking through the mummy wrapping.
18. Let the Chocolate Set
Leave the decorated brownies at room temperature until the white chocolate becomes firm.
If your kitchen is particularly warm, refrigerate them briefly.
🍽️ Equipment
You’ll need:
- 8 × 8-inch baking pan
- Parchment paper
- Large mixing bowl
- Medium mixing bowl
- Whisk
- Silicone spatula
- Measuring cups and spoons or kitchen scale
- Cooling rack
- Large sharp knife
- Microwave-safe bowl
- Small piping bag or zip-top bag
- Toothpick or cake tester
No special Halloween baking pan is required.
🔁 Variations
🧟 Green Monster Mummy Brownies
Tint white candy coating very lightly with oil-based green food coloring before drizzling.
Don’t use water-based coloring with chocolate because it can cause the chocolate to seize.
🩸 Bloody Mummy Brownies
Add a very restrained amount of red candy coating between a few bandages for a spooky Halloween effect.
Keep it playful rather than gruesome, especially when serving children.
🍪 Cookies-and-Cream Mummies
Add some roughly chopped chocolate sandwich cookies to the brownie batter for additional crunch.
🤍 White Candy-Melt Bandages
If you find white chocolate difficult to work with, white candy melts generally produce easier, more predictable drizzling.
🍫 Extra-Dark Mummies
Use dark cocoa powder and dark chocolate chips for a nearly black brownie that creates stronger contrast against the white bandages.
💡 Pro Tips
Don’t Overbake the Brownies
This is the biggest difference between a fudgy brownie and a dry one.
Take them out when a tester shows moist crumbs.
Cool Before Cutting
Warm brownies are much more likely to tear and stick to your knife.
Chill for Extra-Clean Rectangles
A short refrigeration period makes fudgy brownies firmer and easier to portion.
Wipe Your Knife
Chocolate residue accumulates quickly. Cleaning the blade between cuts produces much cleaner edges.
Don’t Overheat White Chocolate
White chocolate is particularly sensitive to excessive heat.
Short microwave intervals and frequent stirring are safer than one long blast.
Make the Bandages Messy
This is one recipe where imperfect decorating is genuinely an advantage.
Mummy wrapping shouldn’t look machine-made.
Add Eyes Before Most of the Drizzle
Positioning the eyes first makes it easier to create bandages that appear to wrap naturally around them.
🧊 Storage & Freezing
Room Temperature
Store decorated brownies in an airtight container at cool room temperature for approximately 2–3 days.
Place parchment between layers so the decorations don’t stick together.
Refrigerator
They can be refrigerated for up to 5 days.
Let them sit at room temperature for about 15–20 minutes before serving for a softer brownie texture.
Freezing
The brownies freeze best before decorating.
Wrap cooled individual brownies tightly and place them inside a freezer-safe container.
Freeze for up to 2 months.
Thaw completely, then add the white chocolate and candy eyes.
❓ Frequently Asked Questions
Can I Use Boxed Brownie Mix?
Yes. If you’re short on time, the mummy decorating technique works with a boxed mix.
However, this homemade version is designed to give you a rich, sturdy, fudgy brownie that holds up especially well to cutting and decorating.
Can I Use Candy Melts Instead of White Chocolate?
Absolutely.
Candy melts are generally easier to melt and drizzle and can be particularly useful when making these with children.
Why Is My White Chocolate Too Thick?
Some brands naturally melt thicker than others.
Stirring in a tiny amount of neutral oil can make it easier to drizzle.
Why Did My White Chocolate Seize?
Water or excessive heat are common causes.
Make sure your bowl and utensils are completely dry and heat the chocolate gradually.
When Should I Add the Candy Eyes?
After cutting the brownies and before creating most of the mummy bandages.
Can I Make These the Day Before a Halloween Party?
Yes.
In fact, making them a day ahead can make party preparation easier. Store them covered once the white chocolate has fully set.
Can Children Help Decorate Them?
Yes, provided an adult handles the hot baking pan and melted chocolate as appropriate.
Once the brownies are cool, adding candy eyes and creating intentionally messy mummy bandages is a particularly forgiving decorating activity.
🍽️ What to Serve With Mummy Brownies
These brownies work particularly well as one item on a larger Halloween dessert table.
Serve them alongside popcorn, fresh fruit, pretzels, chocolate-covered strawberries, or other individually portioned treats to give guests a mixture of sweet and salty options.
If you’re building a larger Halloween party menu, Easy Mummy Pretzel Dogs make a fun savory counterpart. The matching mummy theme connects the table visually without serving two desserts that taste alike.
Your Creamy Spider Web Buffalo Chicken Dip also works well as the savory centerpiece before bringing out the brownies for dessert.
📊 Approximate Nutrition
Per brownie when divided into 12 mummy brownies:
Calories: ~340
Carbohydrates: ~44 g
Protein: ~4 g
Fat: ~18 g
Saturated Fat: ~9 g
Fiber: ~2 g
Sugar: ~32 g
Sodium: ~120 mg
Nutrition is an estimate and varies according to chocolate, candy decorations, ingredient brands, and portion size.
Spooky Mummy Brownies with Candy Eyes
Ingredients
Method
- Preheat oven to 350°F (175°C) and line an 8 × 8-inch pan with parchment.
- Whisk melted butter, oil, granulated sugar, and brown sugar.
- Add eggs one at a time and whisk well.
- Mix in vanilla.
- Separately whisk cocoa powder, flour, and salt.
- Fold the dry ingredients into the wet mixture.
- Fold in chocolate chips.
- Spread batter into the prepared pan.
- Bake for 24–30 minutes, until a tester has moist crumbs but no raw batter.
- Cool for 20 minutes in the pan, then transfer to a rack and cool completely.
- Refrigerate for 20–30 minutes if you want cleaner cuts.
- Cut into 12 rectangular brownies.
- Melt white chocolate gradually in short microwave intervals.
- If necessary, thin with a tiny amount of neutral oil.
- Attach two candy eyes to each brownie with a little melted chocolate.
- Drizzle irregular white chocolate lines across each brownie to create mummy bandages.
- Leave the eyes partially exposed.
- Allow the chocolate to set before serving.
Notes
- Don’t overbake if you want fudgy brownies.
- Cool completely before cutting and decorating.
- Slightly chilling the slab produces cleaner cuts.
- White candy melts can be easier to handle than real white chocolate.
- Keep all utensils dry when melting chocolate.
- Irregular bandages look more realistic than perfect parallel lines.
- The brownies can be baked one day before decorating.
- Freeze undecorated brownies for the best results.