Cozy Black Cat Sugar Cookies with Easy Royal Icing
These Black Cat Sugar Cookies are the kind of Halloween treat that manages to be spooky and adorable at the same time. Buttery cutout sugar cookies are baked until their edges are just barely golden, then covered with smooth black royal icing and finished with simple white cat eyes, noses, and whiskers.
They’re especially fun when you want a Halloween baking project that looks impressive without requiring professional decorating skills. The cat faces don’t need to match—in fact, slightly crooked whiskers, different eye shapes, and imperfect little ears give each cookie its own personality.
The dough is designed to hold its shape during baking, which is particularly important when you’re working with pointed cat ears. Chilling the dough before and after cutting helps prevent those carefully cut silhouettes from spreading in the oven.
Add these cookies to a Halloween dessert table with our Airy Ghost Meringue Cookies for a simple black-and-white spooky theme.

Easy Halloween Black Cat Sugar Cookies
The secret to good decorated Halloween sugar cookies starts long before the royal icing comes out.
You need a cookie that’s tender enough to taste good but sturdy enough to hold a clean cutout shape.
For these black cat cookies, softened butter provides classic sugar-cookie flavor while a small amount of cream cheese keeps the centers tender. The dough is chilled before rolling and then chilled briefly again after cutting.
That second chill is particularly useful for cat-shaped cookies because the ears are the first areas likely to lose their definition.
Once baked and completely cooled, the cookies are decorated with two consistencies of royal icing: thicker icing for outlining and slightly thinner icing for flooding.
Then comes the fun part—giving every cat a face.
⭐ Why You’ll Love This Recipe
Perfect for Halloween: Black cats are instantly recognizable without relying on complicated decorations.
Great shape retention: Proper chilling helps the pointed ears stay defined.
Beginner-friendly decorating: Simple eyes and whiskers are enough to create the cat faces.
Soft, buttery cookies: They taste good underneath all that decoration.
Make-ahead friendly: The dough and undecorated cookies can both be prepared in advance.
Every cookie can be different: There’s no reason to chase perfect identical faces.
For a colorful contrast on the same Halloween table, add our Candy Corn White Chocolate Bark with its bright orange, yellow, and white toppings.
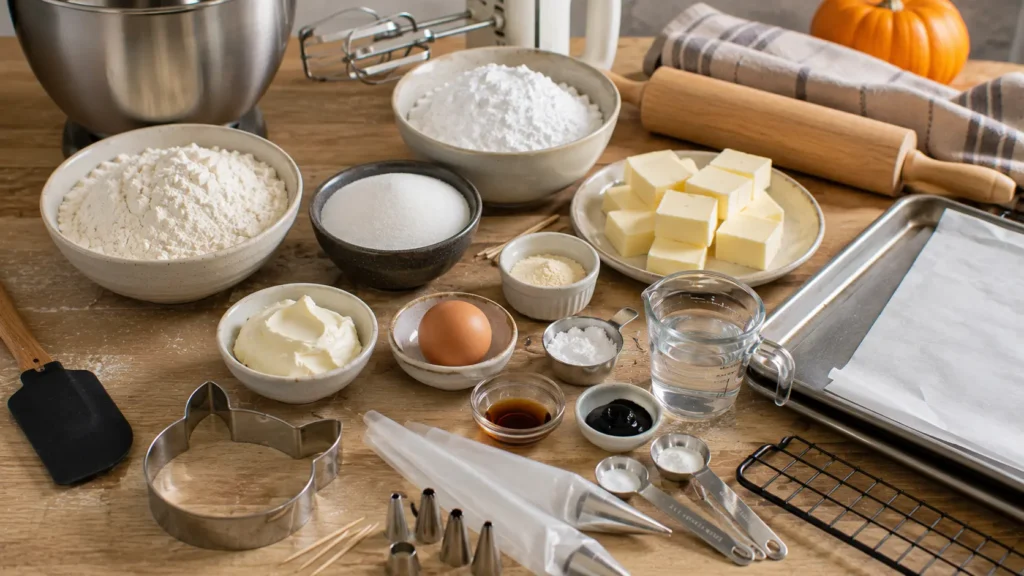
🛒 Ingredients
For the Sugar Cookies
Unsalted Butter — 1 Cup (226 g)
Use softened butter rather than melted butter.
It should give slightly when pressed but shouldn’t look greasy or partially liquid.
Cream Cheese — 2 oz (56 g)
A small amount of full-fat cream cheese helps create a tender cookie while still allowing the dough to hold its shape.
Granulated Sugar — 1 Cup (200 g)
Regular white granulated sugar provides sweetness and structure.
Large Egg — 1
Room-temperature egg incorporates more easily into the creamed butter mixture.
Vanilla Extract — 2 Teaspoons
Vanilla provides the main flavor for our simple sugar-cookie base.
All-Purpose Flour — 2¾ Cups (345 g)
Measure carefully.
Too much flour can produce dry cookies, while too little makes the dough harder to cut cleanly.
Baking Powder — 1 Teaspoon
Just enough gives the cookies a little tenderness without creating excessive puffing.
Fine Salt — ½ Teaspoon
Salt balances the sweetness and brings out the vanilla flavor.
For the Easy Royal Icing
Powdered Sugar — 4 Cups (480 g)
Sift it if there are noticeable lumps.
Meringue Powder — 3 Tablespoons
Meringue powder provides structure and allows the royal icing to dry firm.
Warm Water — 5–6 Tablespoons
Start with less.
Additional water can always be added a few drops at a time when adjusting the consistency.
Vanilla Extract — ½ Teaspoon
Clear vanilla can help maintain bright white detail icing, but regular vanilla works too.
Black Gel Food Coloring
Gel coloring is preferable to thin liquid coloring because it creates deeper color without adding excessive moisture.
You’ll need enough to turn the larger portion of icing a rich black.
👩🍳 How to Make Black Cat Sugar Cookies
1. Combine Butter and Cream Cheese
Place the softened butter and cream cheese in a large mixing bowl.
Beat on medium speed for approximately 2 minutes, until smooth.
2. Add Sugar
Add the granulated sugar.
Beat for another 2–3 minutes, until the mixture becomes lighter and slightly fluffy.
3. Add Egg
Beat in the room-temperature egg until incorporated.
4. Add Vanilla
Mix in the vanilla extract.
Scrape down the sides and bottom of the bowl.
5. Combine the Dry Ingredients
In a separate bowl, whisk together the flour, baking powder, and salt.
6. Make the Dough
Gradually add the dry ingredients to the butter mixture.
Mix on low speed only until a cohesive dough forms.
Avoid excessive mixing.
7. Divide the Dough
Divide the dough into two portions and flatten each into a disk.
8. Chill
Wrap the dough and refrigerate for at least 2 hours.
9. Prepare for Baking
Preheat the oven to 350°F (175°C).
Line two large baking sheets with parchment paper.
10. Roll the Dough
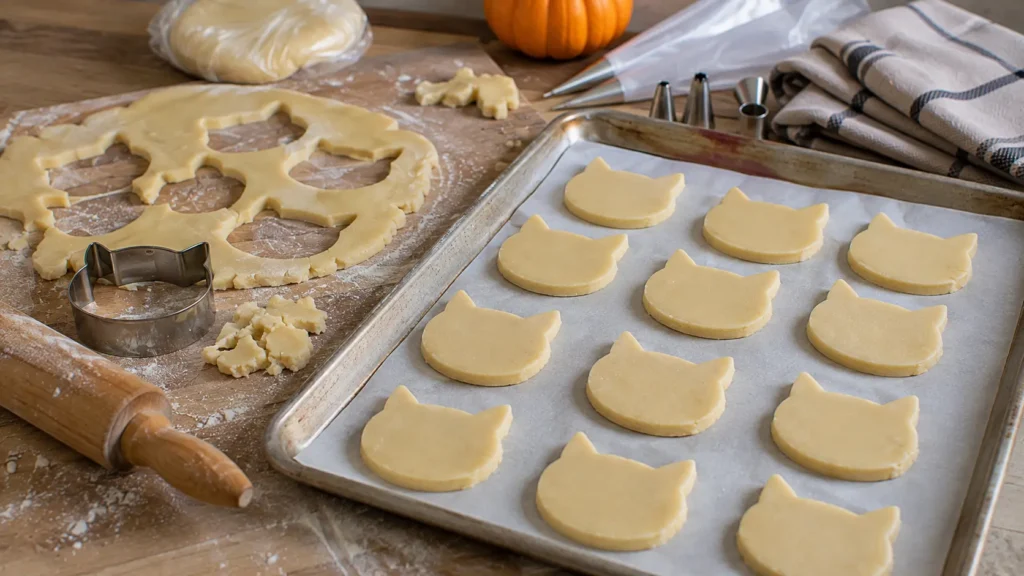
On a lightly floured surface, roll one chilled dough disk to approximately ¼ inch thick.
11. Cut the Cats
Use an approximately 3-inch cat-face cookie cutter to cut the dough.
The shape should have a rounded lower face with two pointed ears.
12. Transfer to the Baking Sheet
Carefully move each cat onto the parchment-lined sheet.
Leave approximately 2 inches between cookies.
13. Chill Again
Refrigerate the entire baking sheet for 15–20 minutes.
This second chilling helps preserve the cat ears.
14. Bake
Bake for approximately 8–10 minutes.
Look for cookies that are set in the centers with only the faintest golden color around the edges.
15. Cool
Leave them on the baking sheet for approximately 5 minutes before transferring them to a wire rack.
Cool completely before decorating.
16. Make the Royal Icing
Combine powdered sugar and meringue powder in a clean mixing bowl.
Add 5 tablespoons warm water and vanilla.
Beat until thick and glossy.
17. Divide the Icing
Reserve a small portion of white icing for the facial details.
Color the larger portion with black gel food coloring.
18. Prepare Two Black Consistencies
Keep some black icing relatively thick for outlining.
Thin the remaining black icing gradually with tiny amounts of water until it reaches a smooth flooding consistency.
19. Outline and Flood
Pipe a thin black border around each cooled cat cookie.
Fill the center with thinner black icing and use a toothpick to guide it toward the edges.
20. Add the Cat Faces
After the black surface begins to set, use white royal icing to pipe simple eyes, a tiny nose, and thin whiskers.
Allow the cookies to dry completely before stacking.
🍳 Equipment
You’ll need a stand mixer or electric hand mixer, two mixing bowls, rolling pin, approximately 3-inch cat-face cookie cutter, two baking sheets, parchment paper, wire cooling rack, rubber spatula, measuring cups and spoons, piping bags, small round piping tips, and toothpicks or a cookie scribe.
A small offset spatula is also helpful when transferring delicate raw cookies without distorting the ears.
🔄 Variations
Green-Eyed Black Cats
Reserve a tiny amount of royal icing and tint it green or yellow for spooky Halloween eyes.
Chocolate Sugar Cookies
Replace a small portion of the flour with unsweetened cocoa powder for a chocolate cookie underneath the black icing.
Simple Silhouette Cats
Skip the facial details entirely and decorate each cookie with smooth black royal icing for a more elegant Halloween appearance.
Different Cat Expressions
Give some cats round eyes, some narrow eyes, and others slightly crooked whiskers.
Purple Halloween Cats
Replace the black icing on a few cookies with deep purple icing for additional color.
Halloween Cookie Platter
Combine the cats with our Spooky Halloween Monster Cookies and Spooky Peanut Butter Spider Cookies for three completely different Halloween cookie designs.
💡 Pro Tips
Chill the dough thoroughly. Warm sugar-cookie dough spreads more easily and can destroy those pointed cat ears.
Don’t roll too thin. About ¼ inch creates cookies sturdy enough for decorating.
Chill the cut cookies again. This small extra step significantly improves shape retention.
Don’t overbake them. The centers should be set, but the cookies don’t need deeply browned edges.
Cool completely before icing. Royal icing on warm cookies will soften and run.
Add black coloring gradually. The shade often becomes darker after sitting for a short period.
Adjust royal icing with tiny amounts of water. A few drops can make a surprisingly large difference.
Don’t aim for identical cats. Small differences make homemade decorated cookies much more charming.
🧊 Storage
Let the royal icing dry completely before storing the cookies.
Once dry, transfer them to an airtight container and keep them at room temperature for approximately 1 week for best quality.
Place parchment paper between layers to protect the decorated surfaces.
Avoid refrigerating decorated royal-icing cookies unless necessary because refrigerator humidity can affect the icing’s texture and appearance.
Undecorated baked cookies can also be frozen for approximately 2–3 months.
Let them thaw completely at room temperature before decorating.
❓ Frequently Asked Questions
Why Did My Cat Cookies Spread?
The dough was probably too warm.
Make sure it receives both chilling periods: once before rolling and again after the cats have been cut.
Can I Make the Dough Ahead?
Yes.
Prepare and refrigerate the dough for up to approximately 3 days, tightly wrapped.
How Do I Get Really Black Royal Icing?
Use concentrated black gel food coloring rather than liquid coloring.
The color also tends to deepen as the icing rests.
Why Is My Royal Icing Running Off the Cookies?
It’s too thin.
Add a little sifted powdered sugar until it reaches a more controllable consistency.
Why Isn’t My Flood Icing Smoothing Out?
It’s probably too thick.
Add water only a few drops at a time until a ribbon of icing settles back into itself after several seconds.
Can I Decorate Warm Cookies?
No.
The cookies should be completely cool before royal icing is applied.
Do I Need a Cat Cookie Cutter?
A cat-face cutter is easiest, but a simple round cutter can work if you add small dough triangles for ears and attach them securely before chilling.
🍽️ How to Serve Black Cat Sugar Cookies
These cookies look particularly striking on a light or wooden serving platter because the black royal icing stands out dramatically against the background.
For a black-and-white Halloween dessert display, pair them with our Airy Ghost Meringue Cookies.
Or create a larger Halloween cookie platter with Spooky Peanut Butter Spider Cookies and Spooky Halloween Monster Cookies.
For parties where you want more than cookies, add pieces of Candy Corn White Chocolate Bark to bring bright orange and yellow into the spread.
📊 Approximate Nutrition
Based on approximately 24 cookies:
Calories: ~180
Carbohydrates: ~26 g
Protein: ~2 g
Fat: ~8 g
Sugar: ~18 g
Sodium: ~80 mg
Nutrition is an estimate and varies depending on cookie size and the amount of royal icing used.

Cozy Black Cat Sugar Cookies with Easy Royal Icing
Ingredients
Method
- Beat butter and cream cheese until smooth.
- Add sugar and beat for 2–3 minutes until light and fluffy.
- Beat in egg and vanilla.
- Whisk flour, baking powder, and salt separately.
- Gradually mix dry ingredients into wet ingredients just until dough forms.
- Divide into two disks, wrap, and refrigerate for at least 2 hours.
- Preheat oven to 350°F (175°C).
- Line baking sheets with parchment.
- Roll chilled dough approximately ¼ inch thick.
- Cut with a 3-inch cat-face cookie cutter.
- Transfer cookies to prepared sheets.
- Refrigerate cut cookies for 15–20 minutes.
- Bake for 8–10 minutes until set with barely golden edges.
- Cool for 5 minutes on the pan before transferring to a cooling rack.
- Cool completely.
- Combine powdered sugar and meringue powder.
- Add 5 tablespoons warm water and vanilla and beat until thick and glossy.
- Reserve a small portion of white icing.
- Color the remaining icing black.
- Prepare thicker black outlining icing and thinner flooding icing.
- Outline each cat with black royal icing.
- Flood the centers and smooth with a toothpick.
- Allow the black icing to begin setting.
- Pipe white eyes, noses, and whiskers.
- Let the royal icing dry completely before storing.