Spooky Peanut Butter Spider Cookies for Halloween
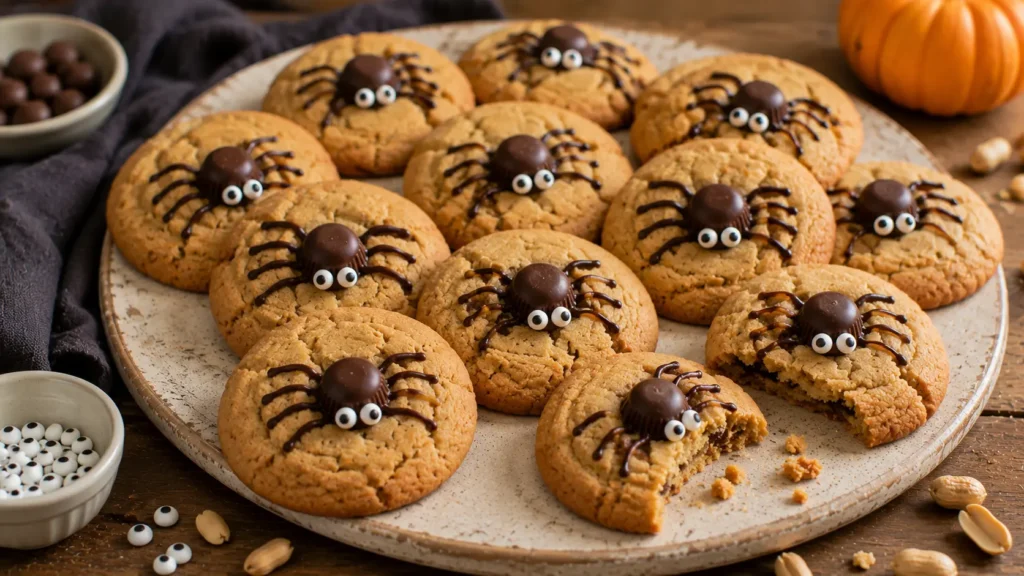
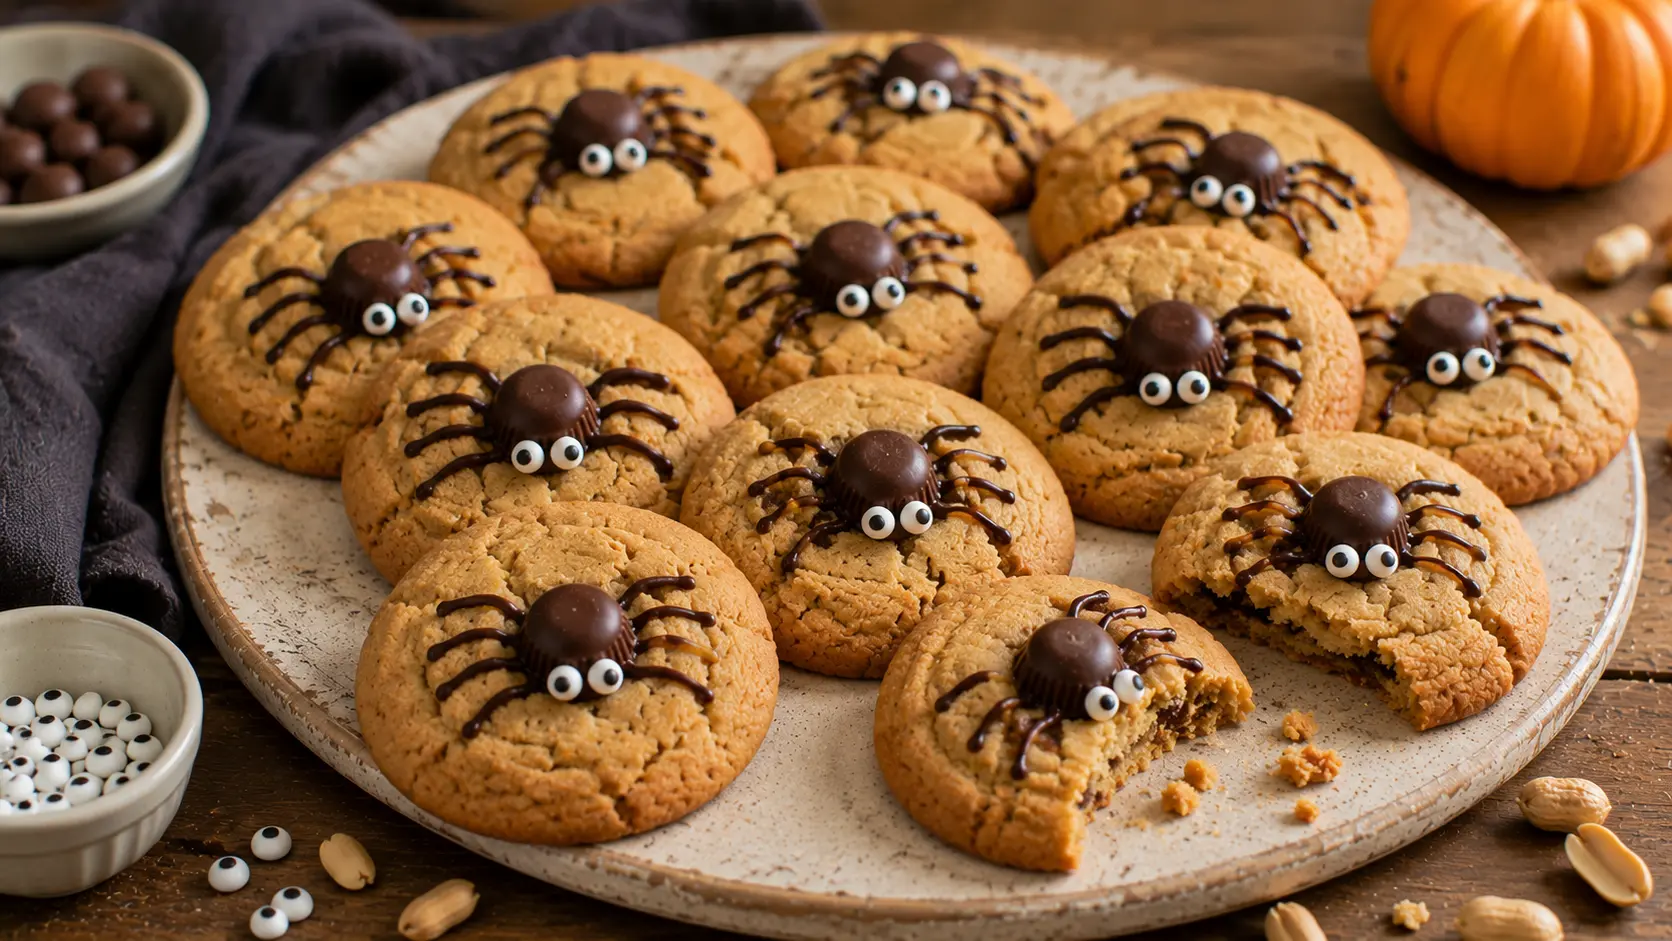
Halloween cookies don’t need complicated icing or elaborate decorating to make an impression. These Spooky Peanut Butter Spider Cookies start with soft, chewy peanut butter cookies and transform them into playful little spiders using round chocolate candies, melted chocolate legs, and edible candy eyes.
The peanut butter cookie itself is important here. It needs enough structure to hold the chocolate spider without becoming dry or crumbly, while the center should remain soft and tender. Brown sugar adds moisture and chewiness, while creamy peanut butter provides plenty of roasted peanut flavor.
The spider decoration is intentionally simple. A round chocolate candy becomes the body, thin lines of melted chocolate form the legs, and two small candy eyes bring the spider to life. Because the spiders don’t need to look identical, these cookies are surprisingly forgiving to decorate and make a great addition to a Halloween dessert table.
Easy Peanut Butter Spider Cookies
The secret to making these cookies work is getting the timing right.
The chocolate body needs to sit securely in the cookie without melting into a puddle. Instead of baking the chocolate candies from the beginning, we’ll bake the peanut butter cookies first and then gently press a round chocolate candy into each cookie while it’s still warm.
The heat softens the bottom of the chocolate just enough to help it adhere.
Once the cookies have cooled, melted semisweet chocolate is piped into four thin legs on each side of the body. Two tiny edible candy eyes complete the spider.
That means you don’t need specialty cookie cutters or complicated frosting techniques.
And underneath all that Halloween decoration is still a classic peanut butter cookie: lightly crisp around the edges, soft through the middle, and packed with peanut flavor.
⭐ Why You’ll Love This Recipe
🕷️ Instantly Recognizable Halloween Design
A chocolate body, eight little legs, and candy eyes turn an ordinary peanut butter cookie into a spooky spider.
🥜 Soft Peanut Butter Cookies
The cookies have plenty of peanut flavor with soft centers and lightly golden edges.
🍫 Peanut Butter + Chocolate
There’s a reason this combination is a classic. The semisweet chocolate balances the sweet, salty peanut butter cookie.
👻 No Complicated Icing
You won’t need royal icing, elaborate piping tips, or advanced decorating skills.
🎃 Great for Halloween Parties
These cookies are easy to serve, transport, and arrange on a Halloween dessert table.
🧊 Make-Ahead Friendly
The cookie dough can be prepared ahead, and the baked cookies can be decorated later.
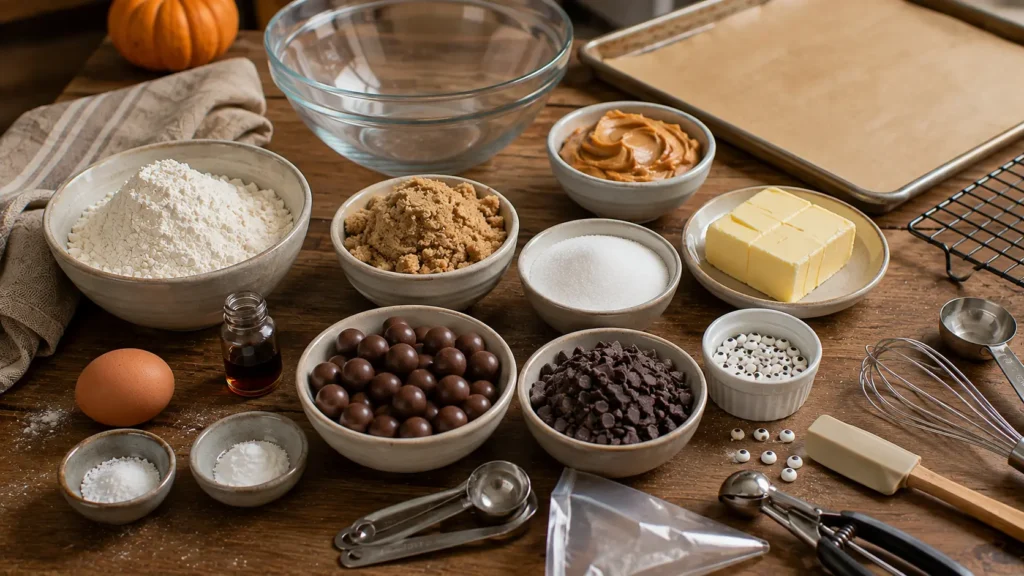
🛒 Ingredients
All-Purpose Flour — 1½ Cups (188 g)
Flour provides enough structure to support the chocolate spider while keeping the cookie tender.
For the most consistent result, weigh your flour rather than packing it into a measuring cup.
Baking Soda — ½ Teaspoon
Helps the cookies spread and brown.
Fine Salt — ¼ Teaspoon
A little salt balances the sweetness and enhances the peanut flavor.
If your peanut butter is particularly salty, you can reduce this slightly.
Unsalted Butter — ½ Cup (113 g), Softened
The butter should be soft enough to cream but not melted.
Pressing it gently should leave an indentation without the butter appearing oily.
Creamy Peanut Butter — ½ Cup (125 g)
Use a conventional creamy peanut butter for the most predictable cookie texture.
Natural peanut butter varieties that separate heavily can change the consistency and spread of the dough.
Light Brown Sugar — ½ Cup (100 g), Packed
Brown sugar adds moisture and chewiness.
Granulated Sugar — ⅓ Cup (67 g)
Granulated sugar helps the edges spread and become lightly crisp.
Large Egg — 1
Provides moisture and structure.
Vanilla Extract — 1½ Teaspoons
Adds warmth and rounds out the peanut butter flavor.
Round Chocolate Candies — 18
Choose small round or dome-shaped chocolates that are proportional to the cookies.
You’ll need one for each spider body.
Avoid extremely large chocolates that cover most of the cookie.
Semisweet Chocolate — 3 oz (85 g)
Melted semisweet chocolate is used to pipe the spider legs and attach the eyes.
Small Edible Candy Eyes — 36
You’ll need two per spider.
Choose small eyes so the spider bodies remain proportional.
👩🍳 How to Make Peanut Butter Spider Cookies
1. Combine the Dry Ingredients
In a medium bowl, whisk together:
- all-purpose flour
- baking soda
- salt
Set aside.
2. Cream the Butter and Peanut Butter
Add the softened butter and creamy peanut butter to a large mixing bowl.
Using an electric mixer, beat on medium speed until smooth and evenly combined, approximately 1 minute.
3. Add the Sugars
Add the brown sugar and granulated sugar.
Beat for another 1–2 minutes, until slightly lighter and creamy.
You don’t need to whip excessive air into the mixture.
4. Add the Egg
Beat in the egg until fully incorporated.
Scrape down the sides and bottom of the bowl.
5. Add Vanilla
Mix in the vanilla extract.
6. Add the Dry Ingredients
Add the flour mixture to the peanut butter mixture.
Mix on low speed just until a cohesive dough forms.
Avoid continuing to beat once the flour has disappeared.
7. Chill the Dough
Cover the dough and refrigerate for approximately 30 minutes.
Chilling helps control spreading and makes the dough easier to portion.
8. Preheat the Oven
Preheat the oven to 350°F (175°C).
Line two large baking sheets with parchment paper.
9. Portion the Dough
Scoop approximately 1½ tablespoons of dough per cookie, roughly 30–35 grams.
Gently roll each portion into a rough ball.
10. Arrange on the Baking Sheet
Place the dough portions approximately 2 inches apart.
Don’t flatten them aggressively.
11. Bake
Bake for approximately 9–11 minutes.
The cookies are ready when:
- edges are lightly golden
- surfaces have developed small cracks
- centers still look soft
- cookies have spread slightly
Don’t wait until the entire cookie looks firm.
12. Create the Spider-Body Indentation
Immediately after removing the cookies from the oven, gently press the rounded back of a teaspoon or another small rounded object into the center of each cookie.
You only need a shallow indentation.
13. Cool Briefly
Allow the cookies to sit on the baking sheet for approximately 3–4 minutes.
This gives them a chance to begin setting while remaining warm.
14. Add the Chocolate Bodies
Place one round chocolate candy into the indentation in each warm cookie.
Press very gently.
The chocolate should sit securely without being pushed deeply into the cookie.

15. Cool Completely
Allow the cookies to finish cooling on the baking sheet for another few minutes.
Transfer carefully to a wire rack.
Wait until the cookies and chocolate bodies are completely cool before piping the legs.
This prevents the decoration from becoming messy.
16. Melt the Semisweet Chocolate
Place the semisweet chocolate in a microwave-safe bowl.
Heat in 15–20 second intervals, stirring thoroughly between each interval.
Stop heating when only a few small pieces remain, then stir until completely smooth.
17. Prepare the Piping Bag
Transfer the melted chocolate to a small piping bag or zip-top bag.
Cut an extremely small opening in the corner.
Thin lines create much more convincing spider legs than thick ones.
18. Pipe Eight Spider Legs
Starting close to the chocolate body, pipe four thin legs on each side.
Instead of straight lines, create slight bends:
outward → small bend → outward again.
This gives the legs a recognizable spider shape.
19. Add the Candy Eyes
Use a tiny dot of melted chocolate to attach two small edible candy eyes to the front of each chocolate body.
Hold each eye in place briefly if necessary.
20. Let the Chocolate Set
Leave the cookies undisturbed until the piped chocolate becomes firm.
Then they’re ready to serve.
🍽️ Equipment
You’ll need:
- Large mixing bowl
- Medium mixing bowl
- Electric hand mixer or stand mixer
- Whisk
- Silicone spatula
- Measuring cups and spoons
- Kitchen scale, recommended
- Cookie scoop
- Two large baking sheets
- Parchment paper
- Wire cooling rack
- Microwave-safe bowl
- Small piping bag or zip-top bag
- Small spoon for creating indentations
🔁 Variations
🍫 Double-Chocolate Spiders
Replace 2 tablespoons of flour with 2 tablespoons of cocoa powder for chocolate-peanut butter cookies.
The dark cookie base gives the spiders an even spookier appearance.
🕷️ One-Eyed Spider Cookies
Use one slightly larger candy eye instead of two small eyes.
The result is more monster-like but still clearly Halloween-themed.
🤎 Different Chocolate Bodies
Use another round chocolate candy that fits naturally in the center of the cookie.
Chocolate truffles are usually too large, so stick with smaller candies.
🥨 Salty Spider Cookies
Add a tiny pinch of flaky salt to the cookie immediately after baking.
Use restraint because both peanut butter and chocolate already provide strong flavors.
🍪 Mini Spider Cookies
Make smaller cookies and use proportionally smaller chocolate candies.
Reduce the baking time and watch them carefully.
💡 Pro Tips
Use Conventional Creamy Peanut Butter
For predictable cookies, use a smooth peanut butter that doesn’t require extensive stirring.
Very oily natural peanut butter can change how much the cookies spread.
Don’t Overmeasure the Flour
Too much flour creates dry, crumbly peanut butter cookies.
A kitchen scale is particularly useful here.
Don’t Skip Chilling
Thirty minutes helps the cookies retain enough thickness to support the spider decorations.
Don’t Overbake
The centers should still appear soft when the cookies leave the oven.
They’ll continue setting on the hot baking sheet.
Make the Indentation While They’re Hot
Once peanut butter cookies cool, they’re more likely to crack if you push into their centers.
Keep the Legs Thin
Thick chocolate lines can make the spiders look more like blobs.
Cut only a tiny opening in your piping bag.
Let the Cookies Cool Before Piping
If the cookie or chocolate body is still warm, the piped legs can spread and lose their shape.
Don’t Make Every Spider Identical
Slight differences in leg angles and eye placement make the cookies look genuinely handmade.
🧊 Storage & Freezing
Room Temperature
Store the decorated cookies in an airtight container at room temperature for up to 4 days.
Place parchment paper between layers to protect the spider decorations.
Refrigerator
Refrigeration isn’t usually necessary.
If your kitchen is particularly warm and the chocolate decorations are softening, you can refrigerate them briefly.
Freezing Baked Cookies
For the best appearance, freeze the cookies before decorating.
Place cooled cookies in a freezer-safe container and freeze for up to 2 months.
Thaw completely before adding the chocolate bodies, legs, and eyes.
Freezing Cookie Dough
Portion the dough into balls and freeze them on a parchment-lined tray.
Once solid, transfer them to a freezer-safe container.
Freeze for up to 2 months.
Allow them to thaw slightly before baking, or bake from partially frozen and add a little extra baking time as needed.
❓ Frequently Asked Questions
Can I Use Natural Peanut Butter?
You can, but the results are less predictable because natural peanut butter varies considerably in oil content and consistency.
For this particular cookie, conventional creamy peanut butter is easier to work with.
When Should I Add the Chocolate Spider Bodies?
Add them while the cookies are still warm, after allowing the cookies to set for just a few minutes.
The warmth helps secure the chocolate.
Why Did My Chocolate Body Melt?
The cookie may have been too hot when the candy was added.
Give the cookies about 3–4 minutes to cool first.
The chocolate can soften slightly, but it shouldn’t collapse completely.
Can I Add the Chocolate Before Baking?
I don’t recommend it.
Adding it afterward gives you much better control over the spider’s shape and prevents unnecessary melting.
Why Are My Peanut Butter Cookies Dry?
The most likely causes are too much flour or too much baking time.
Measure carefully and remove the cookies while the centers remain soft.
Why Did My Cookies Spread Too Much?
The butter may have been overly soft, the dough wasn’t chilled long enough, or your peanut butter may have had a high oil content.
Can I Make These a Day Ahead?
Absolutely.
Once the chocolate decorations have completely set, store the cookies in an airtight container.
Can Kids Help Decorate Them?
Yes. Once the baking and hot-cookie stages are complete, adding chocolate legs and candy eyes can be a fun decorating activity.
🍽️ What to Serve With Peanut Butter Spider Cookies
These spider cookies fit naturally into a larger Halloween dessert spread alongside Spooky Mummy Brownies with Candy Eyes, especially if you want both chocolate-heavy and peanut-butter options.
For something completely different in texture, add Halloween Graveyard Dirt Cups with creamy chocolate pudding and crunchy cookie crumbs. Spooky Halloween Monster Cookies with Candy Eyes are another easy handheld option and make the dessert table especially playful.
On the savory side, Jalapeño Popper Mummies with Crescent Rolls provide a useful contrast before guests move on to all the Halloween sweets.
If you’re serving these at a party, remember that these cookies contain peanuts. Keep them clearly separated from other desserts when guests may have peanut allergies.
📊 Approximate Nutrition
Per cookie when making 18 cookies:
Calories: ~230
Carbohydrates: ~25 g
Protein: ~4 g
Fat: ~14 g
Saturated Fat: ~6 g
Fiber: ~1 g
Sugar: ~15 g
Sodium: ~125 mg
Nutrition is an estimate and varies according to peanut butter, chocolate candy, candy eyes, and portion size.
Spooky Peanut Butter Spider Cookies for Halloween
Ingredients
Method
- Whisk flour, baking soda, and salt together.
- Beat softened butter and peanut butter until smooth.
- Add brown sugar and granulated sugar and beat for 1–2 minutes.
- Mix in the egg.
- Add vanilla.
- Mix in the dry ingredients just until combined.
- Cover and refrigerate dough for 30 minutes.
- Preheat oven to 350°F (175°C) and line baking sheets with parchment.
- Portion dough into approximately 30–35 g balls.
- Arrange about 2 inches apart.
- Bake for 9–11 minutes, until the edges are lightly golden and centers remain soft.
- Immediately make a shallow indentation in the center of each cookie.
- Cool on the baking sheet for 3–4 minutes.
- Gently press one round chocolate candy into each indentation.
- Cool completely.
- Melt the semisweet chocolate.
- Transfer to a small piping bag and cut a tiny opening.
- Pipe four thin bent legs on each side of every chocolate body.
- Attach two candy eyes using tiny dots of melted chocolate.
- Allow the chocolate to set before serving.
Notes
- Conventional creamy peanut butter gives the most predictable texture.
- Weigh the flour if possible.
- Chill the dough for at least 30 minutes.
- Don’t overbake—the centers should remain soft.
- Create the center indentation while the cookies are hot.
- Wait 3–4 minutes before adding the chocolate bodies so they don’t completely melt.
- Cool completely before piping the spider legs.
- Use a very small piping opening for thin legs.
- Store in an airtight container for up to 4 days.
- Contains peanuts.