Halloween Graveyard Dirt Cups with Oreo Crumbs & Gummy Worms
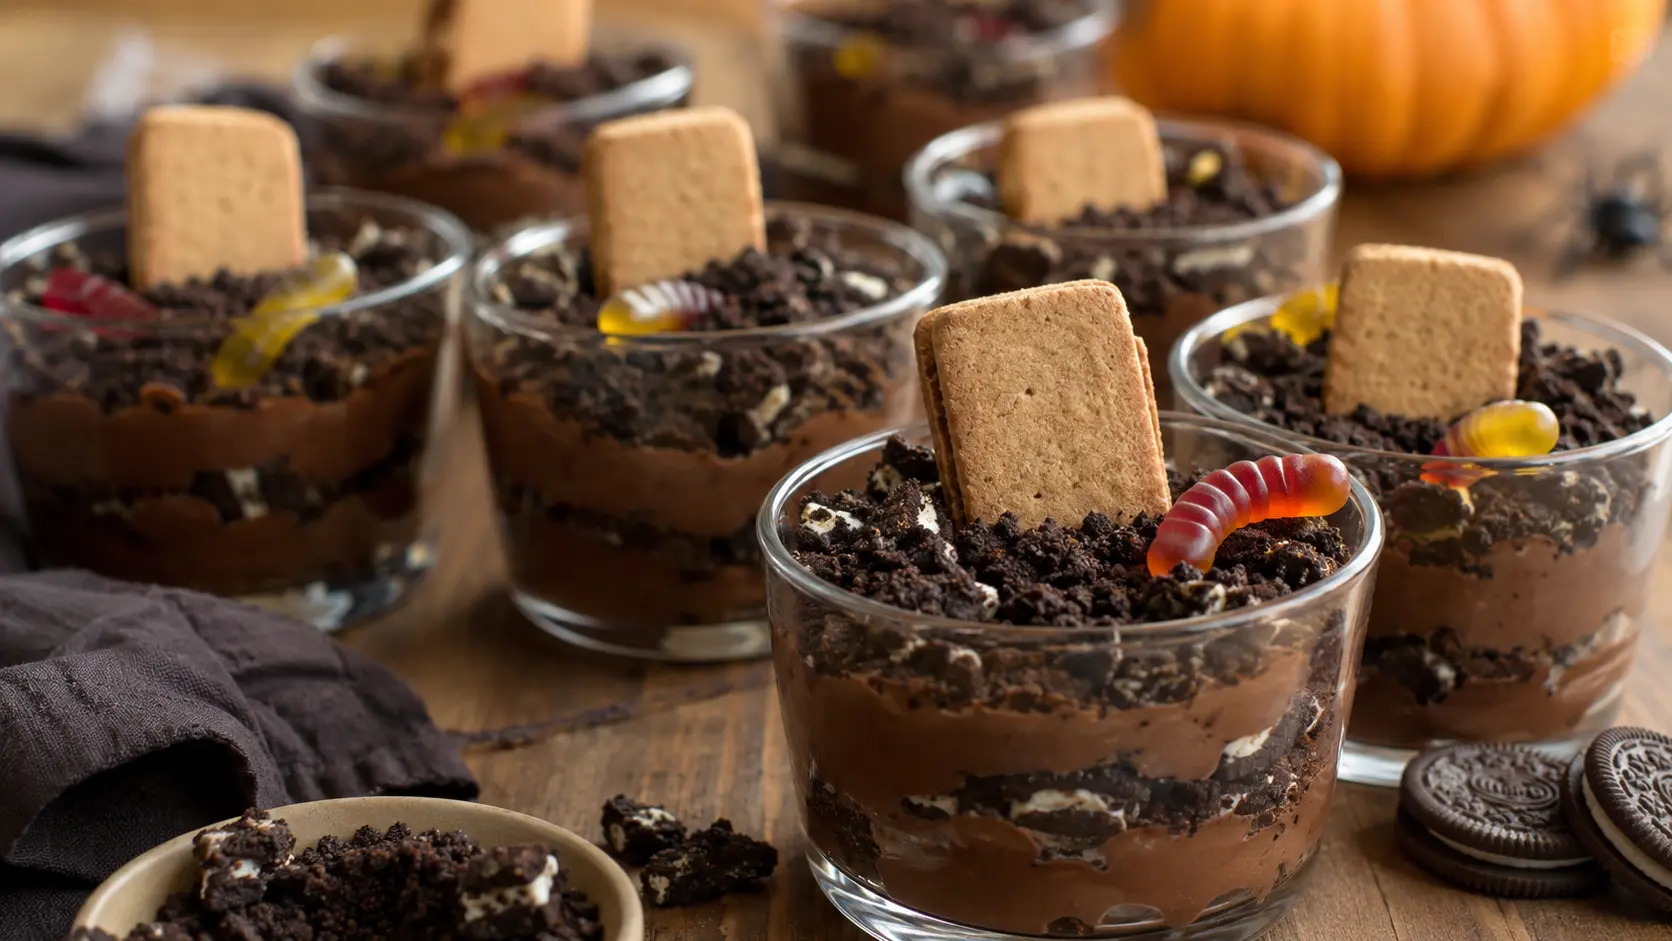
Halloween desserts don’t have to involve complicated baking or elaborate decorating. These Halloween Graveyard Dirt Cups turn a simple chocolate dessert into individual spooky graveyards using layers of creamy chocolate pudding, crushed chocolate sandwich cookies, gummy worms, and cookie tombstones.
The contrast is what makes these cups fun: silky chocolate pudding underneath, dark cookie crumbs that genuinely resemble loose soil, chewy gummy worms peeking through the “dirt,” and simple tombstone cookies standing on top. Each cup can look slightly different, which means there’s no need to make a dozen perfectly identical desserts.
They’re also genuinely convenient for a Halloween party. The pudding can be prepared ahead, the cookies can be crushed in advance, and most of the cups can be assembled several hours before serving. The final decorations take only a few minutes, giving you a dessert that looks festive without creating unnecessary work on party day.
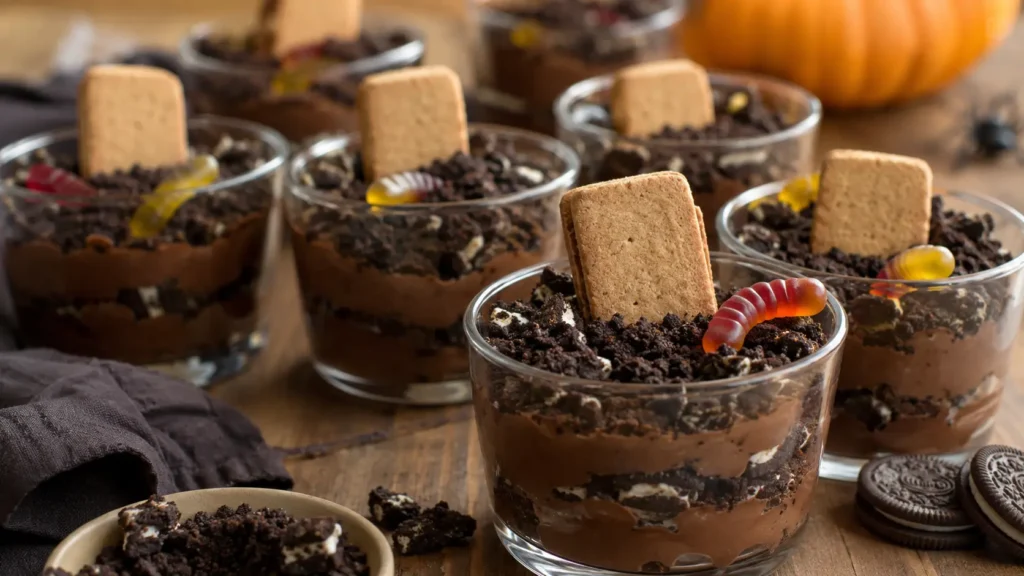
Easy Halloween Graveyard Dirt Cups
A dirt cup sounds simple—and it is—but a good one needs more than chocolate pudding dumped under cookie crumbs.
The pudding should be thick enough to support the toppings while remaining creamy when you dig into it with a spoon. The cookie layer needs enough texture to resemble soil rather than becoming a fine black powder. And the decorations should enhance the dessert without turning every serving into a pile of candy.
For the pudding, we’re making a straightforward stovetop chocolate pudding with cocoa powder, semisweet chocolate, milk, sugar, cornstarch, vanilla, and a little butter.
Making the pudding ourselves gives us control over both flavor and consistency. Cocoa provides deep chocolate flavor, while chopped semisweet chocolate adds richness and helps produce a smoother, more substantial texture.
Once chilled, the pudding is layered with roughly crushed chocolate sandwich cookies. The cookies should contain a mixture of fine crumbs and tiny irregular pieces—the same variation you’d see in actual soil.
Then come the Halloween details: a cookie tombstone, one or two gummy worms, and a few additional crumbs scattered naturally around the top.
Simple, recognizable, and appropriately spooky.
⭐ Why You’ll Love This Recipe
🪦 Perfect for Halloween Parties
Each guest gets an individual mini graveyard, making these easy to serve without cutting or plating dessert.
🍫 Homemade Chocolate Pudding
The chocolate base is rich and creamy enough that this would still be a good dessert without the Halloween decorations.
👻 No Oven Required
Everything is prepared on the stovetop and chilled.
⏰ Make-Ahead Friendly
Prepare the pudding the day before and finish the decorations closer to serving.
🪱 Easy to Customize
Use different gummy-worm colors, vary the tombstone positions, or make some cups simpler for younger children.
🍪 Great Texture
Creamy pudding, soft cookie filling, crunchy crumbs, and chewy gummy candy provide more variety than pudding alone.
🛒 Ingredients
Whole Milk — 3 Cups (720 ml)
Whole milk produces a rich pudding while keeping it soft enough to spoon easily.
You can use 2% milk, although the finished pudding will be slightly less rich.
Granulated Sugar — ½ Cup (100 g)
Sweetens the cocoa while balancing the bitterness of semisweet chocolate.
Unsweetened Cocoa Powder — ¼ Cup (22 g)
Use good-quality unsweetened cocoa powder.
Either natural or Dutch-process cocoa works here because we’re not relying on it for leavening.
Cornstarch — ¼ Cup (32 g)
Cornstarch thickens the pudding without eggs.
It needs to be thoroughly dispersed before heating so you don’t end up with lumps.
Fine Salt — ¼ Teaspoon
A small amount of salt makes the chocolate flavor more pronounced and prevents the dessert from tasting one-dimensionally sweet.
Semisweet Chocolate — 4 oz (113 g), Finely Chopped
Real chocolate gives the pudding additional richness and a smoother mouthfeel.
Finely chopping it allows it to melt quickly into the hot pudding.
Unsalted Butter — 1 Tablespoon (14 g)
A little butter added at the end gives the pudding a silkier finish.
Vanilla Extract — 1½ Teaspoons
Vanilla rounds out the chocolate flavor.
Chocolate Sandwich Cookies — About 24 Cookies
These create our edible graveyard soil.
Cookies with cream filling work well—the filling disappears into the crumbs and adds sweetness.
You don’t need to remove it.
Gummy Worms — Approximately 12–16
One or two worms per cup is plenty.
Too many can overwhelm the actual dessert.
Rectangular Cookies — 8
Use plain rectangular cookies sturdy enough to stand upright in the pudding.
These become the tombstones.
Melted Dark Chocolate — About 1 oz (28 g), Optional
A tiny amount can be used to add simple decoration to the tombstone cookies.
Keep it minimal.
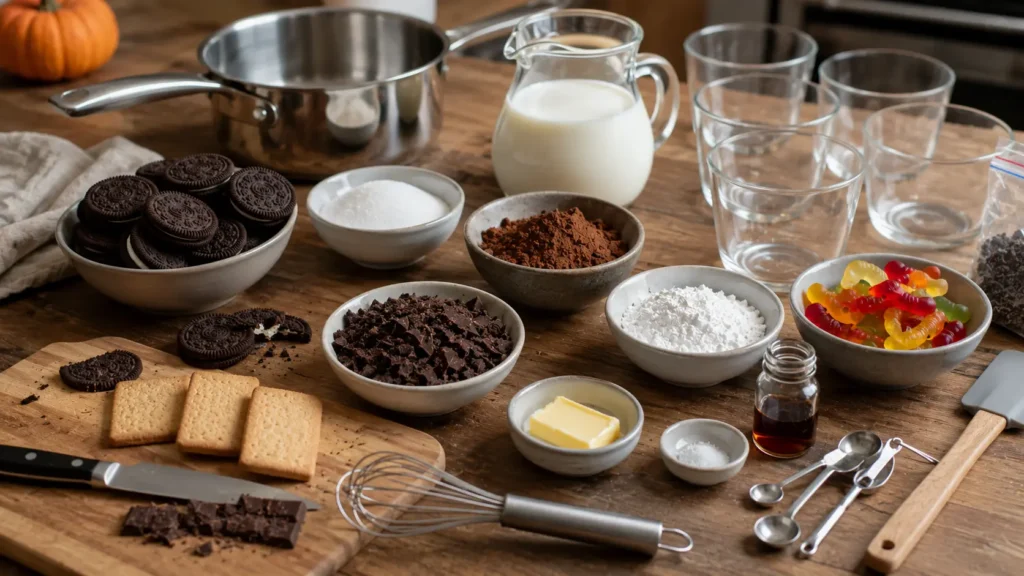
👩🍳 How to Make Halloween Graveyard Dirt Cups
1. Choose Your Serving Cups
Prepare 8 small clear dessert cups, approximately 6–8 ounces each.
Clear cups work particularly well because guests can see the alternating pudding and cookie layers.
2. Chop the Chocolate
Finely chop the semisweet chocolate and set it aside.
Smaller pieces will melt much more quickly once added to the hot pudding.
3. Combine the Dry Pudding Ingredients
In a medium saucepan, whisk together:
- granulated sugar
- cocoa powder
- cornstarch
- salt
Break apart any visible cocoa or cornstarch lumps before adding liquid.
4. Add the Milk Gradually
Pour in approximately ½ cup of the milk first.
Whisk until you have a smooth chocolate mixture.
Gradually whisk in the remaining milk.
Adding the milk slowly at first makes lumps much easier to avoid.
5. Cook the Pudding
Place the saucepan over medium heat.
Cook while whisking frequently, making sure your whisk reaches the bottom and corners of the pan.
As the mixture heats, it will gradually begin to thicken.
6. Let It Bubble Briefly
Once the pudding begins gently bubbling, continue cooking and whisking for approximately 1 minute.
The mixture should visibly coat the whisk and have a thick pudding consistency.
Don’t aggressively boil it.
7. Add the Chocolate
Remove the saucepan from the heat.
Immediately add the finely chopped semisweet chocolate.
Let it sit for approximately 20 seconds, then whisk until completely melted.
8. Finish With Butter and Vanilla
Whisk in the butter and vanilla.
The finished pudding should look smooth, dark, and glossy—but not oily.
9. Transfer and Cover
Transfer the pudding to a clean bowl.
Press plastic wrap directly against the surface if you want to prevent a skin from forming.
Allow it to cool briefly, then refrigerate for at least 2 hours, or until thoroughly chilled.
10. Crush the Cookies
Place the chocolate sandwich cookies in a zip-top bag and crush them with a rolling pin.
Alternatively, pulse them briefly in a food processor.
Don’t pulverize everything.
For realistic “dirt,” you want a mixture of:
- fine crumbs
- coarse crumbs
- tiny cookie pieces
That variation also creates a better eating texture.
11. Prepare the Tombstones
If you’re using melted chocolate for decoration, place it in a tiny piping bag or parchment cone.
Add a few very simple dark marks or lines to the rectangular cookies.
Avoid excessive decoration—the cookie itself should remain recognizable.
Allow the chocolate to set.
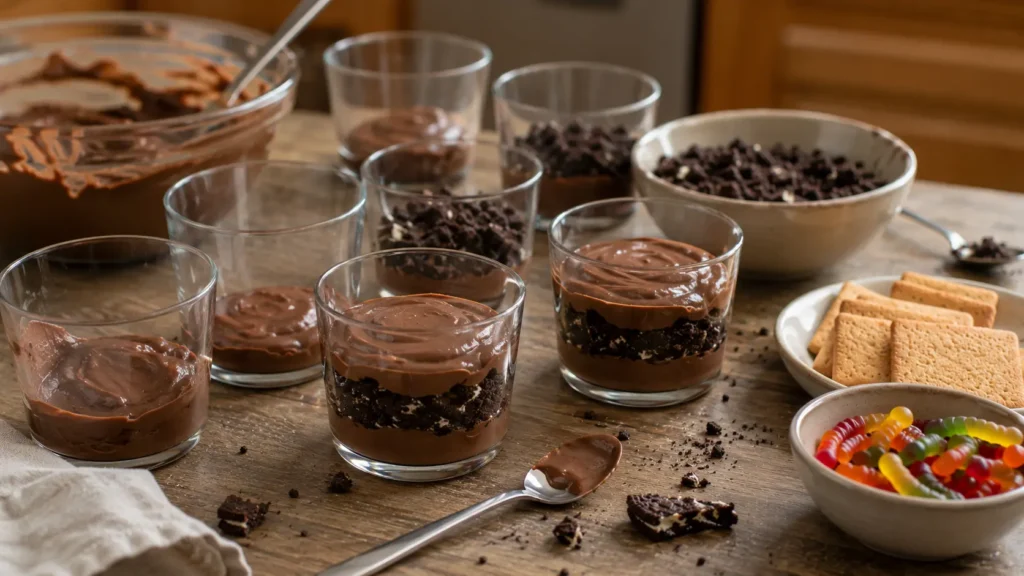
12. Start the First Layer
Spoon approximately 2 tablespoons of chocolate pudding into the bottom of each clear cup.
Spread it roughly rather than creating a perfectly flat layer.
13. Add Cookie Dirt
Sprinkle approximately 1 tablespoon crushed cookies over the pudding.
Don’t compact the crumbs.
14. Add More Pudding
Add another layer of chocolate pudding.
The exact thickness doesn’t need to be identical between every cup.
15. Create the Graveyard Surface
Finish each cup with a generous layer of crushed chocolate cookies.
This upper layer should completely cover the pudding so the surface resembles dark soil.
16. Add the Tombstones
Insert one rectangular tombstone cookie gently into the back portion of each cup.
Don’t push it all the way to the bottom.
It should stand securely while remaining clearly visible.
17. Add the Gummy Worms
Place one or two gummy worms partly into the cookie dirt.
Instead of laying the entire worm on top, partially bury one end in the crumbs so it appears to be emerging from the ground.
18. Add Final Cookie Crumbs
Scatter a small amount of additional cookie crumb around the base of each tombstone.
Let a few larger pieces remain visible.
19. Chill Until Serving
Refrigerate until you’re ready to serve.
For the best appearance, add the tombstone cookies reasonably close to serving time so they remain firm rather than absorbing too much moisture.
🍽️ Equipment
You’ll need:
- Medium saucepan
- Whisk
- Silicone spatula
- Medium mixing bowl
- Cutting board
- Sharp knife
- Measuring cups and spoons
- Kitchen scale, optional
- 8 clear dessert cups
- Zip-top bag and rolling pin or food processor
- Small piping bag or parchment cone, optional
- Plastic wrap
🔁 Variations
🪱 Extra-Worm Dirt Cups
For children who particularly enjoy gummy candy, add an additional worm between the pudding layers.
I would still keep the top relatively restrained so the chocolate dessert remains the focus.
👻 Ghost Graveyard Cups
Add a small swirl of whipped cream to one side of the finished cup and use two tiny chocolate dots for a simple ghost face.
Add this shortly before serving.
🎃 Pumpkin Patch Dirt Cups
Replace the tombstone with one or two small pumpkin-shaped candies.
This gives you a less spooky option while retaining the Halloween theme.
🍫 Extra-Dark Graveyard Cups
Use dark chocolate sandwich cookies and bittersweet chocolate for a more intense chocolate flavor.
🍓 Berry Graveyard Cups
Add a thin layer of chopped strawberries or raspberries between the chocolate pudding layers.
The tart fruit provides a useful contrast against the rich chocolate.
🥛 Shortcut Version
You can use prepared instant chocolate pudding when speed matters.
However, the homemade chocolate pudding is what gives this version enough flavor to work as a real dessert rather than just a Halloween decorating project.
💡 Pro Tips
Mix the Cornstarch Before Heating
Cornstarch lumps become much harder to eliminate after the mixture gets hot.
Whisk everything thoroughly while it’s still cold.
Keep Whisking the Bottom
Milk-based pudding can scorch.
Pay particular attention to the bottom and corners of the saucepan as the mixture thickens.
Don’t Overprocess the Cookies
Perfectly powdered cookies don’t look or taste as interesting.
Leave some coarse pieces.
Cool the Pudding Completely
Warm pudding can soften the cookie crumbs immediately and may cause gummy candy to become sticky.
Use Clear Cups
The visible chocolate-and-cookie layers are part of the presentation.
Add Tombstones Later
Cookie tombstones gradually soften when exposed to pudding moisture.
Insert them closer to serving for the best texture.
Don’t Overdecorate
A tombstone, a gummy worm, and convincing cookie dirt are enough.
Too many decorations can hide the dessert underneath.
🧊 Storage & Make-Ahead Instructions
Refrigerator
Store assembled dirt cups covered in the refrigerator for up to 3 days.
For the best texture, however, I recommend keeping the pudding and cookie crumbs separate until the day you plan to serve them.
Best Make-Ahead Method
One day before:
Prepare the chocolate pudding and refrigerate it.
Crush the sandwich cookies and store them in an airtight container at room temperature.
Prepare any chocolate decorations on the tombstone cookies.
Several hours before serving:
Layer the pudding and cookie crumbs in the cups.
Cover and refrigerate.
Shortly before serving:
Add:
- tombstone cookies
- gummy worms
- final cookie crumbs
This gives you the best combination of convenience and texture.
Freezing
I don’t recommend freezing the fully assembled dirt cups.
The pudding and cookies can develop undesirable textures after freezing and thawing.
❓ Frequently Asked Questions
Can I Make Graveyard Dirt Cups the Night Before?
Yes.
For the best results, assemble the pudding and cookie layers the night before but wait until closer to serving to add the tombstones and gummy worms.
Do I Remove the Cream From the Sandwich Cookies?
No.
Crush the whole cookies, including the filling.
Can I Use Instant Chocolate Pudding?
Yes.
You’ll lose some of the deeper chocolate flavor of the homemade version, but it’s a practical shortcut for large Halloween parties.
Why Didn’t My Homemade Pudding Thicken?
The mixture may not have reached a sufficient temperature.
Cornstarch needs heat to fully thicken.
Once the pudding reaches a gentle bubble, continue cooking while whisking for approximately one minute.
Why Is My Pudding Lumpy?
The dry ingredients may not have been thoroughly dispersed before heating, or the pudding wasn’t whisked enough during cooking.
For an especially smooth finish, you can pass hot pudding through a fine-mesh strainer before chilling.
Why Did My Tombstone Cookies Become Soft?
They absorbed moisture from the pudding.
Add them closer to serving time.
Can I Make These Without Gummy Worms?
Absolutely.
The tombstone and cookie dirt already communicate the graveyard theme.
What Size Cups Should I Use?
Small 6–8 ounce dessert cups work well.
Larger cups can make the servings unnecessarily heavy because the pudding is fairly rich.
🍽️ What to Serve With Graveyard Dirt Cups
Because these cups are rich and chocolatey, they’re especially useful after a savory Halloween menu.
Start with Jalapeño Popper Mummies with Crescent Rolls for something creamy, spicy, and savory. Easy Mummy Pretzel Dogs provide another kid-friendly savory option, while Creamy Spider Web Buffalo Chicken Dip works well when you need something everyone can share.
For a larger dessert table, pair the dirt cups with Spooky Mummy Brownies with Candy Eyes. Both are chocolate-based, but the textures and presentation are very different—the brownies are dense and fudgy, while these cups are cool and creamy.
📊 Approximate Nutrition
Per serving when divided into 8 dirt cups:
Calories: ~430
Carbohydrates: ~67 g
Protein: ~6 g
Fat: ~18 g
Saturated Fat: ~9 g
Fiber: ~3 g
Sugar: ~47 g
Sodium: ~300 mg
Nutrition is an estimate. Actual values depend heavily on the sandwich cookies, gummy candy, tombstone cookies, chocolate, milk, and serving size used.
Halloween Graveyard Dirt Cups with Oreo Crumbs & Gummy Worms
Ingredients
Method
- Prepare eight 6–8-ounce clear dessert cups.
- Finely chop the semisweet chocolate.
- Whisk sugar, cocoa powder, cornstarch, and salt in a saucepan.
- Gradually whisk in the milk until smooth.
- Cook over medium heat, whisking frequently.
- Once gently bubbling and thickened, cook for about 1 additional minute while whisking.
- Remove from heat and add chopped chocolate.
- Whisk until completely melted.
- Stir in butter and vanilla.
- Transfer to a bowl, cover the surface, and refrigerate for at least 2 hours.
- Roughly crush the chocolate sandwich cookies.
- If desired, decorate rectangular tombstone cookies with a small amount of melted chocolate and allow them to set.
- Add a layer of chocolate pudding to each serving cup.
- Sprinkle with crushed cookie dirt.
- Add another layer of pudding.
- Cover the surface with additional crushed cookies.
- Insert one tombstone cookie into each cup.
- Partially bury one or two gummy worms in the cookie crumbs.
- Add a final scattering of coarse cookie crumbs.
- Refrigerate until serving.
Notes
- Crush the whole sandwich cookies, including their cream filling.
- Leave some coarse cookie pieces for a more convincing dirt texture.
- Homemade pudding can be prepared one day ahead.
- Add tombstone cookies closer to serving so they remain firmer.
- Clear 6–8-ounce cups show the layers particularly well.
- Instant chocolate pudding can be substituted when you need a faster version.
- Don’t aggressively boil the pudding.
- Keep the finished cups refrigerated until serving.