Creamy No-Churn Salted Caramel Ice Cream
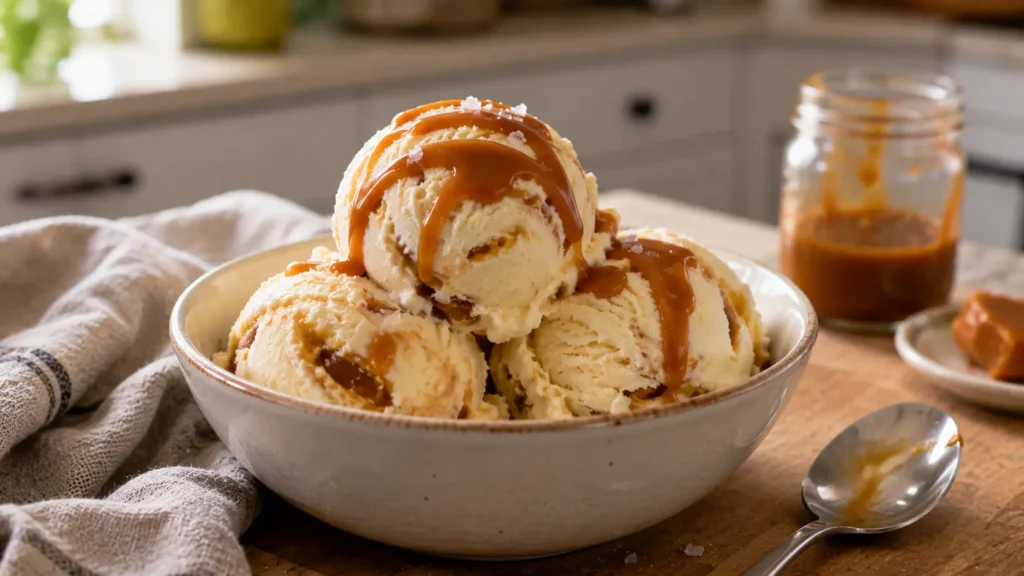
You don’t need an ice cream maker to make an incredibly creamy homemade frozen dessert. This Creamy No-Churn Salted Caramel Ice Cream combines a rich vanilla ice cream base with ribbons of buttery salted caramel for a sweet-and-salty dessert that takes only a few minutes of hands-on preparation.
The base comes together with whipped heavy cream, sweetened condensed milk, and vanilla. Homemade salted caramel is folded and swirled through the mixture rather than completely blended in, giving every scoop a slightly different balance of creamy vanilla and deep caramel flavor.
It’s an easy make-ahead dessert for summer gatherings, weekend treats, or anytime you want homemade ice cream without special equipment. The hardest part is waiting for it to freeze.
Easy No-Churn Salted Caramel Ice Cream
Traditional homemade ice cream usually requires cooking a custard base and churning it while it freezes.
No-churn ice cream takes a much simpler approach.
Heavy cream is whipped until it holds soft-to-medium peaks, creating tiny air pockets that help give the finished dessert a lighter, scoopable texture. Sweetened condensed milk provides sweetness and helps keep the frozen mixture creamy.
For this salted caramel version, a simple homemade caramel sauce is cooled before being swirled through the ice cream base.
The goal isn’t to mix the caramel completely into the cream. Leaving irregular ribbons and pockets creates those concentrated caramel bites that make each scoop interesting.
If you enjoy easy desserts that don’t require complicated baking, our Easy No-Bake Pumpkin Cheesecake Cups are another simple make-ahead option.
Why You’ll Love This Salted Caramel Ice Cream
- No ice cream machine: A mixer and freezer are all you need.
- Rich and creamy: Whipped cream creates a soft homemade ice cream texture.
- Homemade salted caramel: Buttery caramel ribbons run throughout the base.
- Minimal hands-on time: Most of the recipe time is simply freezing.
- Easy to prepare ahead: Make it the day before you plan to serve it.
- Simple ingredients: No complicated custard base is required.
- Customizable: Add chocolate, nuts, cookies, or pretzels.
- Perfect sweet-salty balance: Flaky salt keeps the caramel from tasting one-dimensionally sweet.
Ingredients
Heavy Whipping Cream
Use 2 cups cold heavy whipping cream.
Keep the cream refrigerated until you’re ready to whip it. Cold cream incorporates air much more effectively than warm cream.
Sweetened Condensed Milk
Use 1 can (14 ounces) sweetened condensed milk.
Make sure you’re using sweetened condensed milk rather than evaporated milk.
The two aren’t interchangeable here.
Vanilla Extract
Use 2 teaspoons pure vanilla extract.
Vanilla provides a subtle background flavor that complements the caramel.
Fine Salt
Add a small pinch of fine salt to the ice cream base.
Granulated Sugar
For the caramel, use 1 cup granulated sugar.
Butter
Use 6 tablespoons unsalted butter, cut into pieces.
Having the butter ready before you begin caramelizing the sugar makes the process easier.
Heavy Cream for the Caramel
Use ½ cup heavy cream, preferably warmed slightly.
Sea Salt
Use ½–¾ teaspoon fine sea salt in the caramel, depending on how salty you’d like it.
Flaky Sea Salt
Use a very small amount for finishing individual servings.
This is optional but gives the scoops a recognizable salted-caramel appearance.
How to Make No-Churn Salted Caramel Ice Cream
1. Prepare the storage pan
Line a 9 × 5-inch loaf pan with parchment paper if desired, or use a freezer-safe container with a lid.
Set it aside.
2. Prepare the caramel ingredients
Measure the sugar, butter, cream, and salt before heating anything.
Caramel changes quickly once the sugar reaches the correct temperature, so having everything ready matters.
3. Melt the sugar
Add the granulated sugar to a medium heavy-bottomed saucepan.
Heat over medium heat.
As the sugar begins melting around the edges, gently stir or swirl as needed so it melts evenly.
4. Watch the color
Continue cooking until the melted sugar reaches a deep amber color.
Don’t walk away from the pan. Caramel can move from properly browned to burned very quickly.
5. Add the butter carefully
Reduce the heat and carefully add the butter.
The caramel will bubble vigorously.
Whisk carefully until the butter is incorporated.
6. Add the cream
Slowly pour in the warm heavy cream while whisking.
Again, expect vigorous bubbling.
7. Add salt
Remove the caramel from the heat and stir in the sea salt.
8. Cool completely
Transfer the caramel to a heat-safe container and allow it to cool completely.
This step is essential.
Warm caramel can deflate the whipped cream and negatively affect the ice cream texture.
9. Whip the cream
Pour 2 cups cold heavy whipping cream into a large mixing bowl.
Beat with an electric mixer until soft peaks begin forming.
10. Continue to medium peaks
Continue whipping until the cream holds medium peaks.
Don’t keep beating until it becomes grainy or begins turning into butter.
11. Prepare the condensed milk mixture
In another bowl, combine the sweetened condensed milk, vanilla, and a small pinch of salt.
12. Add whipped cream
Fold approximately one-third of the whipped cream into the condensed milk mixture.
This lightens it.
13. Fold in the remainder
Add the remaining whipped cream in two additions.
Fold gently using broad strokes.
Avoid stirring aggressively because you want to preserve the air incorporated into the cream.
14. Add the first ice cream layer
Spoon approximately one-third of the ice cream mixture into the prepared loaf pan.
Spread it loosely.
15. Add caramel
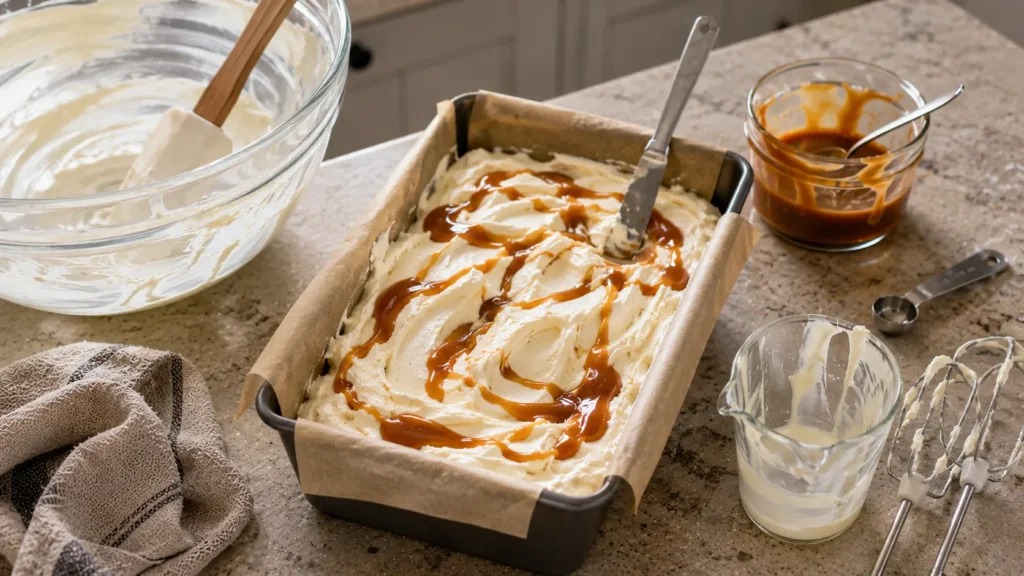
Drizzle several spoonfuls of cooled salted caramel over the surface.
16. Add another layer
Add another third of the ice cream mixture.
Drizzle with more caramel.
17. Add the final layer
Spread the remaining ice cream mixture over the top.
18. Finish with caramel
Drizzle more cooled caramel across the surface.
You may have a little caramel left over depending on how heavily you swirl the ice cream.
Save it for serving.
19. Swirl gently
Drag a butter knife through the mixture only a few times.
Create irregular caramel ribbons rather than completely mixing the caramel into the base.
20. Cover
Press a piece of parchment paper or plastic wrap gently against the surface, then cover the container.
21. Freeze
Freeze for at least 6 hours, preferably overnight.
22. Temper before scooping
Remove the ice cream from the freezer approximately 5–10 minutes before serving if it is very firm.
23. Scoop
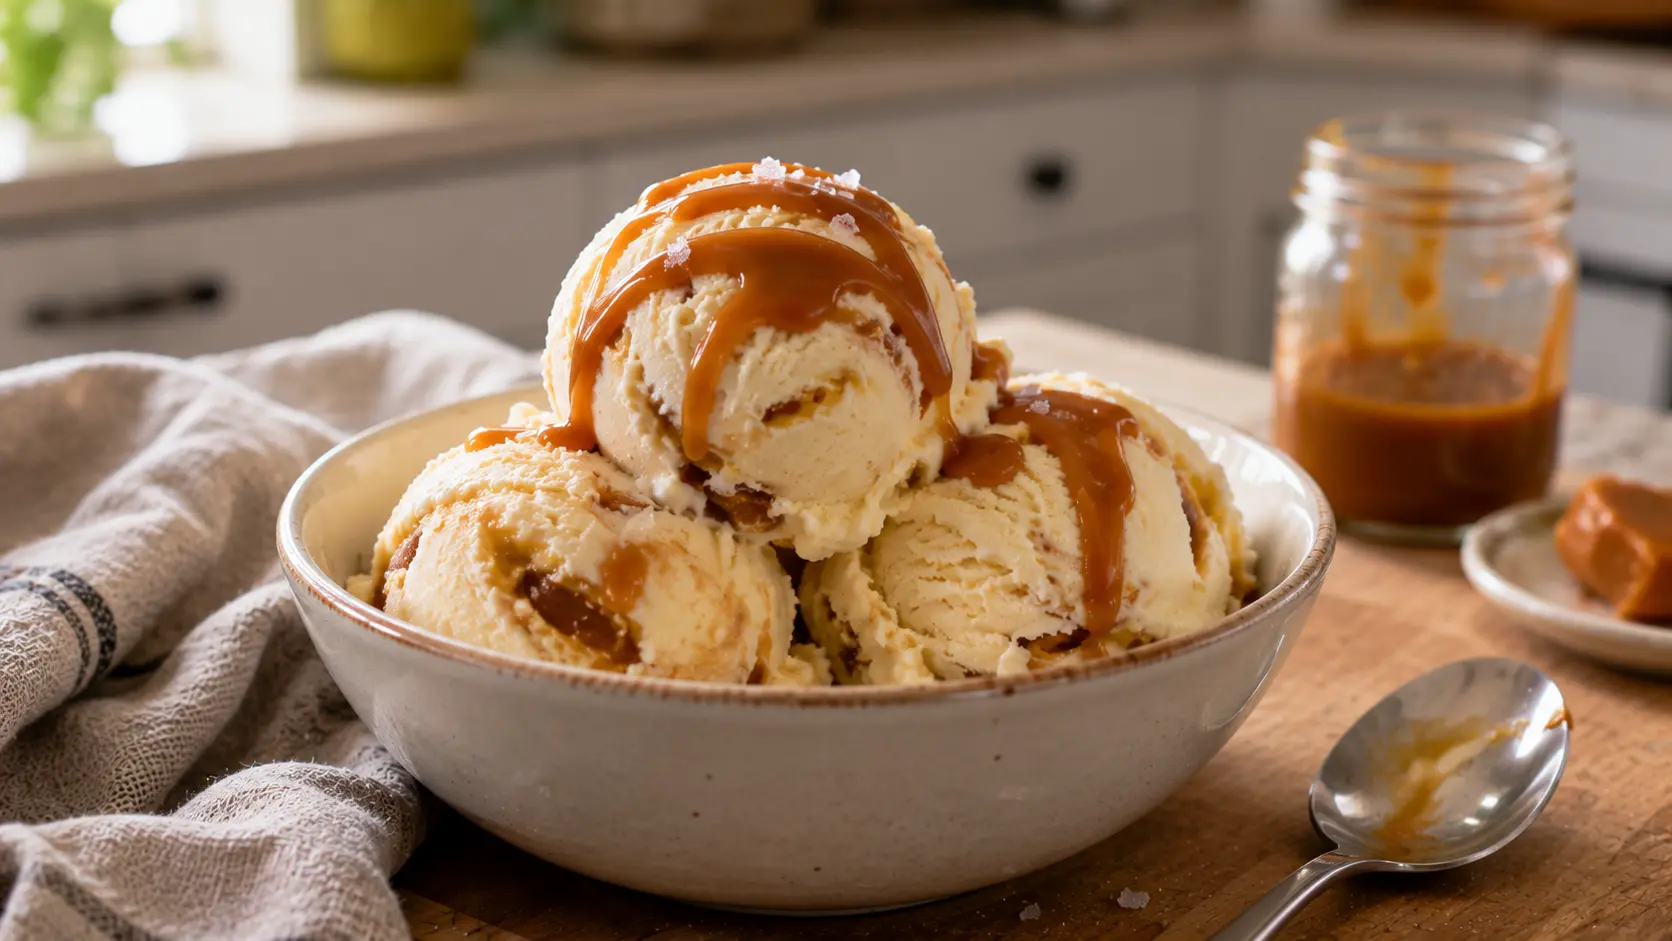
Use an ice cream scoop to create natural, imperfect scoops.
24. Finish
Drizzle with a small amount of reserved caramel and, if desired, add just a few flakes of sea salt.
Serve immediately.
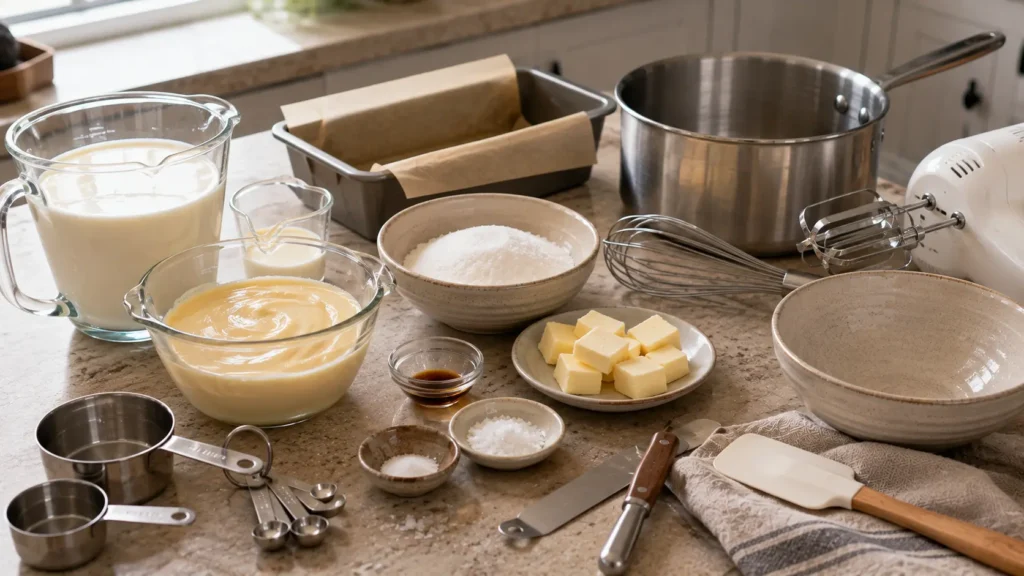
Equipment You’ll Need
- Medium heavy-bottomed saucepan
- Heat-resistant whisk
- Heat-safe container
- Large mixing bowl
- Medium mixing bowl
- Electric hand mixer or stand mixer
- Rubber spatula
- 9 × 5-inch loaf pan or freezer-safe container
- Butter knife
- Measuring cups and spoons
- Ice cream scoop
Easy Variations
Chocolate Salted Caramel Ice Cream
Fold ½ cup mini chocolate chips or finely chopped dark chocolate into the finished base before layering.
Keep the amount restrained so the caramel remains the dominant flavor.
Salted Caramel Pretzel Ice Cream
Add roughly crushed pretzels between the layers for salty crunch.
Add them shortly before freezing rather than soaking them in warm caramel.
Salted Caramel Pecan Ice Cream
Fold in toasted chopped pecans.
If you like caramel-and-pecan desserts, our Best Salted Caramel Apple Crisp Cheesecake Bars use that same rich fall-dessert flavor profile in baked-bar form.
Caramel Cookie Ice Cream
Fold roughly broken vanilla or shortbread cookies into the base.
Keep the pieces irregular rather than crushing them into fine crumbs.
Coffee Salted Caramel Ice Cream
Dissolve a small amount of instant espresso powder into the condensed milk before folding in the whipped cream.
The bitterness of coffee pairs particularly well with caramel.
Pro Tips
Keep the whipping cream cold. It will whip faster and hold more volume.
Cool the caramel completely. Warm caramel can melt and deflate your whipped cream.
Don’t overwhip the cream. Stop when it holds medium peaks.
Fold rather than stir. Gentle folding helps preserve the air responsible for the ice cream’s lighter texture.
Don’t over-swirl. You want visible caramel ribbons rather than uniformly caramel-colored ice cream.
Use a shallow container. It helps the mixture freeze more evenly.
Cover the surface well. This reduces exposure to air and helps limit ice crystals.
Let very firm ice cream soften briefly. A few minutes at room temperature makes scooping easier.
How to Make Salted Caramel Without Burning It
Caramel requires attention more than complicated technique.
Use a light-colored or stainless-steel saucepan if possible because it makes the sugar’s color easier to judge.
Once the sugar begins melting, watch it continuously.
You’re looking for a deep amber color rather than very dark brown. If it smells sharply burned, the caramel has probably gone too far.
Also remember that adding butter and cream to hot caramel causes vigorous bubbling. Use a saucepan with enough room and add the ingredients carefully.
How Do You Make No-Churn Ice Cream Creamy?
The whipped cream is crucial.
Whipping incorporates air into the mixture before freezing. Gentle folding then helps retain those air pockets.
Sweetened condensed milk also contains enough sugar to lower the freezing point of the mixture, helping prevent the finished ice cream from becoming one solid block.
Covering the surface tightly during freezing also limits ice-crystal formation.
Why Is My No-Churn Ice Cream Icy?
Several things can contribute to an icy texture.
The cream may not have been whipped enough, the mixture may have been stirred too aggressively after whipping, or the container may have been inadequately covered.
Repeatedly allowing the ice cream to soften and refreeze can also encourage larger ice crystals.
Storage
Keep the ice cream tightly covered in a freezer-safe container.
For the best texture and flavor, enjoy it within approximately 2 weeks.
It can remain frozen longer, but homemade no-churn ice cream is usually at its creamiest when relatively fresh.
If using a loaf pan without a fitted lid, press parchment or plastic wrap against the surface before covering the entire pan tightly.
Frequently Asked Questions
Do I need an ice cream maker?
No. This recipe is specifically designed to be made without one.
Can I use store-bought caramel?
Yes, although the flavor and consistency will differ.
Choose a thick caramel sauce rather than a very thin syrup.
Can I use evaporated milk instead of condensed milk?
No. Sweetened condensed milk is much thicker and contains a significant amount of sugar. Evaporated milk isn’t a direct substitute.
Why is my caramel grainy?
Sugar crystals can sometimes form during caramel preparation. Avoid excessive stirring once the sugar begins melting and make sure your saucepan and utensils are clean.
Why did my caramel become hard?
Caramel naturally thickens as it cools. If it becomes excessively firm, it may have cooked too far or need to be gently warmed before serving.
Can I make the caramel ahead?
Yes. Prepare it in advance, refrigerate it, and gently warm it enough to become pourable again before allowing it to cool to an appropriate temperature for the ice cream.
How long does no-churn ice cream need to freeze?
Allow at least 6 hours, although overnight freezing usually gives the most reliable texture.
What to Serve with Salted Caramel Ice Cream
This ice cream is rich enough to serve completely on its own.
For extra texture, add a few toasted pecans, crushed pretzels, or a small amount of dark chocolate.
You can also serve a scoop alongside warm fruit desserts. It would be especially good with our Cinnamon Apple Galette, where the cold creamy ice cream contrasts with tender baked apples and flaky pastry.
For another apple-and-caramel combination, pair a small scoop with Pumpkin Apple Crisp for an extra-indulgent fall dessert.
And if you’re putting together a larger dessert spread, Caramelized Apple & Cinnamon Puff Pastry Tart provides another warm pastry option that works naturally with vanilla and caramel flavors.
Nutrition Information
Approximate nutrition per serving, based on 10 servings:
- Calories: 410
- Protein: 4g
- Carbohydrates: 43g
- Fat: 25g
- Saturated Fat: 16g
- Sugar: 41g
- Sodium: 210mg
Nutrition values are estimates and will vary according to ingredients, caramel quantity, and serving size.
Creamy No-Churn Salted Caramel Ice Cream
Ingredients
Method
- Prepare a 9 × 5-inch loaf pan or freezer-safe container.
- Measure all caramel ingredients before beginning.
- Heat granulated sugar in a heavy-bottomed saucepan over medium heat until melted and deep amber.
- Carefully add butter and whisk until incorporated.
- Slowly add warm heavy cream while whisking carefully.
- Remove from heat and stir in sea salt.
- Transfer caramel to a heat-safe container and cool completely.
- Beat 2 cups cold heavy cream until medium peaks form.
- In another bowl, combine sweetened condensed milk, vanilla, and a pinch of salt.
- Fold one-third of the whipped cream into the condensed milk.
- Gently fold in the remaining whipped cream in two additions.
- Spread one-third of the ice cream base into the prepared container.
- Drizzle with cooled salted caramel.
- Repeat with another layer of ice cream and caramel.
- Add the remaining ice cream mixture.
- Drizzle additional caramel over the surface.
- Swirl gently with a butter knife only a few times.
- Cover tightly.
- Freeze for at least 6 hours or overnight.
- Let stand for 5–10 minutes if necessary before scooping.
- Serve with reserved caramel and optional flaky sea salt.
Notes
- Keep heavy whipping cream cold until you’re ready to whip it.
- Sweetened condensed milk cannot be replaced directly with evaporated milk.
- Cool the caramel completely before adding it to the ice cream.
- Caramel becomes much thicker as it cools.
- Avoid overwhipping the cream.
- Fold gently to preserve incorporated air.
- Don’t over-swirl the caramel.
- Cover the surface tightly before freezing to help reduce ice crystals.
- Let very firm ice cream soften briefly before scooping.