Maple Pecan Scones with Maple Glaze – Easy Fall Recipe
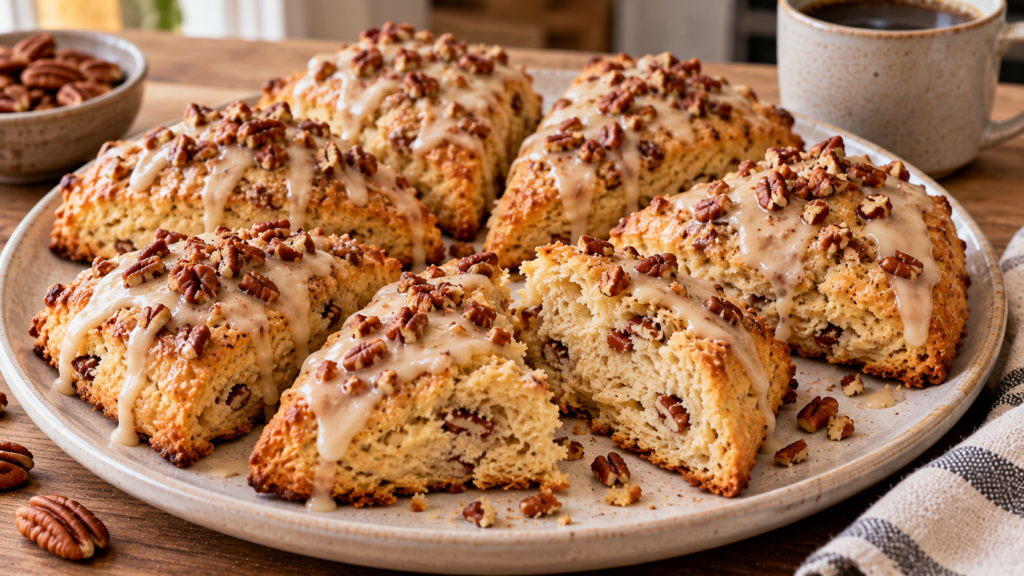
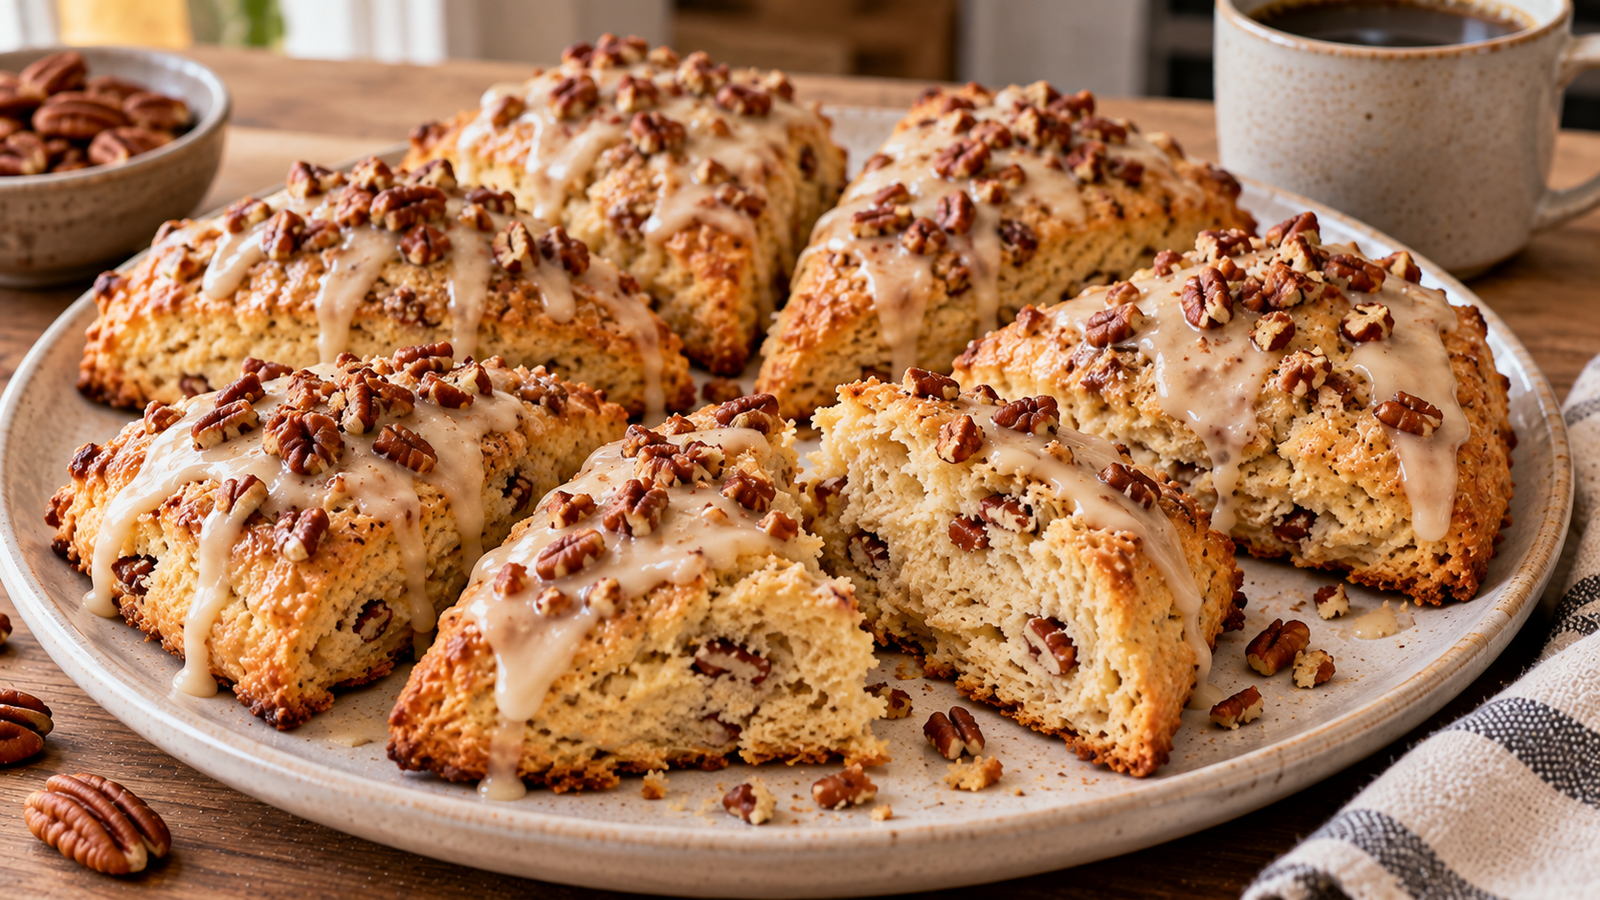
Imagine pulling apart a warm, buttery scone and finding tender layers filled with toasted pecans, brown sugar, cinnamon, and maple flavor — then getting a little sweet maple glaze in every bite. These maple pecan scones are exactly the kind of cozy homemade bake that belongs beside a hot cup of coffee on a cool fall morning.
The combination works because the scones themselves aren’t overwhelmingly sweet. Cold butter creates tender, flaky pockets throughout the dough, toasted pecans add crunch and nuttiness, and pure maple syrup gives the scones a warm sweetness without turning them into cake. Once cooled slightly, a simple maple glaze goes over the top.
They’re also much easier to make than bakery-style scones might suggest. There’s no yeast, no rising time, and no complicated shaping. If you’ve enjoyed the seasonal flavors in our Brown Butter Pumpkin Snickerdoodle Cookies, these scones bring that same cozy fall feeling to the breakfast table in a completely different way.
Easy Maple Pecan Scones with Maple Glaze
A great scone should sit somewhere between a biscuit and a pastry.
It should be tender inside but sturdy enough to pick up, with crisp golden edges and visible flaky layers rather than a soft cupcake-like crumb.
The secret is keeping the butter cold and handling the dough as little as possible.
As cold pieces of butter melt in the hot oven, they release steam and help create little pockets and layers throughout the scone. Overworking the dough or allowing the butter to become too warm works against that texture.
We’re adding toasted pecans directly to the dough and using maple syrup both inside the scones and in the glaze.
The result is unmistakably maple-pecan without being excessively sweet.
Why You’ll Love These Maple Pecan Scones
Perfect fall flavor. Maple, pecans, cinnamon, brown sugar, and butter are an ideal autumn combination.
Tender and flaky. Cold butter and minimal mixing keep the centers from becoming dense.
Crunchy toasted pecans. Toasting the nuts before adding them intensifies their flavor.
Real maple flavor. Pure maple syrup is used in both the dough and glaze.
No yeast required. There’s no proofing or rising time.
Easy to prepare ahead. The unbaked scones can be chilled before baking.
Great with coffee. They’re sweet enough to feel special without becoming overwhelmingly dessert-like.
And although we already have Maple Pumpkin Scones on Yummizer, these aren’t simply the same recipe without pumpkin. These focus specifically on the classic combination of maple and toasted pecans, giving you a different fall scone for days when pumpkin isn’t what you’re craving.
Ingredients You’ll Need
All-Purpose Flour
Regular all-purpose flour provides enough structure while still allowing the scones to remain tender.
Measure carefully. Too much flour is one of the easiest ways to end up with dry scones.
Brown Sugar
Brown sugar contributes sweetness and a subtle caramel-like flavor that works especially well with maple and pecans.
Baking Powder
Scones need a generous amount of leavening to rise properly.
Make sure your baking powder is fresh.
Cinnamon
A little cinnamon gives the scones warmth without overpowering the maple.
Salt
Salt balances the sweetness and makes the butter, maple, and pecan flavors more noticeable.
Unsalted Butter
This is one of the most important ingredients.
The butter should be very cold when it enters the dough.
Cut it into small cubes and keep it refrigerated until you’re ready to use it.
Pecans
Toast the pecans before adding them to the dough.
That short extra step gives them a deeper, nuttier flavor and better crunch.
Let them cool before mixing them into the dough so they don’t warm the butter.
Heavy Cream
Heavy cream gives the scones richness and helps produce a tender interior.
Keep it cold.
Pure Maple Syrup
Use real maple syrup rather than pancake syrup if possible.
It provides the maple flavor in both the dough and glaze.
Egg
One large egg helps bind the dough and contributes structure and richness.
Vanilla Extract
Vanilla rounds out the maple and pecan flavors.
Powdered Sugar
Powdered sugar forms the base of the maple glaze.
It dissolves easily and creates a smooth consistency.

How to Make Maple Pecan Scones
1. Toast the Pecans
Preheat your oven to 400°F (200°C).
Spread the chopped pecans on a baking sheet and toast for approximately 5–7 minutes, watching them carefully.
They’re ready when they smell noticeably nutty.
Remove them and allow them to cool completely.
2. Prepare the Baking Sheet
Line a large baking sheet with parchment paper.
Set it aside.
3. Combine the Dry Ingredients
In a large mixing bowl, whisk together:
- Flour
- Brown sugar
- Baking powder
- Cinnamon
- Salt
Break apart any brown sugar lumps with your fingers or whisk.
4. Add the Cold Butter
Add the cold cubed butter to the flour mixture.
Using a pastry cutter or your fingertips, quickly work the butter into the flour.
Stop when you have an uneven mixture containing pieces ranging from small crumbs to pea-sized bits of butter.
Do not try to make it perfectly smooth.
Those visible pieces of cold butter are exactly what we want.
5. Add the Pecans
Stir the cooled toasted pecans into the flour and butter mixture.
Distribute them evenly without crushing them.
6. Mix the Wet Ingredients
In a separate bowl or measuring jug, whisk together:
- Cold heavy cream
- Egg
- Pure maple syrup
- Vanilla extract
Mix until combined.
7. Combine Wet and Dry Ingredients
Pour the wet mixture over the dry ingredients.
Use a fork or silicone spatula to stir gently.
Stop as soon as the dough begins forming large, shaggy clumps.
It should look slightly messy.
Do not continue mixing until it resembles smooth cookie dough.
8. Bring the Dough Together
Turn the dough onto a lightly floured work surface.
Use your hands to gently bring the loose pieces together.
If there are a few dry crumbs, press them into the dough rather than kneading aggressively.
9. Shape the Dough
Gently shape the dough into a round disc approximately 7 inches wide and 1 inch thick.
Avoid pressing it too thin.
Thicker dough helps create tall bakery-style scones.
10. Cut Into Wedges
Use a sharp knife or bench scraper to cut the disc into 8 triangular wedges.
Press straight downward rather than sawing excessively through the dough.
11. Transfer to the Baking Sheet
Arrange the scones on the parchment-lined baking sheet.
Leave approximately 2 inches of space between them.
At this point, you should still be able to see small pieces of cold butter and toasted pecans throughout the raw dough.

12. Chill the Scones
Place the baking sheet in the refrigerator for approximately 15 minutes.
This helps firm the butter again before baking.
Don’t skip this if your kitchen is warm or the dough softened while you were shaping it.
13. Brush With Cream
Lightly brush the tops with a small amount of heavy cream.
This encourages attractive browning.
For extra crunch, you can sprinkle a tiny amount of coarse sugar over the tops, although this is optional because we’ll be adding glaze later.
14. Bake
Bake at 400°F (200°C) for approximately 18–22 minutes.
The scones should rise and develop lightly golden tops and deeper golden edges.
15. Cool
Transfer the baked scones to a wire rack.
Allow them to cool for approximately 10–15 minutes before glazing.
If they’re extremely hot, the glaze will simply melt off.
16. Make the Maple Glaze
Place powdered sugar in a small bowl.
Add pure maple syrup, a little heavy cream, vanilla, and a tiny pinch of salt.
Whisk until smooth.
The glaze should be thick enough to sit on the scones but fluid enough to drizzle.
If it’s too thick, add cream ½ teaspoon at a time.
If it’s too thin, add a little more powdered sugar.
17. Glaze the Scones
Drizzle the maple glaze naturally over the slightly cooled scones.
Don’t worry about making identical lines.
A homemade glaze should look homemade.
18. Add Pecans
While the glaze is still wet, sprinkle a few additional toasted chopped pecans over each scone.
Allow the glaze to set slightly, then serve.
Equipment You’ll Need
You only need basic baking equipment:
- Large mixing bowl
- Small mixing bowl or measuring jug
- Baking sheet
- Parchment paper
- Pastry cutter or fork
- Whisk
- Silicone spatula
- Sharp knife or bench scraper
- Pastry brush
- Wire cooling rack
- Measuring cups and spoons
A pastry cutter is useful but absolutely not essential. Your fingertips can work the butter into the flour as long as you work quickly enough to keep the butter cold.
Variations and Substitutions
Maple Walnut Scones
Replace the pecans with toasted walnuts.
Walnuts have a slightly different flavor but pair beautifully with maple.
Cinnamon Maple Scones
Leave out the nuts and increase the cinnamon slightly.
This is an easy alternative when you’re baking for someone who doesn’t eat nuts.
Maple Chocolate Chip Scones
Replace approximately half of the pecans with mini chocolate chips.
Dark or semi-sweet chocolate prevents the scones from becoming excessively sweet.
Maple Pecan Cranberry Scones
Add about ½ cup dried cranberries.
Their tartness works particularly well against the maple glaze.
Orange Maple Pecan Scones
Add finely grated orange zest to the dough.
The citrus aroma gives the maple-pecan combination a brighter flavor.
No Glaze
The scones are flavorful enough to serve without glaze.
Before baking, brush them with cream and sprinkle with coarse sugar for a simpler finish.
Pro Tips for Flaky Scones
Keep everything cold. Cold butter and cream are essential.
Toast the pecans first. Raw pecans won’t provide the same depth of flavor.
Cool the toasted pecans. Adding hot nuts to the dough can soften your butter.
Don’t overmix. Shaggy dough is good. Perfectly smooth dough isn’t the goal.
Don’t knead like bread. Scone dough needs only enough handling to hold together.
Shape the dough thick. Thin dough creates flat scones.
Chill before baking. This helps the butter stay solid until the scones enter the hot oven.
Use real maple syrup. Maple-flavored pancake syrup doesn’t provide the same flavor.
Don’t overbake. Remove the scones when they’re golden and cooked through rather than waiting until they’re deeply browned everywhere.
How to Make Scones Ahead
These are excellent for preparing ahead.
Refrigerate Before Baking
Shape and cut the scones, arrange them on the baking sheet, cover, and refrigerate for several hours.
Bake when you’re ready.
Freeze Unbaked Scones
Arrange the shaped wedges on a parchment-lined tray and freeze until solid.
Transfer them to a freezer-safe container or bag.
They can be baked from frozen, although they’ll generally need a few additional minutes in the oven.
For best results, add the glaze after baking, not before freezing.
How to Store Maple Pecan Scones
Allow the glaze to set before storing.
Keep the scones in an airtight container at room temperature for approximately 2 days.
For longer storage, refrigerate them, although refrigeration can gradually make baked goods feel drier.
They taste best when fresh.
How to Reheat Scones
For the best texture, warm an unglazed or lightly glazed scone briefly in a low oven.
A microwave works too, but only use short intervals because overheating can make the texture tough.
If you’re reheating a heavily glazed scone, expect the glaze to soften or melt slightly.
Can You Freeze Maple Pecan Scones?
Yes.
You can freeze baked scones for approximately 2 months for best quality.
If possible, freeze them before glazing.
Wrap cooled scones individually and place them in a freezer-safe container.
Thaw and gently reheat before adding fresh maple glaze.
Frequently Asked Questions
Why Are My Scones Dry?
The most common causes are too much flour, overmixing, or overbaking.
Measure your flour carefully and stop mixing as soon as the dough comes together.
Why Didn’t My Scones Rise?
Your baking powder may be old, the dough may have been shaped too thin, or the butter may have become too warm before baking.
Fresh leavening and cold dough make a significant difference.
Should Scone Dough Be Sticky?
It should be slightly tacky and shaggy but manageable.
If it’s extremely wet, add a small amount of flour.
If it’s completely dry and crumbling apart, add a tiny splash of cold cream.
Make adjustments gradually.
Can I Use Milk Instead of Heavy Cream?
You can, but the texture will change because milk contains significantly less fat.
Heavy cream produces a richer, more tender scone.
Can I Use Pancake Syrup?
Technically, the recipe can still work, but the flavor won’t be the same.
Pure maple syrup is strongly recommended because maple is one of the central flavors in this recipe.
Do I Have to Toast the Pecans?
No, but it’s worth doing.
Toasting makes pecans more aromatic and intensifies their nutty flavor.
Can I Make These Without Nuts?
Yes.
Simply leave the pecans out. You could add dried cranberries or mini chocolate chips instead.
Why Did My Scones Spread?
The butter or dough was probably too warm.
Chilling the shaped scones for about 15 minutes before baking helps reduce spreading.
What to Serve With Maple Pecan Scones
These scones are perfect with hot coffee, cappuccino, black tea, chai, or a cold glass of milk.
For a full fall breakfast or brunch, pair them with our Pumpkin Pie Baked Oatmeal or Banana Oat Breakfast Bars.
And if you’re building an autumn baking spread, add Brown Butter Pumpkin Snickerdoodle Cookies for something chewy alongside the flaky scones.
For another maple-and-pumpkin option, our existing Maple Pumpkin Scones give you a distinctly different seasonal flavor while staying within the same cozy fall breakfast theme.
Nutrition Information
Approximate nutrition per glazed scone:
Calories: 430
Protein: 6g
Carbohydrates: 49g
Fat: 24g
Saturated Fat: 11g
Fiber: 2g
Sugar: 20g
Sodium: 330mg
Nutrition information is an estimate and varies according to ingredients, portion size, and the amount of glaze used.
Maple Pecan Scones with Maple Glaze
Ingredients
Method
- Preheat oven to 400°F (200°C).
- Spread pecans on a baking sheet and toast for 5–7 minutes. Cool completely and roughly chop.
- Line a baking sheet with parchment paper.
- Whisk flour, brown sugar, baking powder, cinnamon, and salt together in a large bowl.
- Add cold cubed butter and cut it into the flour until the mixture contains crumbs and pea-sized pieces of butter.
- Stir in ¾ cup cooled toasted pecans.
- In another bowl, whisk cold heavy cream, egg, maple syrup, and vanilla.
- Pour the wet ingredients over the flour mixture.
- Stir gently just until a shaggy dough begins to form.
- Turn onto a lightly floured work surface and gently bring the dough together without kneading excessively.
- Shape into an approximately 7-inch-wide, 1-inch-thick disc.
- Cut into 8 wedges.
- Transfer the wedges to the prepared baking sheet, leaving space between them.
- Refrigerate for 15 minutes.
- Lightly brush the tops with heavy cream.
- Bake for approximately 18–22 minutes, until risen and golden around the edges.
- Transfer to a wire rack and cool for 10–15 minutes.
- Whisk powdered sugar, maple syrup, 1 tablespoon heavy cream, vanilla, and salt until smooth. Add additional cream only as needed.
- Drizzle glaze over the slightly cooled scones.
- Sprinkle with additional toasted pecans and allow the glaze to set slightly before serving.
Notes
- Keep the butter, cream, and dough cold for the flakiest texture.
- Let toasted pecans cool before adding them to the dough.
- Don’t overmix or aggressively knead the dough.
- Add liquid to the glaze gradually.
- Unbaked shaped scones can be frozen and baked later.
- Baked scones can be frozen for approximately 2 months for best quality.
- For freezing, leave them unglazed and add fresh glaze after reheating.