Easy Maple Pumpkin Scones with Homemade Brown Butter Glaze
These Easy Maple Pumpkin Scones with Homemade Brown Butter Glaze are everything a cozy fall breakfast should be: tender in the center, lightly crisp around the edges, warmly spiced, and finished with a nutty maple brown butter glaze that makes them feel extra special without making the recipe complicated.
Real pumpkin puree gives the scones their beautiful autumn color and soft texture, while cinnamon, ginger, nutmeg, and maple bring plenty of seasonal flavor. The brown butter glaze is the finishing touch—it has a deeper, toastier flavor than ordinary powdered sugar icing and pairs especially well with pumpkin.
They’re perfect with coffee on a cool morning, for a fall brunch, or as a make-ahead treat when you want something more exciting than an everyday muffin.
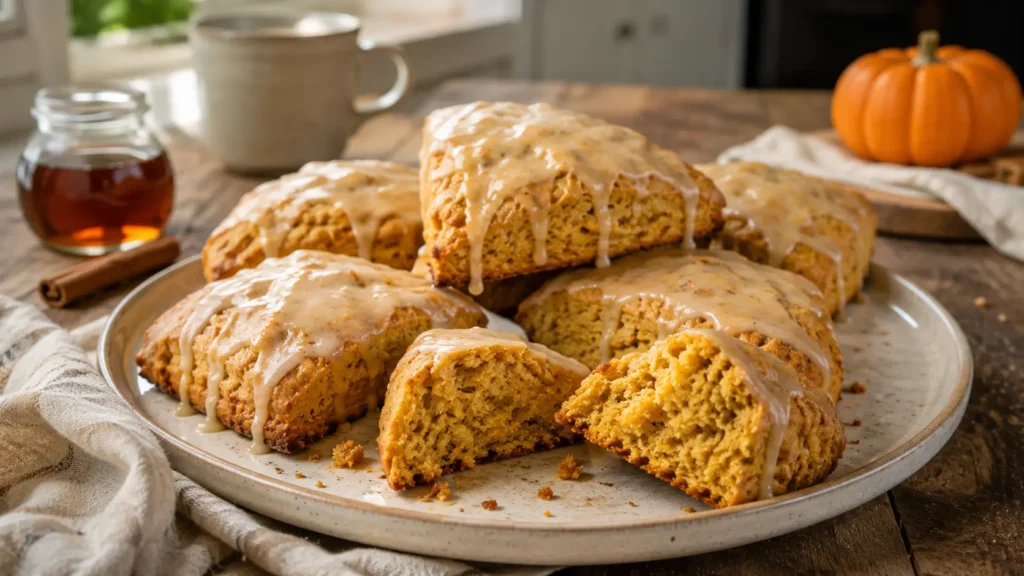
Easy Maple Pumpkin Scones
Homemade scones sometimes have a reputation for being difficult, but the technique is actually straightforward.
The biggest secret is keeping the butter cold and avoiding overworking the dough.
Unlike cake or muffins, scone dough shouldn’t be perfectly smooth. A slightly shaggy dough with visible bits of cold butter is exactly what helps create tender, flaky pockets once those pieces melt in the oven.
Pumpkin adds one challenge: moisture.
Too much pumpkin can turn a scone into something soft and cakey. That’s why this recipe uses a measured amount of pumpkin puree and only enough additional liquid to bring the dough together.
If pumpkin breakfasts are your favorite part of fall, our Pumpkin Spice Muffins are another easy option, while Pumpkin Cinnamon Rolls with Maple Cream Cheese Frosting are ideal when you want something more indulgent for brunch.
Why You’ll Love These Pumpkin Scones
- Easy homemade scone recipe
- Full of real pumpkin
- Warm fall spices
- Maple flavor in every bite
- Tender centers
- Lightly crisp edges
- No mixer required
- Perfect with coffee
- Freezer-friendly
- Great for fall brunch
- Uses simple baking ingredients
- Homemade brown butter glaze
- Beautiful enough for holiday breakfast
- Ready in about 40 minutes
Ingredients
All-Purpose Flour
You’ll need 2¼ cups all-purpose flour.
Measure the flour carefully. Too much flour is one of the easiest ways to end up with dry scones.
For best results, spoon the flour into your measuring cup and level it rather than packing it down.
Pumpkin Puree
Use ½ cup plain pumpkin puree.
Do not substitute pumpkin pie filling. Pumpkin pie filling contains added sugar and spices that would change the recipe.
Cold Unsalted Butter
Use ½ cup (1 stick) cold unsalted butter.
Cold butter is crucial.
As the little pieces of butter melt in the oven, they create pockets within the dough that contribute to the tender, slightly flaky texture.
Brown Sugar
Use ⅓ cup packed light brown sugar.
Its subtle molasses flavor works particularly well with pumpkin and maple.
Baking Powder
You’ll need 2½ teaspoons baking powder to give the scones lift.
Cinnamon
Use 1½ teaspoons ground cinnamon.
Ground Ginger
Use ½ teaspoon ground ginger.
Nutmeg
Use ¼ teaspoon ground nutmeg.
Salt
Use ½ teaspoon fine salt.
Egg
One large egg helps bind the dough.
Maple Syrup
Use 3 tablespoons pure maple syrup in the scone dough.
This gives the scones gentle maple flavor without making them excessively sweet.
Heavy Cream
Use 3 tablespoons cold heavy cream, plus a little extra for brushing the tops.
Depending on your pumpkin and flour, you may need another tablespoon if the dough is unusually dry.
Vanilla
Use 1 teaspoon vanilla extract.
For the Brown Butter Maple Glaze
You’ll need:
- 3 tablespoons unsalted butter
- 1 cup powdered sugar
- 2 tablespoons pure maple syrup
- 1–2 tablespoons milk or heavy cream
- ½ teaspoon vanilla extract
- Small pinch of salt
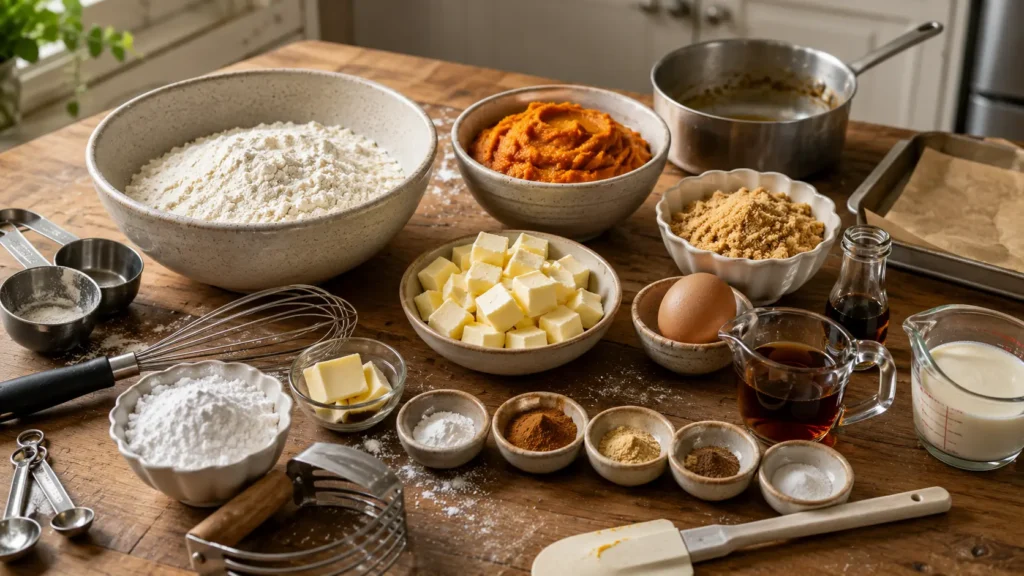
How to Make Maple Pumpkin Scones
1. Preheat the oven
Preheat your oven to 400°F (205°C).
Line a large baking sheet with parchment paper.
2. Combine the dry ingredients
In a large mixing bowl, whisk together:
- Flour
- Brown sugar
- Baking powder
- Cinnamon
- Ginger
- Nutmeg
- Salt
Break apart any larger brown sugar clumps.
3. Cut the cold butter into cubes
Remove the butter directly from the refrigerator and cut it into small cubes.
Keep it cold until you’re ready to use it.
4. Work the butter into the flour
Add the cold butter cubes to the dry ingredients.
Use a pastry cutter or your fingertips to work the butter into the flour until the mixture resembles coarse crumbs.
Leave some butter pieces approximately pea-sized.
Don’t completely blend the butter into the flour.
5. Combine the wet ingredients
In a separate medium bowl, whisk together the pumpkin puree, egg, maple syrup, heavy cream, and vanilla.
6. Add wet ingredients to dry
Pour the pumpkin mixture into the flour mixture.
7. Fold gently
Use a rubber spatula or wooden spoon to gently fold everything together.
Stop once most of the flour has been incorporated.
8. Check the dough
The dough should be somewhat shaggy and slightly tacky but not wet.
If there are large patches of completely dry flour that won’t incorporate, add another 1 tablespoon cold cream.
9. Turn out the dough
Transfer the dough onto a lightly floured work surface.
10. Bring it together
Using lightly floured hands, gently press the dough together.
Avoid kneading it like bread dough.
11. Shape into a disc
Pat the dough into a round disc approximately 7 inches across and 1 inch thick.
Don’t worry if the edges aren’t perfectly smooth.
12. Cut into wedges
Using a sharp knife or bench scraper, cut the disc into 8 wedges.
13. Transfer to the baking sheet
Arrange the wedges on the parchment-lined baking sheet with approximately 2 inches between them.
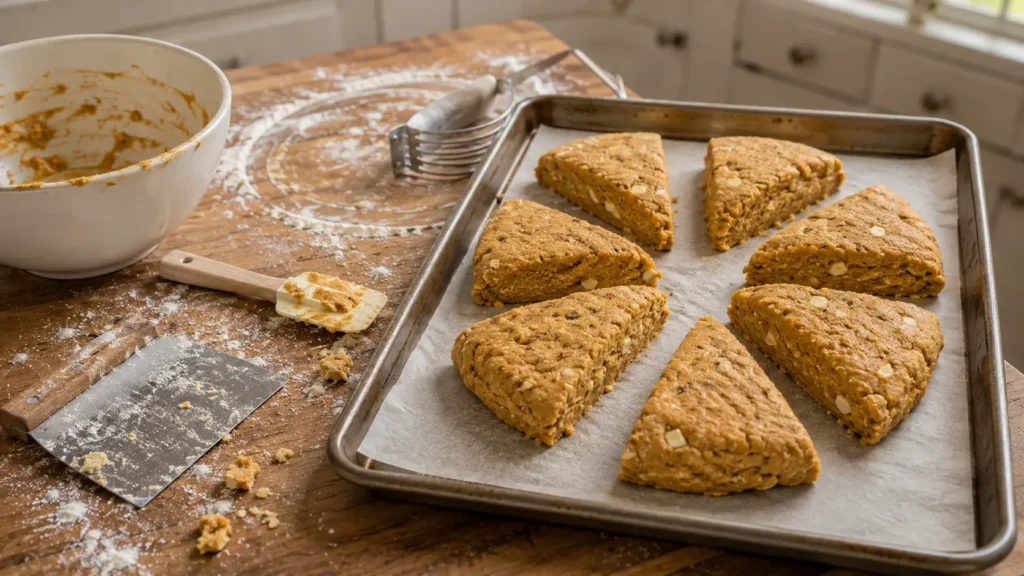
14. Chill briefly
Place the baking sheet in the refrigerator for approximately 10–15 minutes.
This helps the butter firm up again before baking.
15. Brush with cream
Lightly brush the tops with a little heavy cream.
Don’t soak them.
16. Bake
Bake for approximately 16–20 minutes, or until the scones have risen and the edges are lightly golden.
17. Cool
Transfer the baked scones to a wire rack.
Allow them to cool for at least 15 minutes before glazing.
How to Make Homemade Brown Butter Glaze
18. Brown the butter
Place 3 tablespoons butter in a small light-colored saucepan over medium-low heat.
Let it melt.
The butter will begin to foam and bubble.
Swirl the pan occasionally.
19. Watch the milk solids
After several minutes, you’ll notice small golden-brown flecks forming at the bottom of the saucepan.
Once the butter smells nutty and the milk solids are amber-brown, immediately remove the pan from the heat.
Don’t walk away during this stage because browned butter can become burnt quickly.
20. Transfer the brown butter
Pour the brown butter—including those flavorful browned milk solids—into a small bowl.
Let it cool for several minutes.
21. Make the glaze
Whisk in the powdered sugar, maple syrup, vanilla, pinch of salt, and 1 tablespoon milk or cream.
22. Adjust consistency
If the glaze is too thick, add additional milk about 1 teaspoon at a time.
You want a thick but drizzleable glaze.
23. Glaze the cooled scones
Drizzle the maple brown butter glaze naturally over the cooled pumpkin scones.
Allow it to set for approximately 10 minutes before serving.
What Makes Brown Butter Glaze So Good?
Regular melted butter provides richness, but browning the butter changes its flavor significantly.
During browning, the milk solids toast and develop a distinctly nutty, caramel-like aroma.
Those little brown flecks shouldn’t be discarded—they contain much of the flavor.
Combined with maple syrup, powdered sugar, and vanilla, brown butter creates a glaze with more depth than a basic powdered-sugar icing.
It’s especially good with pumpkin because both flavors complement cinnamon and warm baking spices.
Equipment You’ll Need
- Large mixing bowl
- Medium mixing bowl
- Whisk
- Rubber spatula
- Pastry cutter or fork
- Measuring cups
- Measuring spoons
- Sharp knife or bench scraper
- Baking sheet
- Parchment paper
- Wire cooling rack
- Small light-colored saucepan
- Small bowl for glaze
How to Get Tender, Flaky Pumpkin Scones
Keep Everything Cold
Cold butter matters more than perfectly shaped scones.
If the butter becomes completely soft while you’re working, refrigerate the shaped scones before baking.
Don’t Overmix
Once the wet ingredients meet the flour, mix only until the dough comes together.
Overworking develops gluten and can make the scones tough.
Don’t Add Too Much Pumpkin
It may be tempting to add extra pumpkin for stronger flavor, but additional puree introduces considerable moisture.
That can make the scones cakey instead of tender and flaky.
Don’t Over-Flour the Dough
Use only enough flour on your work surface to prevent serious sticking.
Adding too much while shaping can dry out the finished scones.
Easy Variations
Pumpkin Pecan Scones
Fold ½ cup chopped toasted pecans into the dough.
Pumpkin Chocolate Chip Scones
Add ½ cup mini chocolate chips.
For this version, you may want to use slightly less glaze.
Maple Pecan Pumpkin Scones
Add chopped pecans and sprinkle a few over the glaze before it sets.
Plain Pumpkin Spice Scones
Skip the glaze and sprinkle the tops lightly with coarse sugar before baking.
Cinnamon Glaze
Replace the maple syrup in the glaze with milk and add a small pinch of cinnamon.
Vanilla Brown Butter Glaze
Leave out the maple syrup and thin the glaze with milk or cream instead.
Pro Tips
Use cold butter. Warm butter can cause the scones to spread instead of creating flaky pockets.
Use plain pumpkin puree. Pumpkin pie filling isn’t interchangeable.
Measure your flour carefully. Too much creates dry, heavy scones.
Don’t eliminate all the butter chunks. Small visible pieces are desirable.
Handle the dough gently. It doesn’t need kneading.
Chill before baking. Even 10–15 minutes helps.
Don’t overbake. Pull the scones once the edges are lightly golden and the centers are set.
Cool before glazing. Glaze on hot scones will melt away.
Use a light-colored pan for browning butter. It’s easier to see when the milk solids reach the correct color.
Make-Ahead Instructions
You can prepare and shape the scones the evening before baking.
Place the unbaked wedges on a parchment-lined baking sheet, cover them, and refrigerate overnight.
The following morning, brush them with cream and bake.
This makes them particularly convenient for weekend brunch.
For another make-ahead pumpkin breakfast, Pumpkin Baked Oatmeal Cups are easy to portion and freeze, while Pumpkin Oatmeal Breakfast Cookies are ideal when you need something more portable.
Storage
Room Temperature
Store completely cooled glazed scones in an airtight container for approximately 2 days.
Refrigerator
You can refrigerate them for up to 4–5 days, although refrigeration can make baked goods firmer.
Freezer
For best results, freeze the scones before glazing.
Allow baked scones to cool completely, then place them in a freezer-safe container.
Freeze for up to approximately 3 months.
Thaw and add fresh glaze before serving.
Can I Freeze Unbaked Scones?
Yes.
After cutting the dough into wedges, place them on a parchment-lined baking sheet and freeze until firm.
Transfer the frozen wedges to a freezer-safe container.
You can bake them from frozen, adding a few extra minutes to the baking time as needed.
This is particularly useful when you want freshly baked pumpkin scones without making an entire batch at once.
What to Serve with Pumpkin Scones
These scones are especially good with:
- Hot coffee
- Black tea
- Chai
- Cold milk
- Fresh fruit
- Greek yogurt
- Scrambled eggs for a larger brunch
For a full fall breakfast spread, pair them with Pumpkin Sheet Pan Pancakes or Pumpkin Pie Baked Oatmeal.
And if you want a coffee-shop-style fall drink alongside them, Easy Iced Pumpkin Cream Cold Brew makes a natural pairing.
Frequently Asked Questions
Can I use pumpkin pie filling?
No. Use plain pumpkin puree.
Why did my pumpkin scones spread?
The butter may have become too warm, or the dough may have contained too much liquid.
Why are my scones dry?
The most common causes are too much flour, overmixing, or overbaking.
Should scone dough be sticky?
It should be slightly tacky and somewhat shaggy but shouldn’t behave like wet cake batter.
Can I make these without the glaze?
Absolutely. The pumpkin scones can be served plain or sprinkled with coarse sugar before baking.
Do I have to brown the butter?
No, but you’ll lose the toasted, nutty flavor that makes this particular glaze distinctive.
How do I know when brown butter is ready?
Look for amber-brown milk solids at the bottom and a distinctly nutty aroma. Remove it from the heat before those solids turn very dark.
Can I use salted butter?
Yes. Reduce the added salt slightly.
Can I use milk instead of heavy cream in the dough?
Heavy cream provides better richness and texture. Milk can work in a pinch, but the result may be somewhat different.
Can I make smaller scones?
Yes. Divide the dough into smaller portions and reduce the baking time accordingly.
Nutrition Information
Approximate nutrition per glazed scone:
- Calories: 340
- Protein: 5g
- Carbohydrates: 49g
- Fat: 15g
- Saturated Fat: 9g
- Fiber: 2g
- Sugar: 22g
- Sodium: 270mg
Nutrition values are estimates and will vary depending on exact ingredients and glaze quantity.
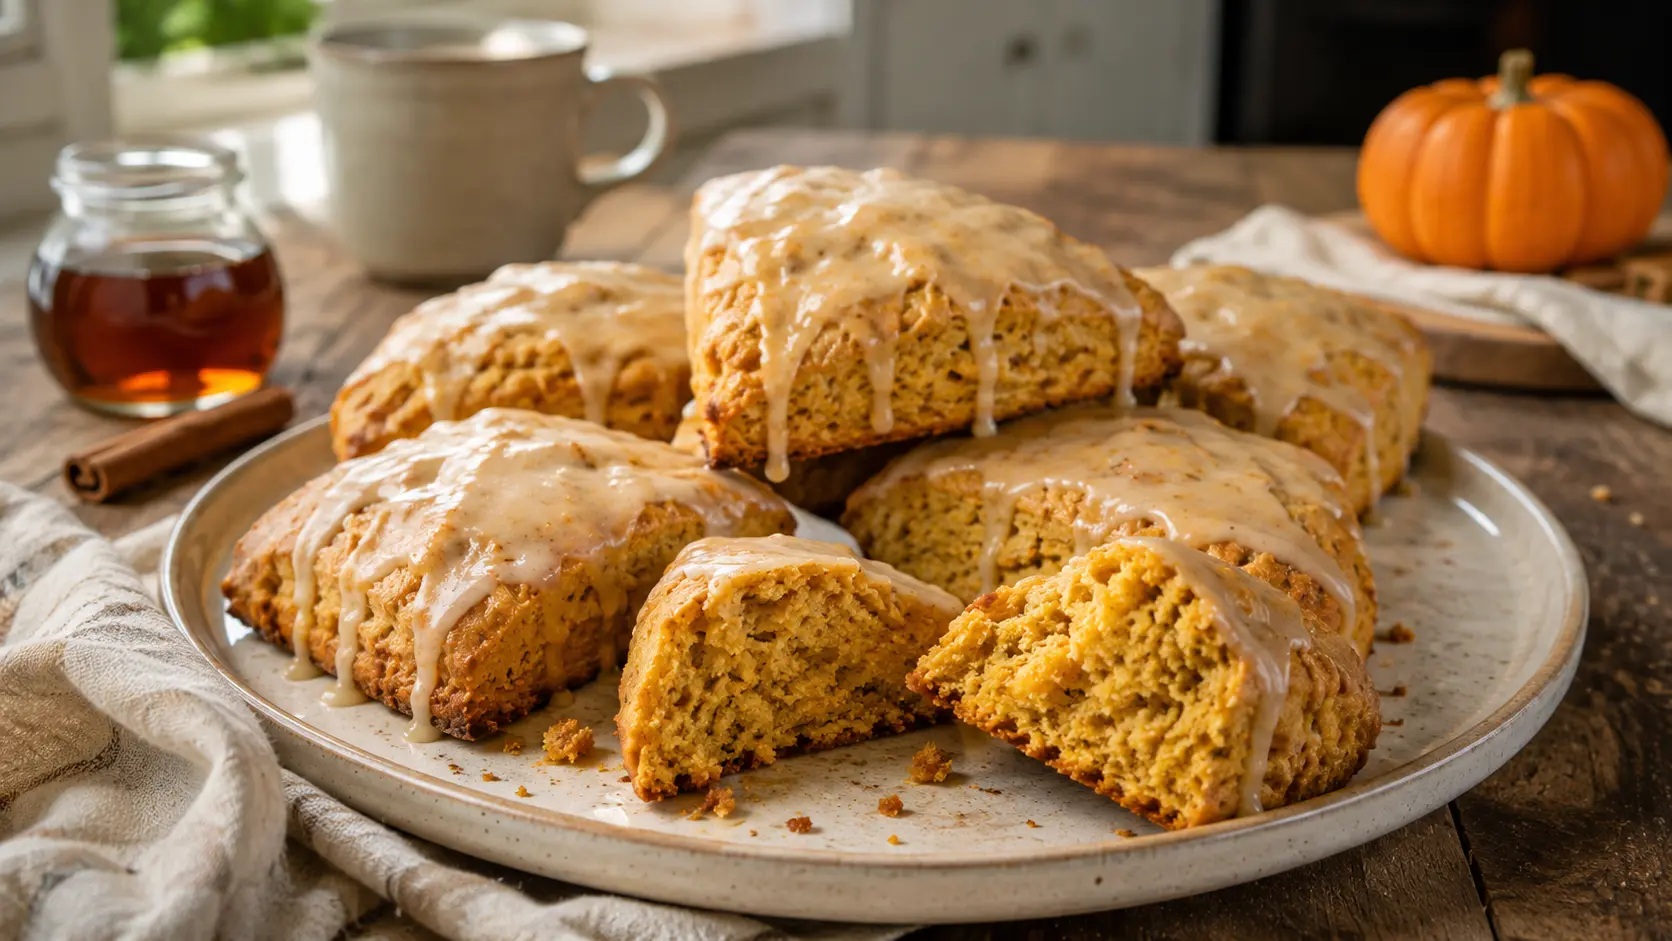
Easy Maple Pumpkin Scones with Homemade Brown Butter Glaze
Ingredients
Method
- Preheat oven to 400°F (205°C) and line a baking sheet with parchment.
- Whisk flour, brown sugar, baking powder, cinnamon, ginger, nutmeg, and salt together.
- Add cold cubed butter and cut it into the flour until coarse crumbs form, leaving some pea-sized pieces.
- In another bowl, whisk pumpkin puree, egg, maple syrup, 3 tablespoons cream, and vanilla.
- Pour the wet mixture into the dry ingredients.
- Fold gently until a shaggy dough forms. Add another tablespoon of cold cream only if necessary.
- Transfer the dough to a lightly floured surface.
- Gently bring it together without kneading.
- Pat into a roughly 7-inch disc about 1 inch thick.
- Cut into 8 wedges.
- Arrange wedges approximately 2 inches apart on the prepared baking sheet.
- Refrigerate for 10–15 minutes.
- Lightly brush the tops with heavy cream.
- Bake for 16–20 minutes until risen, set, and lightly golden around the edges.
- Transfer to a wire rack and cool for at least 15 minutes.
- Meanwhile, melt 3 tablespoons butter in a small light-colored saucepan over medium-low heat.
- Continue cooking, swirling occasionally, until the milk solids become amber-brown and smell nutty.
- Immediately transfer the brown butter and browned milk solids to a bowl.
- Let cool briefly.
- Whisk in powdered sugar, maple syrup, vanilla, salt, and 1 tablespoon milk or cream.
- Add additional milk 1 teaspoon at a time until thick but drizzleable.
- Drizzle over cooled scones.
- Allow the glaze to set for approximately 10 minutes before serving.
Notes
- Use plain pumpkin puree rather than pumpkin pie filling.
- Keep the butter cold until it is incorporated into the flour.
- Don’t overwork the dough.
- Pumpkin puree varies in moisture, so add additional cream only when needed.
- Chill the shaped scones before baking for better structure.
- Watch brown butter carefully because it can burn quickly.
- Include the browned milk solids in the glaze because they provide much of the nutty flavor.
- Cool the scones before glazing.
- Freeze baked scones before glazing for best results.