No-Bake Chocolate Peanut Butter Protein Bars – Easy Homemade High-Protein Snack
Craving something chocolatey, satisfying, and easy to grab when hunger hits? These No-Bake Chocolate Peanut Butter Protein Bars combine creamy peanut butter, hearty oats, vanilla protein powder, and a smooth layer of dark chocolate into one delicious homemade snack. They’re soft, chewy, naturally sweetened with honey, and packed with rich peanut butter flavor. Best of all, you don’t need to turn on the oven or spend hours in the kitchen.
Unlike many store-bought protein bars that can taste dry, chalky, or overly processed, these homemade peanut butter protein bars have a tender, slightly chewy texture and a rich chocolate topping that makes them feel like a treat. The combination of peanut butter, oats, and protein powder creates a filling snack that’s easy to prepare in advance and keep in the refrigerator throughout the week.
Whether you’re looking for an afternoon pick-me-up, a convenient post-workout snack, or something sweet to enjoy with your morning coffee, this easy no-bake protein bars recipe is worth adding to your meal-prep routine. If you already enjoy our Cozy No-Bake Peanut Butter Energy Balls or Creamy Overnight Peanut Butter Protein Oats, you’ll love this chocolate-covered version that can be sliced into individual bars and stored for busy days.
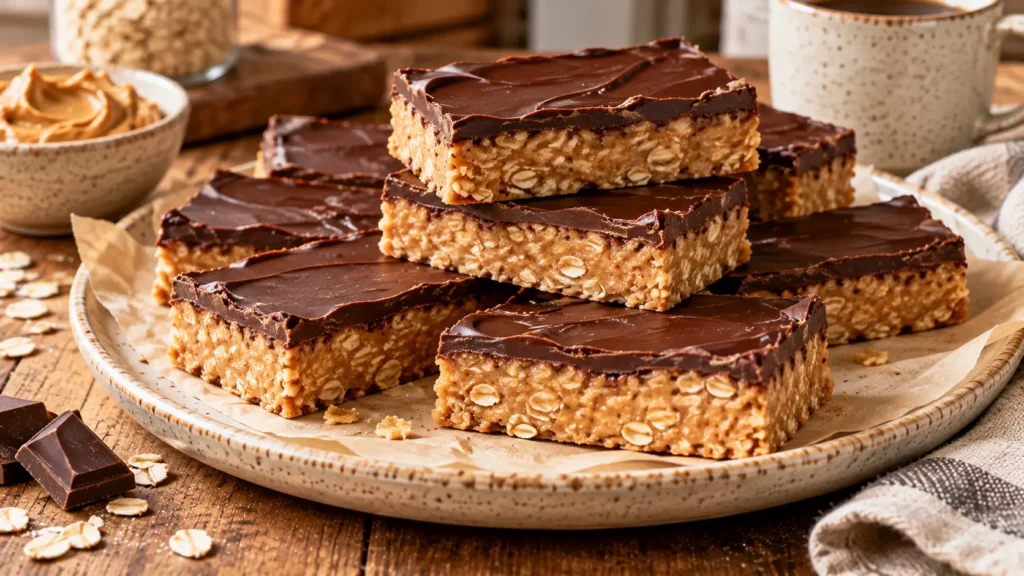
Easy No-Bake Chocolate Peanut Butter Protein Bars
Homemade protein bars are a convenient way to prepare satisfying snacks using ingredients you can recognize and customize.
These chocolate peanut butter protein bars are made with a simple oat-based mixture that gets pressed into a baking pan and topped with melted dark chocolate. After chilling in the refrigerator, the mixture firms up enough to slice into neat bars.
The peanut butter acts as both a flavor ingredient and a binder, helping hold the oats and protein powder together. Honey adds sweetness and stickiness, while milk adjusts the consistency so the mixture isn’t too dry.
Vanilla protein powder adds extra protein and gives the bars a pleasant sweetness without overpowering the peanut butter. A small amount of vanilla extract and salt enhances the overall flavor.
The dark chocolate topping adds a rich finishing layer that contrasts beautifully with the soft peanut butter base.
One of the biggest advantages of this recipe is that it doesn’t require baking. Everything comes together in a mixing bowl, making it a practical option for beginners, busy families, and anyone who enjoys homemade snacks without complicated preparation.
Why You’ll Love These Peanut Butter Protein Bars
No oven required: These bars set in the refrigerator, making them ideal for quick and easy snack preparation.
Simple ingredients: You’ll only need a handful of everyday pantry ingredients.
Extra protein: Peanut butter and protein powder provide protein in every serving.
Rich chocolate flavor: A thin layer of dark chocolate makes the bars taste like a homemade chocolate peanut butter treat.
Soft and chewy texture: The oat and peanut butter base stays pleasantly tender rather than becoming hard or crumbly.
Perfect for meal prep: Prepare a batch ahead of time and store it in the refrigerator for convenient snacks.
Easy to customize: Add nuts, seeds, cinnamon, or different types of chocolate.
Great for busy afternoons: These bars are easy to pack in a lunchbox with a cold pack or enjoy at home.
Less expensive than some packaged options: Making bars at home can be economical, depending on the ingredients and protein powder you use.
Ingredients for No-Bake Chocolate Peanut Butter Protein Bars
These homemade protein bars are made with a chewy peanut butter-oat base and a smooth chocolate topping.
For the Peanut Butter Protein Base
1 cup (250g) creamy peanut butter
Peanut butter is the main ingredient responsible for the bars’ rich flavor and soft texture.
Choose a smooth, creamy peanut butter that mixes easily with the other ingredients.
Natural peanut butter works well, but stir it thoroughly before measuring because the oil can separate.
If your peanut butter is very thick or dry, you may need a little extra milk.
1½ cups (135g) old-fashioned rolled oats
Rolled oats add texture, fiber, and structure.
They give the bars a pleasant chewiness without requiring baking.
For a smoother texture, you can pulse the oats briefly in a food processor before mixing.
Avoid steel-cut oats because they remain too firm in this no-bake recipe.
If you need gluten-free bars, use certified gluten-free oats.
¾ cup (90g) vanilla protein powder
Protein powder increases the protein content and helps absorb moisture from the peanut butter mixture.
Whey protein powder or a plant-based protein blend can work, but different brands absorb liquid differently.
Some plant-based powders require additional milk.
Vanilla protein powder gives the bars a mild sweetness that pairs well with peanut butter and chocolate.
⅓ cup (113g) honey
Honey adds sweetness and helps bind the ingredients together.
Its sticky consistency is particularly useful in no-bake recipes.
You can substitute maple syrup, although the texture may be slightly softer.
¼ cup (60ml) milk, plus more as needed
Milk helps soften the oat and protein powder mixture.
Add it gradually rather than pouring in too much at once.
You want a thick mixture that can be pressed into a pan, not a runny batter.
Whole milk, reduced-fat milk, or unsweetened almond milk can be used.
1 teaspoon vanilla extract
Vanilla enhances the sweetness and balances the peanut butter flavor.
¼ teaspoon fine salt
Salt helps bring out the chocolate and peanut butter flavors.
If you’re using salted peanut butter, reduce or omit the additional salt.
For the Chocolate Topping
¾ cup (130g) dark chocolate chips
Dark chocolate adds a rich, smooth topping.
Semi-sweet chocolate chips also work well if you prefer a sweeter flavor.
Choose chocolate you enjoy eating because its flavor will be noticeable in every bite.
1 teaspoon coconut oil
Coconut oil helps the melted chocolate spread smoothly and makes the topping a little easier to slice after chilling.
Use refined coconut oil if you don’t want a noticeable coconut flavor.
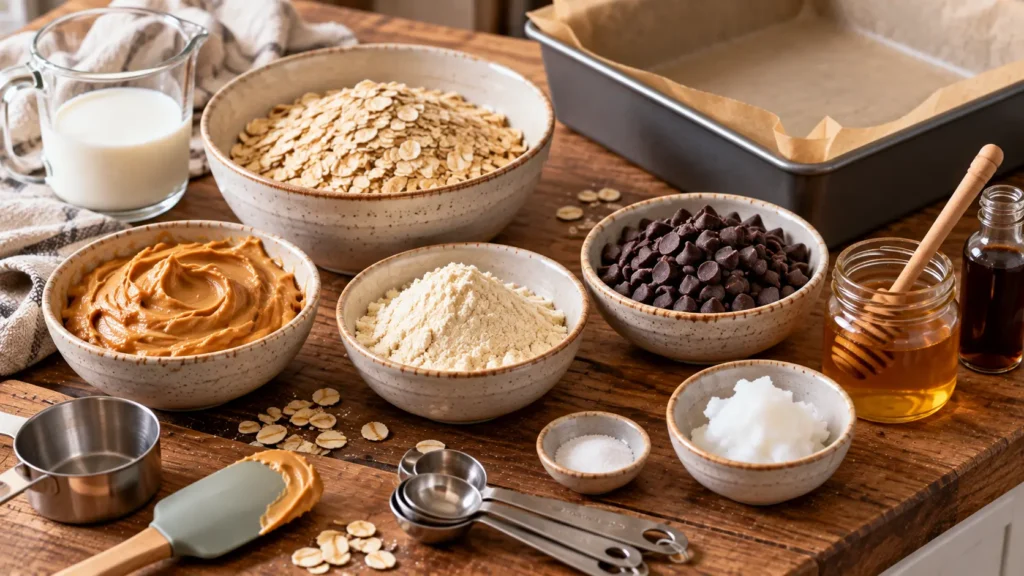
How to Make No-Bake Chocolate Peanut Butter Protein Bars
These homemade protein bars come together in a few simple stages: preparing the pan, mixing the base, pressing the mixture firmly, adding chocolate, and chilling.
Step 1: Prepare the Baking Pan
Line an 8×8-inch (20×20cm) square baking pan with parchment paper.
Leave some parchment hanging over two opposite sides.
These overhanging edges will help you lift the finished bars out of the pan without breaking them.
Step 2: Measure the Ingredients
Measure the peanut butter, rolled oats, protein powder, honey, milk, vanilla extract, and salt.
Keep the chocolate chips and coconut oil separate for the topping.
Accurate measurements are particularly important because protein powder can absorb different amounts of liquid.
Step 3: Prepare the Peanut Butter
If your peanut butter is very thick, warm it gently in a microwave-safe bowl for approximately 10–15 seconds.
It should become easier to stir without turning hot.
If using natural peanut butter, make sure the separated oil is fully incorporated.
Step 4: Combine Peanut Butter and Honey
Add the peanut butter and honey to a large mixing bowl.
Stir until the mixture becomes smooth and evenly combined.
The honey should blend completely into the peanut butter.
Step 5: Add Vanilla and Salt
Stir in the vanilla extract and salt.
These ingredients may seem small, but they make the bars taste more balanced.
Step 6: Add the Rolled Oats
Pour the rolled oats into the peanut butter mixture.
Stir with a sturdy spoon or spatula until the oats are coated.
The mixture will begin to thicken.
Step 7: Add the Protein Powder
Gradually add the vanilla protein powder.
Stir after each addition to help distribute it evenly.
The mixture will become noticeably thicker as the protein powder absorbs moisture.
Step 8: Add the Milk
Pour in the milk a little at a time while mixing.
Start with approximately 2 tablespoons, then add more as needed.
Continue until the mixture forms a thick, cohesive dough.
It should hold together when squeezed between your fingers.
Step 9: Check the Texture
Take a small amount of the mixture and press it together.
If it crumbles easily, add another teaspoon or two of milk.
If it feels overly wet or sticky, add a small amount of rolled oats or protein powder.
The ideal texture resembles a thick, soft cookie dough.
Step 10: Transfer the Mixture to the Pan
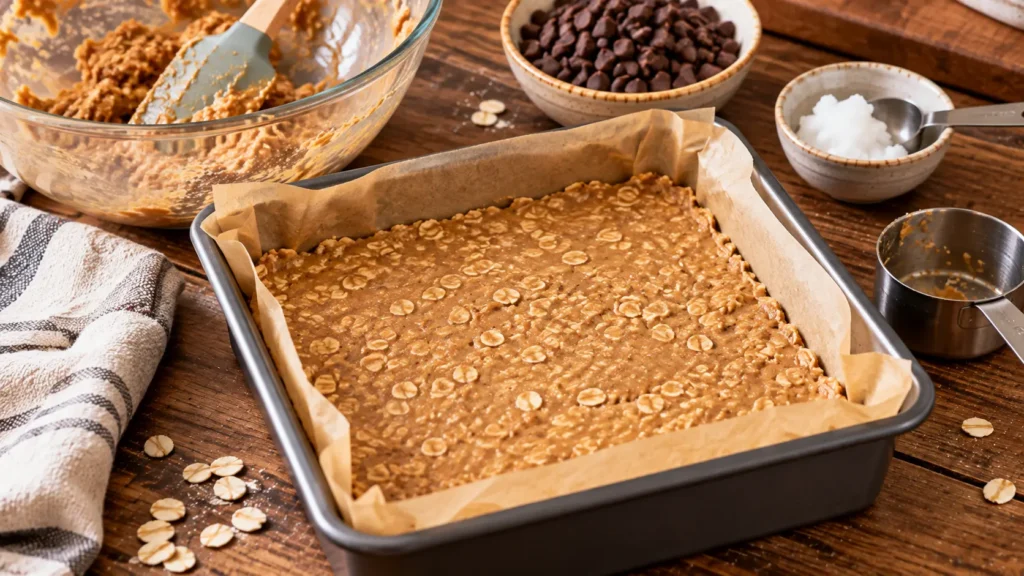
Spoon the peanut butter protein mixture into the prepared baking pan.
Spread it roughly across the bottom using a spatula.
Step 11: Press the Mixture Firmly
Place another small piece of parchment paper over the mixture.
Use the bottom of a measuring cup or flat glass to press it into an even layer.
Press firmly, especially around the corners.
This step is important because compacting the mixture helps the finished bars hold together when sliced.
Step 12: Prepare the Chocolate Topping
Place the dark chocolate chips and coconut oil in a microwave-safe bowl.
Microwave in 20-second intervals, stirring between each interval.
Continue until the chocolate is almost completely melted.
Stir until smooth.
Alternatively, melt the chocolate gently using a double boiler.
Avoid overheating because chocolate can become thick or grainy.
Step 13: Pour the Chocolate Over the Base
Pour the melted chocolate over the pressed peanut butter mixture.
Use a spatula to spread it into a thin, even layer.
Make sure the chocolate reaches the edges.
Step 14: Smooth the Surface
Gently tap the baking pan against the countertop once or twice to help level the chocolate.
Avoid shaking the pan excessively.
The chocolate layer should be smooth but doesn’t need to look perfectly polished.
Step 15: Refrigerate the Bars
Place the pan in the refrigerator.
Chill for approximately 1 hour, or until the peanut butter base feels firm and the chocolate topping has set.
If your refrigerator is particularly warm or the mixture is soft, additional chilling time may be necessary.
Step 16: Remove from the Pan
Once the bars are firm, lift them from the pan using the parchment paper overhang.
Transfer the slab to a cutting board.
Step 17: Prepare for Slicing
Allow the bars to sit at room temperature for approximately 3–5 minutes.
This can help prevent the chocolate topping from cracking excessively during slicing.
Step 18: Cut into Bars
Using a sharp knife, cut the slab into 12 rectangular bars.
For clean cuts, warm the knife briefly under hot water, dry it completely, and slice carefully.
Wipe the blade between cuts if necessary.
Step 19: Check the Texture
The bars should hold together when lifted.
The base should be chewy and firm enough to slice, while the chocolate topping should have a smooth, slightly crisp texture.
If the bars are too soft, return them to the refrigerator for another 15–20 minutes.
Step 20: Serve or Store
Enjoy immediately or transfer the bars to an airtight container.
Keep them refrigerated until ready to eat.
For the best texture, let a refrigerated bar sit at room temperature for a few minutes before serving.
Equipment You’ll Need
You don’t need specialized baking equipment to make these protein bars.
An 8×8-inch square baking pan is ideal for creating bars with a satisfying thickness.
You’ll also need a large mixing bowl, measuring cups and spoons, sturdy spatula, parchment paper, microwave-safe bowl or double boiler, sharp knife, and cutting board.
A kitchen scale is helpful for measuring protein powder, oats, and peanut butter accurately.
If you prefer a finer texture, a food processor can be used to pulse the oats, but it isn’t required.
Delicious Protein Bar Variations
Chocolate Chip Peanut Butter Protein Bars
Mix ¼ cup mini chocolate chips directly into the peanut butter base before pressing it into the pan.
You can keep the chocolate topping or omit it for a simpler version.
Crunchy Peanut Butter Protein Bars
Use crunchy peanut butter instead of creamy peanut butter.
The peanut pieces add texture and a little extra crunch.
Peanut Butter Banana Protein Bars
Add a small amount of mashed ripe banana to the base.
Because banana adds moisture, reduce the milk and adjust the dry ingredients as needed.
These bars will be softer and should be refrigerated promptly.
Almond Butter Protein Bars
Replace peanut butter with creamy almond butter.
The flavor will be slightly milder, and the mixture may require a small adjustment in milk.
Coconut Chocolate Protein Bars
Mix 2 tablespoons of unsweetened shredded coconut into the base.
You can also sprinkle a small amount over the melted chocolate before chilling.
Cinnamon Peanut Butter Protein Bars
Add ½ teaspoon ground cinnamon to the base.
Cinnamon brings a warm flavor that pairs beautifully with oats and peanut butter.
Extra Chocolate Protein Bars
Use chocolate protein powder instead of vanilla protein powder.
This creates a more intense chocolate-peanut butter flavor.
Peanut Butter Protein Bars with Chia Seeds
Add 1 tablespoon chia seeds to the mixture.
You may need a little additional milk because chia seeds absorb moisture.
For another easy snack featuring oats and peanut butter, try our Cozy No-Bake Peanut Butter Energy Balls.
Pro Tips for Perfect No-Bake Protein Bars
Use creamy peanut butter. Smooth peanut butter helps bind the ingredients and creates a more uniform texture.
Stir natural peanut butter thoroughly. Separated oil can affect the consistency of the bars.
Choose a protein powder you enjoy. The flavor of the powder will influence the finished recipe.
Add milk gradually. Different protein powders absorb liquid differently, so the exact amount may vary.
Press the mixture firmly. A tightly packed base is less likely to crumble.
Don’t make the chocolate layer too thick. A thinner topping is easier to slice and provides a better balance of flavors.
Avoid overheating the chocolate. Melt it gently and stir frequently.
Chill completely before slicing. Cutting too early can cause the bars to fall apart.
Use a warm, dry knife. This helps create cleaner cuts through the chocolate.
Store in the refrigerator. The bars contain moisture and are designed to remain firm when chilled.
Are Homemade Protein Bars Healthy?
Homemade protein bars can be a convenient addition to a balanced diet, especially when you want control over the ingredients and portion sizes.
These bars contain peanut butter, oats, protein powder, and dark chocolate.
Peanut butter provides fats and some protein, while oats contribute carbohydrates and fiber. Protein powder increases the overall protein content.
However, these bars also contain honey and chocolate, which contribute added sugars and calories.
That doesn’t make them unsuitable as a snack, but portion size and your individual nutritional needs still matter.
The exact amount of protein per bar depends heavily on the protein powder and peanut butter brands you use.
If you want a more filling breakfast rather than a snack, our Creamy Overnight Peanut Butter Protein Oats are another practical make-ahead option.
How Much Protein Is in Each Bar?
Using a typical vanilla protein powder containing approximately 24g of protein per 30g serving, this recipe provides an estimated 10–12g of protein per bar when divided into 12 portions.
The exact amount will vary depending on the protein powder, peanut butter, oats, milk, and chocolate.
For the most accurate result, calculate the nutrition using the labels of the specific ingredients you use.
Can You Make These Protein Bars Without Protein Powder?
Yes, but you’ll need to adjust the recipe.
Protein powder is one of the main dry ingredients and helps the mixture hold its shape.
You can replace it with additional finely ground oats, but the resulting bars will contain less protein and may require less milk.
Start with a smaller amount of milk and adjust until the mixture holds together.
For a recipe designed specifically without protein powder, our Cozy No-Bake Peanut Butter Energy Balls are a good alternative.
How to Make Protein Bars Ahead of Time
These bars are ideal for preparing in advance.
Make a batch on the weekend, chill until firm, and slice into individual portions.
Store the bars in an airtight container with parchment paper between layers to prevent sticking.
Keep them in the refrigerator and take one out whenever you need a convenient snack.
If packing them for school, work, or travel, use an insulated lunch bag with a cold pack.
Because the chocolate topping softens in warm conditions, these bars aren’t ideal for sitting in a hot car or an unrefrigerated bag for several hours.
How to Store No-Bake Protein Bars
Store the finished bars in an airtight container in the refrigerator for up to 5–7 days.
Place parchment paper between layers if stacking them.
Keeping the bars chilled helps maintain their shape and prevents the chocolate topping from becoming too soft.
If the bars contain dairy milk, use fresh milk and refrigerate them promptly.
Can You Freeze Homemade Protein Bars?
Yes.
These chocolate peanut butter protein bars freeze well.
Wrap individual bars in parchment paper or plastic wrap.
Place them in a freezer-safe container or bag.
Freeze for up to 2 months for the best quality.
When ready to eat, transfer a bar to the refrigerator to thaw.
You can also allow it to soften briefly at room temperature before eating, provided it isn’t left out for an extended period.
Freezing individual portions makes it easy to prepare several weeks of snacks at once.
Frequently Asked Questions
Do Protein Bars Need to Be Baked?
No.
These bars are made without baking because peanut butter, honey, and the dry ingredients form a mixture that firms up when chilled.
Can I Use Natural Peanut Butter?
Yes.
Natural peanut butter works well, but it must be thoroughly stirred before measuring.
If the mixture is too oily or soft, add a small amount of additional oats or protein powder.
Can I Use Quick Oats Instead of Rolled Oats?
Yes.
Quick oats produce a softer, more uniform texture.
Old-fashioned rolled oats create a chewier result.
Can I Use Chocolate Protein Powder?
Absolutely.
Chocolate protein powder gives the bars a richer chocolate flavor.
Can I Make These Bars Vegan?
Yes, with substitutions.
Use plant-based protein powder, maple syrup instead of honey, plant-based milk, and dairy-free chocolate.
Can I Make These Gluten-Free?
Yes.
Use certified gluten-free oats and verify that the protein powder and other packaged ingredients are gluten-free.
Why Are My Protein Bars Crumbly?
The mixture may contain too much protein powder or not enough moisture.
Add a little milk or peanut butter and press the mixture firmly into the pan.
Why Are My Protein Bars Too Soft?
Too much milk, honey, or oily peanut butter can make the bars soft.
Add a small amount of oats or protein powder and chill thoroughly.
Why Did My Chocolate Topping Crack?
The chocolate may have become too cold or the layer may be too thick.
Allow the bars to sit for a few minutes before cutting, and use a warm, dry knife.
Can I Skip the Chocolate Topping?
Yes.
The peanut butter base can be chilled and sliced without chocolate.
The bars will have a simpler flavor and slightly different nutritional values.
Can Kids Eat These Protein Bars?
These bars contain peanuts and may contain milk or soy, depending on the protein powder and chocolate.
For children, consider whether protein powder is appropriate for their age and nutritional needs; it generally isn’t necessary for most children who eat a varied diet. A version made without protein powder may be more suitable.
Are These Good for Post-Workout Snacks?
They can be a convenient post-workout snack because they provide carbohydrates, fats, and protein.
Whether they’re appropriate for your needs depends on your overall diet and activity level.
What to Serve with Chocolate Peanut Butter Protein Bars
These bars are satisfying on their own, but they also pair well with simple drinks and snacks.
Serve one with a cup of coffee, unsweetened tea, or a glass of milk for an afternoon break.
For breakfast, pair a bar with fresh berries, sliced banana, or plain Greek yogurt.
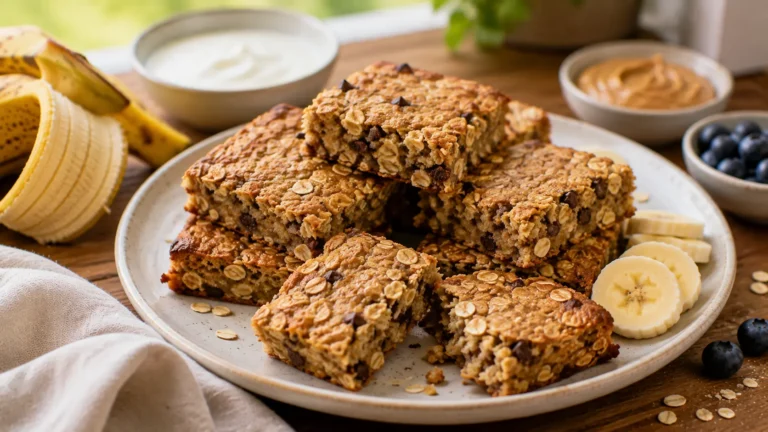
If you’re preparing several make-ahead snacks for the week, combine these bars with our Banana Oat Breakfast Bars and Cozy No-Bake Peanut Butter Energy Balls.
For a breakfast meal-prep rotation, you can also prepare Creamy Overnight Peanut Butter Protein Oats or Creamy Vanilla Chia Pudding.
These recipes offer different textures and flavors while using convenient pantry ingredients.
Nutrition Information
The following values are approximate and based on 12 bars using typical peanut butter, vanilla whey protein powder, honey, and dark chocolate.
| Nutrient | Estimated amount per bar |
|---|---|
| Calories | 320 kcal |
| Protein | 12g |
| Carbohydrates | 27g |
| Fat | 20g |
| Saturated Fat | 6g |
| Sugar | 16g |
| Fiber | 3g |
| Sodium | 110mg |
Nutrition values vary considerably by brand. These estimates should not replace calculations using your actual ingredients.
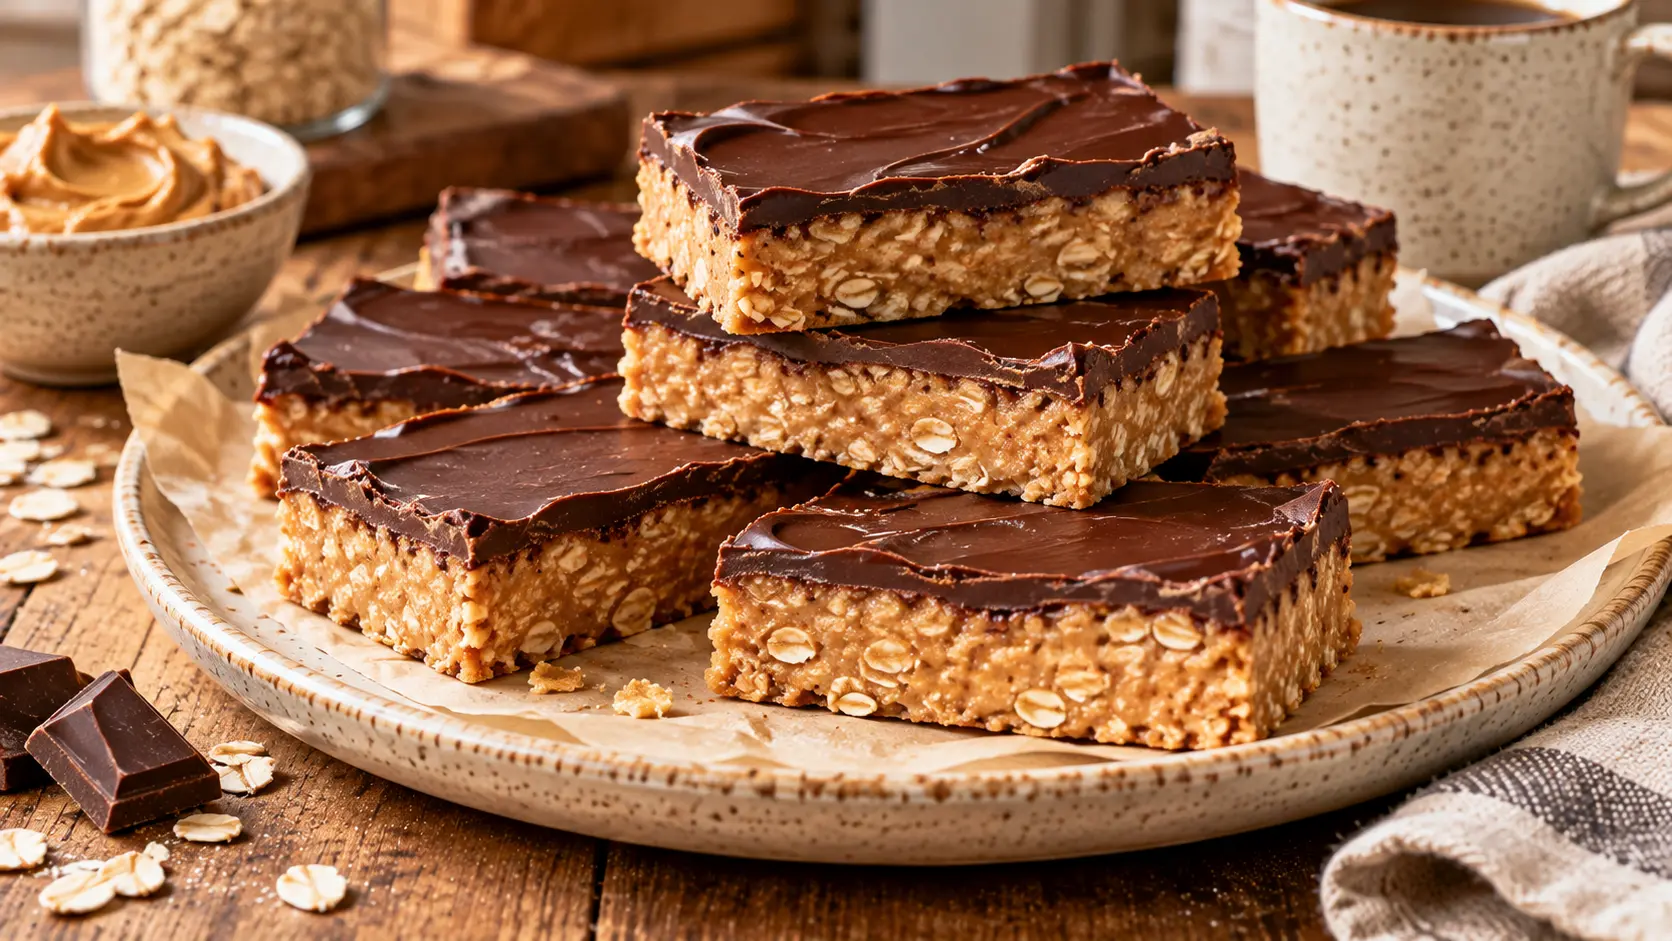
No-Bake Chocolate Peanut Butter Protein Bars
Ingredients
Method
- Line an 8×8-inch baking pan with parchment paper, leaving an overhang on two sides.
- Measure all ingredients and set aside the chocolate chips and coconut oil.
- If necessary, warm the peanut butter briefly until easy to stir.
- Combine peanut butter and honey in a large mixing bowl.
- Stir in vanilla extract and salt.
- Add rolled oats and mix until coated.
- Gradually stir in vanilla protein powder.
- Add milk a little at a time until a thick, cohesive dough forms.
- Check the consistency and adjust with additional milk or oats if necessary.
- Transfer the mixture to the prepared baking pan.
- Press firmly into an even layer using parchment paper and the bottom of a measuring cup.
- Combine chocolate chips and coconut oil in a microwave-safe bowl.
- Melt in 20-second intervals, stirring until smooth.
- Pour the melted chocolate over the peanut butter base.
- Spread the chocolate evenly with a spatula.
- Refrigerate for approximately 1 hour, until firm.
- Lift the chilled slab from the pan using the parchment overhang.
- Let stand for 3–5 minutes before slicing.
- Cut into 12 rectangular bars using a sharp knife.
- Store in an airtight container in the refrigerator.
Notes
-
Different protein powders absorb different amounts of liquid. Adjust the milk gradually.
-
Use well-stirred creamy peanut butter for the best texture.
-
Press the base firmly into the pan to prevent crumbling.
-
Use a thin chocolate topping for easier slicing.
-
Chill completely before cutting.
-
Refrigerate leftovers for up to 5–7 days.
-
Freeze individually wrapped bars for up to 2 months.
-
For vegan bars, use maple syrup, plant-based milk, vegan protein powder, and dairy-free chocolate.
-
For gluten-free bars, use certified gluten-free oats and check all packaged ingredients.