Homemade Pumpkin Pie Pop Tarts with Cinnamon Glaze
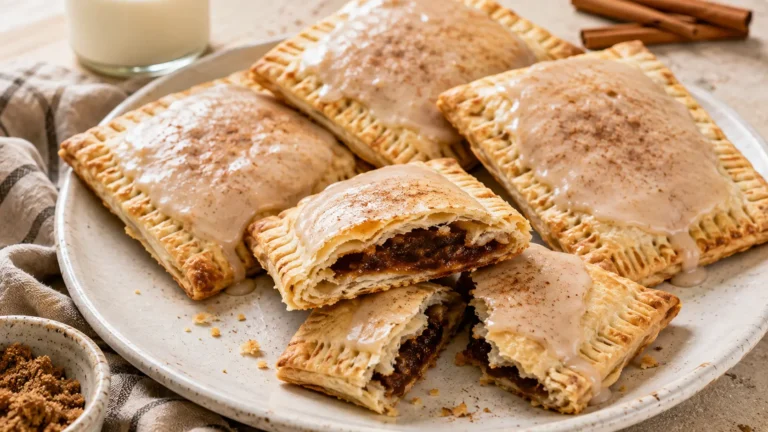
Imagine the best parts of pumpkin pie tucked inside a buttery, flaky handheld pastry and finished with a sweet cinnamon glaze. These homemade pumpkin pie Pop Tarts have crisp golden edges, a soft spiced pumpkin center, and just enough glaze to make them feel like a special fall breakfast or dessert.
Unlike classic brown sugar Pop Tarts, this version uses a real pumpkin filling flavored with brown sugar, cinnamon, ginger, nutmeg, and vanilla. The filling becomes thick and creamy as it bakes while the pastry develops those flaky layers around it.
They’re also a fun way to use leftover pumpkin puree when you don’t have enough for a full pie. Serve them slightly warm with coffee, milk, or hot chocolate, or make a batch for a fall brunch alongside our Pumpkin Pie Baked Oatmeal.
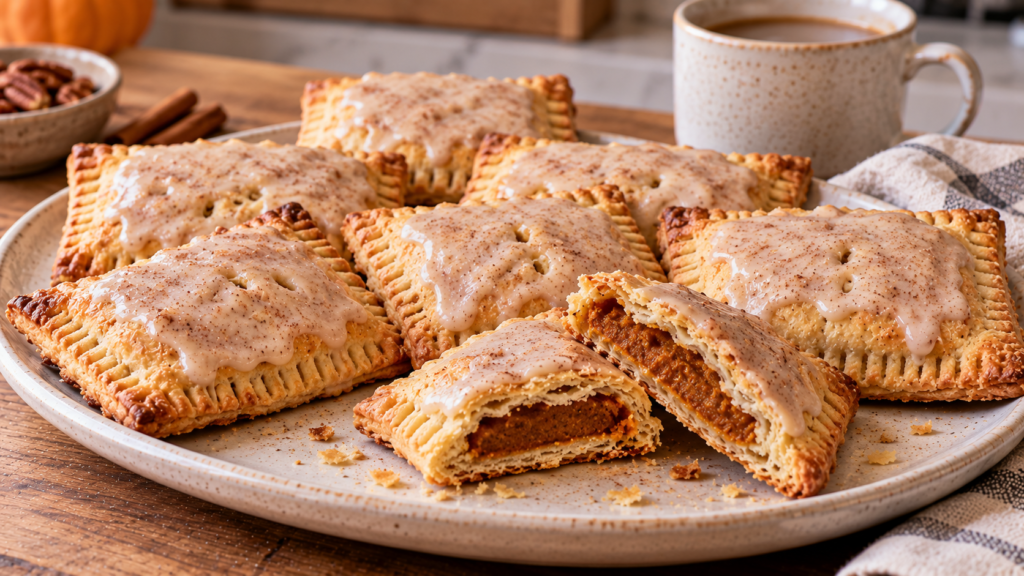
Easy Homemade Pumpkin Pie Pop Tarts
Homemade Pop Tarts don’t need to look factory-perfect.
Actually, that’s part of their charm.
You want slightly irregular rectangular pastries with crimped edges, tiny steam vents, flaky corners, and cinnamon glaze that doesn’t fall in exactly the same pattern on every pastry.
The filling is equally important.
Simply spooning pumpkin puree into pastry would give you a watery, bland center. Instead, we’re combining pumpkin with brown sugar, warm spices, vanilla, and a little cornstarch.
The cornstarch helps control moisture while the spices turn plain pumpkin into something that tastes much closer to pumpkin pie.
And because the filling is enclosed inside pastry, we’re intentionally keeping it relatively thick. A runny filling is much more likely to escape during baking.
Why You’ll Love These Pumpkin Pie Pop Tarts
Real pumpkin filling. These aren’t merely pumpkin-spice flavored—the filling actually contains pumpkin puree.
Perfect for fall. Pumpkin, cinnamon, ginger, nutmeg, brown sugar, and buttery pastry deliver classic autumn flavor.
Easy homemade pastry. You can use refrigerated pie crust for convenience or your favorite homemade pie dough.
Great use for leftover pumpkin. You only need a modest amount of puree.
Easy to customize. Make them with cinnamon glaze, maple glaze, or even leave them unglazed.
Freezer-friendly. The baked pastries can be frozen for later.
Breakfast or dessert. They’re sweet enough for dessert but fit naturally onto a fall brunch table.
We already have Best Homemade Brown Sugar Cinnamon Pop Tarts on Yummizer, but these have a distinctly different filling and seasonal search intent. Instead of duplicating that classic version, we’re turning the concept into a true pumpkin-pie-inspired fall pastry.
Ingredients You’ll Need
Pie Crust
For the easiest version, use refrigerated pie crust.
You’ll need enough pastry for two standard 9-inch pie crusts.
A homemade all-butter pie dough also works beautifully if you’d rather make everything from scratch.
Most importantly, keep the dough cold.
Warm pastry becomes soft, sticky, and harder to shape.
Pumpkin Puree
Use 100% pure pumpkin puree, not pumpkin pie filling.
Pumpkin pie filling already contains sugar and spices, which would make it difficult to control the sweetness and seasoning.
Brown Sugar
Brown sugar sweetens the pumpkin while contributing a subtle caramel flavor.
Either light or dark brown sugar works.
Cornstarch
A small amount of cornstarch helps thicken the pumpkin filling and reduces the chance of excess moisture making the pastry soggy.
Ground Cinnamon
Cinnamon is the main warm spice in both the pumpkin filling and our glaze.
Ground Ginger
Ginger gives the pumpkin filling a little warmth and prevents the flavor from becoming one-dimensional.
Ground Nutmeg
You only need a small amount.
Nutmeg is powerful, but in moderation it gives the filling that recognizable pumpkin-pie aroma.
Salt
A pinch of salt balances the sugar and spices.
Vanilla Extract
Vanilla rounds out the pumpkin filling and is also delicious in the glaze.
Egg
One beaten egg creates the egg wash.
It helps the pastry develop an attractive golden finish in the oven and can also help seal the edges.
Powdered Sugar
Powdered sugar creates a smooth glaze that sets nicely over the cooled pastries.
Milk
Milk thins the glaze.
Add it gradually because even a small amount can dramatically change the consistency.
Optional Maple Syrup
A teaspoon of pure maple syrup in the glaze adds another layer of fall flavor.
It’s optional, though. The cinnamon glaze is already flavorful without it.

How to Make Pumpkin Pie Pop Tarts
1. Preheat the Oven
Preheat your oven to 400°F (200°C).
Line a large metal baking sheet with parchment paper.
2. Make the Pumpkin Filling
In a medium bowl, combine:
- Pumpkin puree
- Brown sugar
- Cornstarch
- Cinnamon
- Ginger
- Nutmeg
- Salt
- Vanilla
Stir until completely combined.
The mixture should be thick and spoonable rather than runny.
3. Taste the Spice Balance
Because the filling doesn’t contain raw egg, you can taste a tiny amount and adjust the spices before assembling the pastries.
If you’d like stronger cinnamon, add a little more.
Avoid adding extra liquid.
4. Roll Out the Pastry
Place one cold pie crust onto a lightly floured work surface.
If necessary, roll it slightly thinner and more evenly.
Aim for roughly ⅛ inch thick.
Repeat with the second crust.
5. Cut the Rectangles
Using a sharp knife or pizza cutter, cut the dough into approximately 3 × 4½-inch rectangles.
You’ll need an even number because each Pop Tart requires a bottom and top piece.
Gather and reroll scraps gently if necessary.
Try not to overwork the dough.
6. Arrange the Bottom Pastries
Place half of the rectangles onto your parchment-lined baking sheet.
Leave a little space between each one.
7. Add the Pumpkin Filling
Spoon approximately 1½ tablespoons of pumpkin filling into the center of each rectangle.
Spread it slightly while leaving approximately a ½-inch border around all sides.
Don’t overfill them.
A huge mound of pumpkin might look appealing before baking, but it’s much more likely to burst through the pastry.
8. Brush the Edges
Lightly brush the exposed pastry border with beaten egg.
This helps the top layer adhere.
9. Add the Top Pastry
Place another rectangle of dough over each filled bottom.
Gently align the edges.
Don’t press down on the center because you don’t want to force the pumpkin filling outward.
10. Seal the Edges
Press around the perimeter with your fingertips.
Then use the tines of a fork to crimp all four edges.
The fork marks give the pastries their classic homemade Pop Tart appearance while strengthening the seal.
11. Add Steam Vents
Use a toothpick or the tip of a small knife to make 3–4 tiny holes in the top of each pastry.
This allows steam to escape during baking.
At this point, the Pop Tarts should still look pale and completely raw.

12. Chill Before Baking
Transfer the entire baking sheet to the refrigerator for approximately 10–15 minutes.
This firms the pastry after handling and helps it hold its shape in the oven.
13. Apply Egg Wash
Remove the chilled pastries from the refrigerator.
Brush the tops lightly with beaten egg.
Avoid allowing large amounts of egg wash to pool around the edges.
14. Bake
Bake at 400°F (200°C) for approximately 18–22 minutes.
The pastries are ready when they’re puffed slightly and golden around the tops and edges.
A tiny amount of filling may occasionally escape from one pastry. That’s completely normal with homemade pastries.
15. Cool
Transfer the baked Pop Tarts to a wire rack.
Allow them to cool for at least 15–20 minutes before glazing.
Don’t glaze them while piping hot.
The glaze will melt and disappear instead of forming a visible layer.
16. Make the Cinnamon Glaze
In a small bowl, whisk together:
- Powdered sugar
- Cinnamon
- Vanilla
- Milk
Start with less milk than you think you’ll need.
Add more approximately ½ teaspoon at a time until the glaze becomes thick but spreadable.
If using maple syrup, whisk it in now.
17. Glaze the Pop Tarts
Spoon glaze over the center of each cooled pastry.
Use the back of the spoon to spread it toward the edges while leaving some golden pastry visible.
The glaze shouldn’t completely cover every millimeter of the crust.
18. Let the Glaze Set
Leave the glazed pastries at room temperature for approximately 10–15 minutes, or until the glaze begins to set.
Then serve.
Equipment You’ll Need
You’ll need a large baking sheet, parchment paper, mixing bowls, rolling pin, sharp knife or pizza cutter, fork, pastry brush, whisk, measuring cups and spoons, and a wire cooling rack.
A ruler is optional. Homemade Pop Tarts don’t need mathematically perfect dimensions.
Variations and Substitutions
Maple Pumpkin Pop Tarts
Add a teaspoon of pure maple syrup to the glaze and reduce the milk slightly as needed.
Maple and pumpkin work beautifully together.
Pumpkin Cream Cheese Pop Tarts
Add a thin layer of lightly sweetened cream cheese beneath the pumpkin filling.
Be careful not to overfill the pastry.
Brown Sugar Pumpkin Pop Tarts
Increase the brown sugar slightly and add an extra pinch of cinnamon for a stronger brown-sugar flavor.
Pumpkin Pecan Pop Tarts
Add a small amount of finely chopped toasted pecans to the pumpkin filling.
Don’t use large pieces, which can make sealing the pastries difficult.
No-Glaze Pumpkin Pop Tarts
Skip the glaze and sprinkle the egg-washed tops with cinnamon sugar before baking.
Mini Pumpkin Pie Pop Tarts
Cut smaller rectangles for bite-sized pastries.
Reduce the amount of filling and begin checking them earlier because smaller pastries can bake faster.
Pro Tips for the Best Homemade Pop Tarts
Keep the pastry cold. Cold dough is easier to work with and produces a better flaky texture.
Use pumpkin puree, not pumpkin pie filling. They’re not interchangeable here.
Keep the filling thick. Excess moisture increases the chance of soggy pastry and leaking.
Don’t overfill. Leave enough empty pastry around the edges to create a strong seal.
Crimp thoroughly. Go around all four sides with a fork.
Cut steam vents. Trapped steam can cause the pastry to puff excessively or split.
Chill before baking. Even 10–15 minutes helps firm the pastry after shaping.
Cool before glazing. Otherwise your glaze will melt straight off.
Accept imperfections. A slightly crooked rectangle or small crack makes homemade pastries look more authentic, not less successful.
Make-Ahead Instructions
You can assemble the Pop Tarts several hours before baking.
Place them on the prepared baking sheet, cover carefully, and refrigerate.
Wait to apply the final egg wash until shortly before baking.
You can also make the pumpkin filling a day ahead and keep it refrigerated in an airtight container.
How to Store Pumpkin Pie Pop Tarts
Once completely cooled and the glaze has set, store the pastries in an airtight container.
They can remain at room temperature for around 1 day in a cool kitchen.
For longer storage, refrigerate for up to 4 days.
Because these contain a moist pumpkin filling, refrigeration is the safer choice for extended storage.
How to Reheat Homemade Pop Tarts
Oven
Warm the pastries at approximately 325°F (165°C) for several minutes.
This is the best method for restoring some crispness to the pastry.
Air Fryer
A few minutes at a relatively low temperature works well.
Watch carefully because the glaze can melt.
Microwave
Microwave for only a few seconds at a time.
The filling can become surprisingly hot even when the outside doesn’t feel particularly warm.
The microwave will also soften the pastry rather than crisp it.
Important: Don’t Use a Pop-Up Toaster
Despite the name “Pop Tart,” don’t put these homemade glazed pastries into a traditional slot toaster.
Glaze or filling can melt or leak into the appliance.
Use an oven, toaster oven, air fryer, or microwave instead.
Can You Freeze Pumpkin Pie Pop Tarts?
Yes.
For best results, freeze them without the glaze.
Allow baked pastries to cool completely, wrap them individually, and transfer them to a freezer-safe container.
Freeze for up to approximately 2 months for best quality.
Thaw, reheat gently, allow them to cool slightly, and then add fresh cinnamon glaze.
You can also freeze assembled unbaked pastries. Freeze them individually on a tray before transferring them to a freezer-safe container.
Bake from frozen, adding a few extra minutes as necessary.
Frequently Asked Questions
Can I Use Store-Bought Pie Crust?
Absolutely.
It’s the easiest way to make this recipe and keeps the focus on the homemade pumpkin filling and cinnamon glaze.
Can I Use Puff Pastry?
You can, but you’ll get a much puffier, lighter pastry rather than the classic pie-crust-style homemade Pop Tart texture.
It’s a delicious variation, but noticeably different.
What’s the Difference Between Pumpkin Puree and Pumpkin Pie Filling?
Pumpkin puree is essentially cooked, pureed pumpkin without the added sugar and spice mixture found in prepared pumpkin pie filling.
For this recipe, use plain pumpkin puree so you control the sweetness and seasoning yourself.
Why Did My Pumpkin Filling Leak Out?
The pastry may have been overfilled, the border may have been too narrow, or the edges may not have been sealed thoroughly enough.
Small leaks can still happen occasionally and aren’t a major problem.
Why Is My Bottom Pastry Soggy?
The filling may have contained too much moisture.
Use thick pumpkin puree, include the cornstarch, and avoid overfilling.
A properly preheated oven also helps the pastry begin cooking quickly.
Why Is My Glaze Transparent?
It’s probably too thin or the pastries were still too hot.
Add more powdered sugar for a thicker glaze and wait until the pastries have cooled before applying it.
Can I Make These Less Sweet?
Yes.
Reduce the brown sugar in the pumpkin filling slightly and apply a thinner layer of glaze.
Can Kids Help Make Them?
Kids can help cut pastry with age-appropriate tools, spoon filling, crimp edges with forks, and glaze cooled pastries.
Adults should supervise cutting and handle the hot oven and baking sheets.
What to Serve With Pumpkin Pie Pop Tarts
For a cozy fall breakfast, serve them with coffee, chai, hot chocolate, or cold milk.
They also fit nicely alongside Pumpkin Pie Baked Oatmeal when you’re preparing a larger autumn brunch.
If you’re putting together a pumpkin-heavy fall dessert table, our Pumpkin Cream Cheese Muffins add a soft bakery-style option, while Brown Butter Pumpkin Snickerdoodle Cookies bring a chewy cinnamon-sugar element.
And if someone prefers the classic Pop Tart flavor rather than pumpkin, point them toward our Best Homemade Brown Sugar Cinnamon Pop Tarts. That gives both recipes a useful internal connection without competing for exactly the same search intent.
Nutrition Information
Approximate nutrition per glazed Pop Tart:
Calories: 360
Protein: 4g
Carbohydrates: 49g
Fat: 17g
Saturated Fat: 7g
Fiber: 2g
Sugar: 23g
Sodium: 290mg
Nutrition values are estimates and will vary depending on the pastry dough, glaze quantity, brands, and serving size.
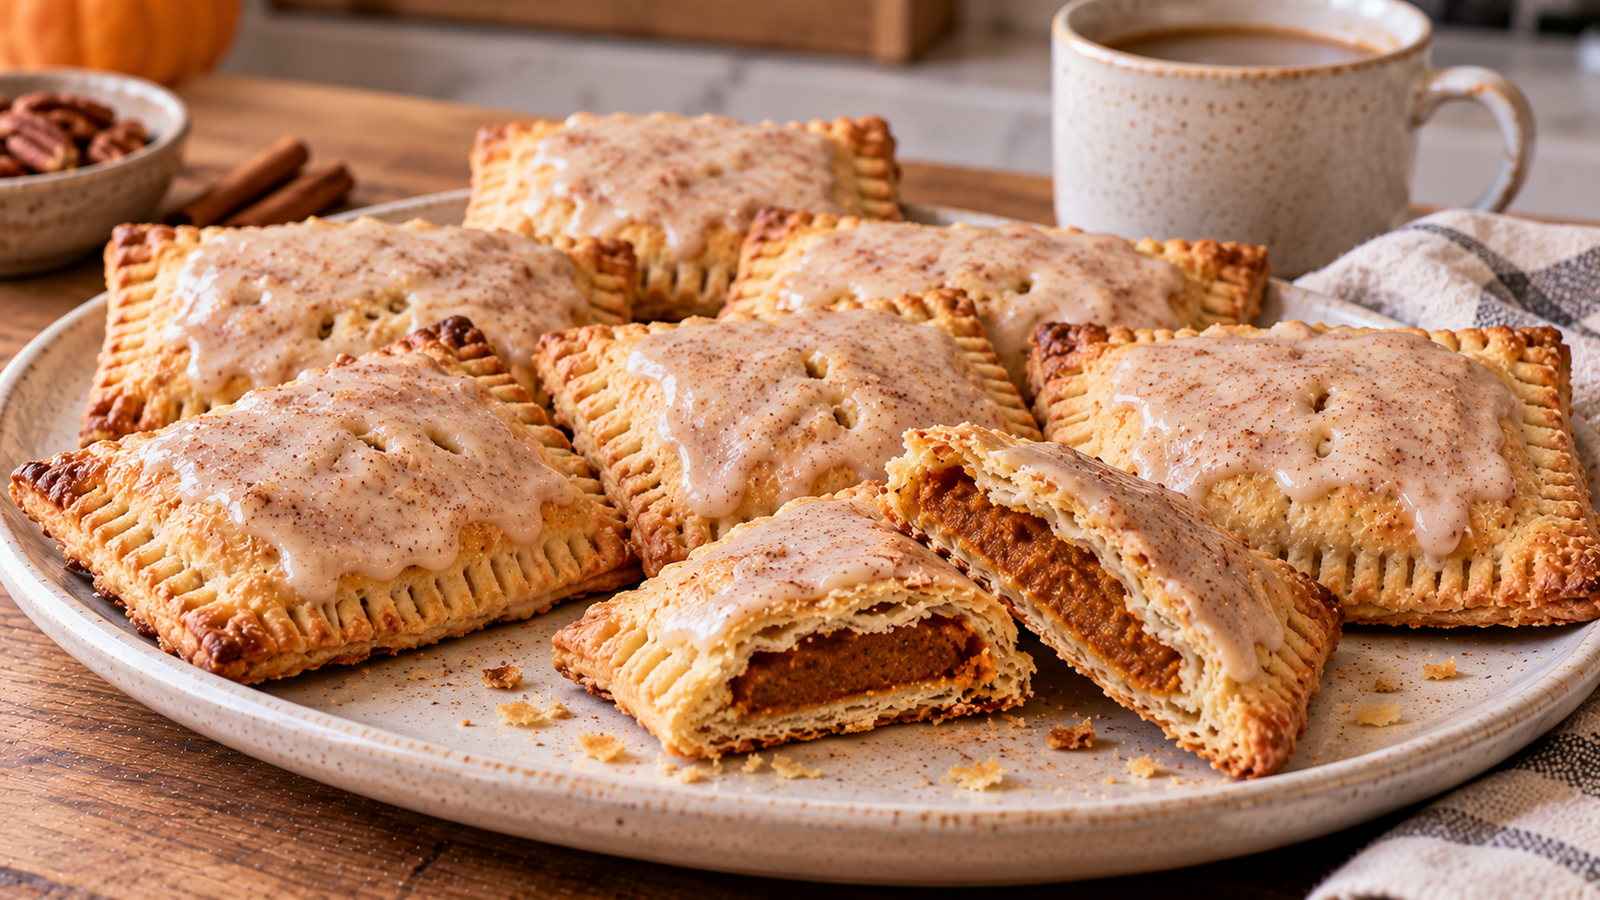
Homemade Pumpkin Pie Pop Tarts with Cinnamon Glaze
Ingredients
Method
- Preheat oven to 400°F (200°C) and line a large baking sheet with parchment paper.
- Combine pumpkin puree, brown sugar, cornstarch, cinnamon, ginger, nutmeg, salt, and vanilla in a bowl.
- Stir until smooth and thick.
- Roll cold pie dough on a lightly floured work surface to approximately ⅛-inch thickness.
- Cut approximately sixteen 3 × 4½-inch rectangles, rerolling scraps gently when necessary.
- Arrange eight rectangles on the prepared baking sheet.
- Spoon approximately 1½ tablespoons pumpkin filling into the center of each, leaving about a ½-inch border.
- Brush the exposed borders lightly with egg wash.
- Place the remaining pastry rectangles over the filling.
- Press the edges together gently.
- Crimp all four edges with a fork.
- Cut 3–4 small steam vents into each pastry.
- Refrigerate the assembled pastries for 10–15 minutes.
- Brush the tops lightly with egg wash.
- Bake for approximately 18–22 minutes, until puffed and golden.
- Transfer to a wire rack and cool for at least 15–20 minutes.
- Whisk powdered sugar, cinnamon, vanilla, and 1½ tablespoons milk together.
- Add optional maple syrup and additional milk in very small amounts if needed.
- Spoon the thick cinnamon glaze over the cooled Pop Tarts.
- Let the glaze set for 10–15 minutes before serving.
Notes
- Use pure pumpkin puree, not prepared pumpkin pie filling.
- Keep the pastry cold throughout preparation.
- Don’t overfill the pastries.
- Seal and crimp the edges thoroughly to minimize leaking.
- Small filling leaks are normal with homemade pastries.
- Cool before glazing so the icing doesn’t melt.
- Store refrigerated for up to approximately 4 days.
- Freeze unglazed baked Pop Tarts for up to approximately 2 months for best quality.
- Do not reheat homemade glazed Pop Tarts in a traditional pop-up toaster.