Spooky Witch Finger Pretzel Rods – Easy White Chocolate Treat
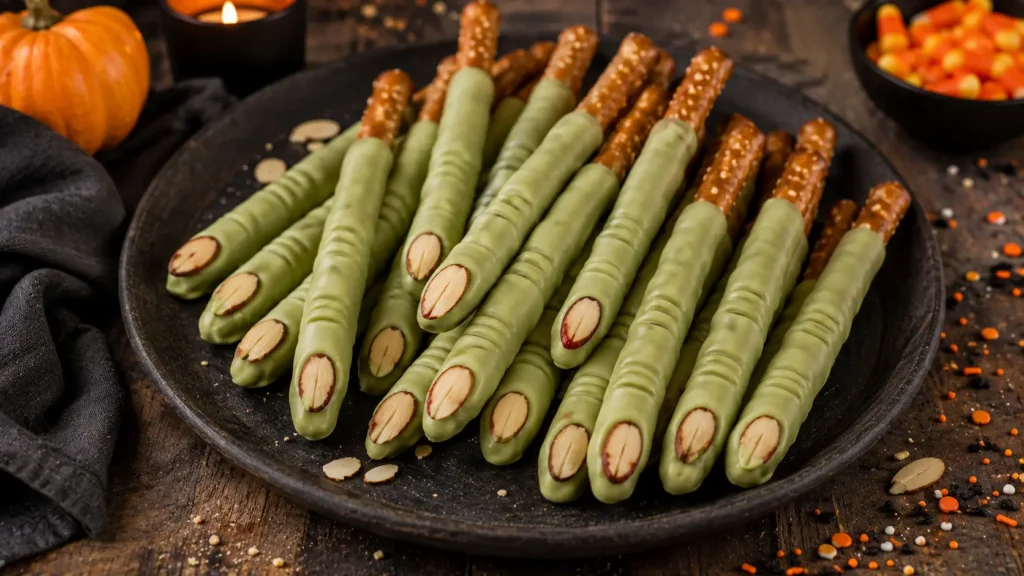
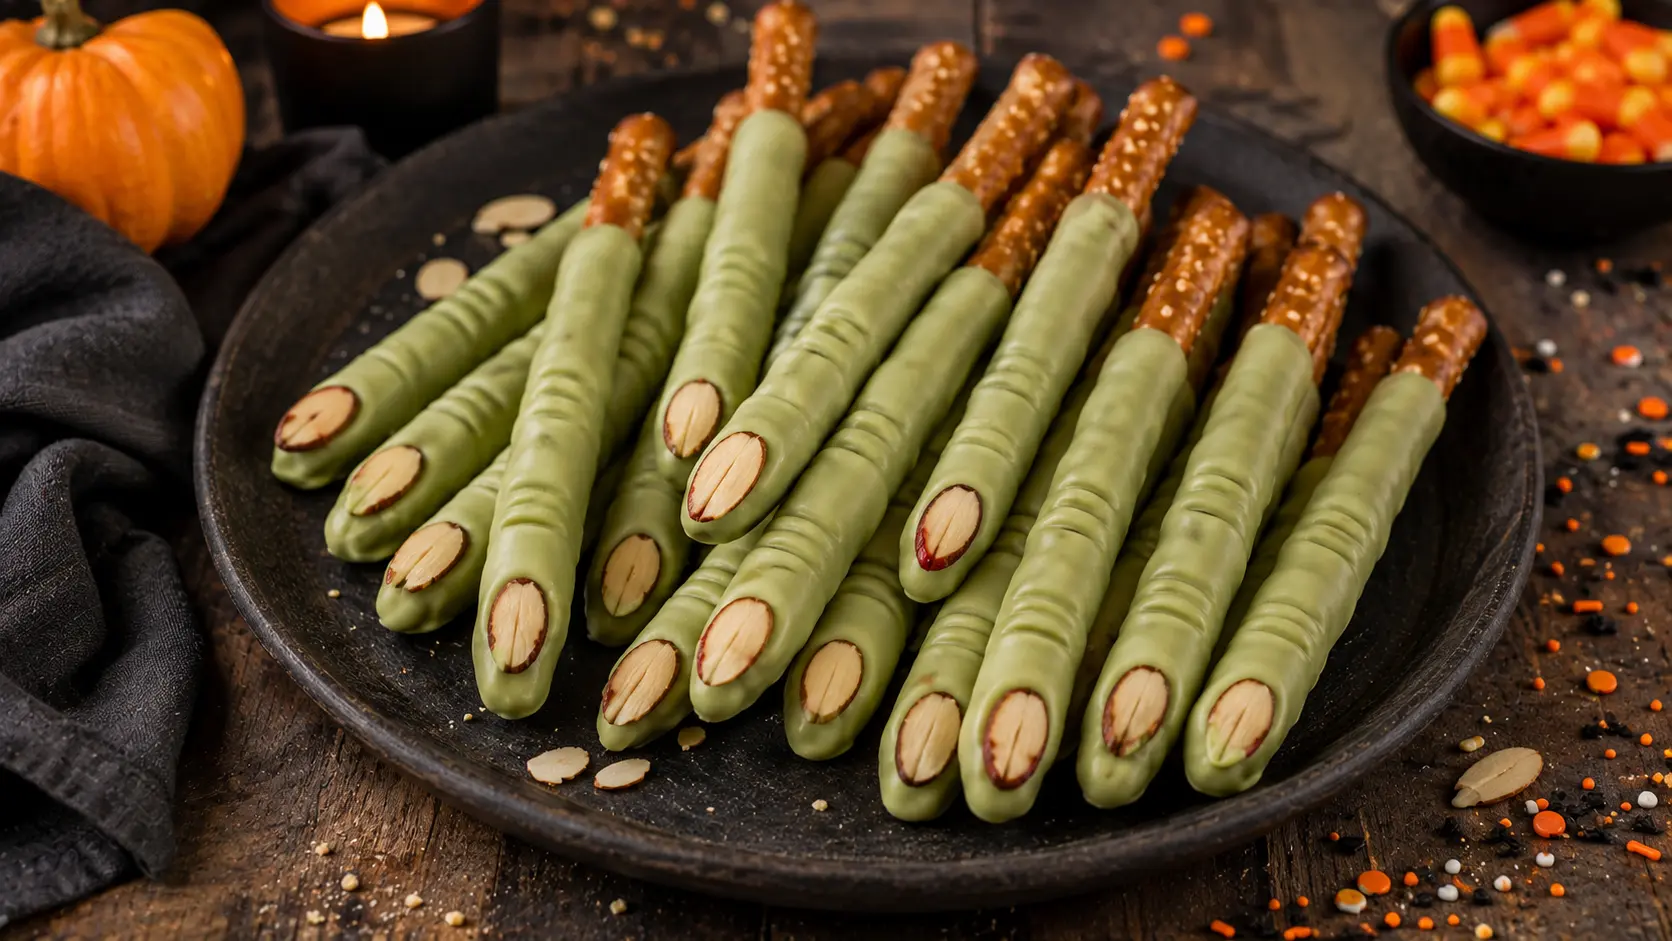
If you need a Halloween treat that looks impressive without spending hours baking and decorating, these Witch Finger Pretzel Rods are hard to beat. Crunchy pretzel rods are coated in green-tinted white chocolate, decorated with sliced almond “fingernails,” and given a few simple knuckle lines to transform them into creepy little witch fingers.
They’re spooky enough for a Halloween party but still fun rather than overly gruesome. Underneath all the decoration, they’re simply the classic combination of salty pretzels and sweet white chocolate, so they’re just as enjoyable to eat as they are to put on a party table.
Best of all, there’s no baking required. Melt the chocolate, tint it green, dip the pretzels, add the fingernails, and let everything set. Make them ahead for a Halloween dessert board, wrap them individually for party favors, or serve them alongside your other spooky Yummizer recipes.
Easy Witch Finger Pretzel Rods
The idea behind these treats is simple: a long pretzel rod already has roughly the right shape for a crooked witch finger. Once it’s covered with pale green chocolate and topped with an almond slice, the transformation takes only a few decorative details.
The coating is where you need to pay the most attention.
If you’re using white chocolate, choose a food coloring specifically formulated for chocolate or fat-based confections. Ordinary water-based coloring can cause melted chocolate to become thick and grainy because even a small amount of moisture can make chocolate seize. Color additives also need to be approved for their intended food use, so follow the labeling on the coloring you purchase.
An even easier option is to use green candy-melting wafers that are already colored. That eliminates the coloring step entirely.
The almond fingernail goes on while the coating is still wet, and the knuckle creases are added once the coating has partially set. The result is imperfect, crooked, and slightly wrinkled—which is exactly what a witch finger should look like.
⭐ Why You’ll Love This Recipe
- No baking required.
- Ready with just a handful of ingredients.
- Sweet-and-salty flavor.
- Perfect for Halloween parties.
- Easy enough for beginner candy makers.
- Can be prepared ahead.
- Fun addition to Halloween dessert boards.
- Easy to customize with different decorations.
- Naturally imperfect—the messier fingers often look creepier.
- Great alongside both sweet and savory Halloween snacks.
🛒 Ingredients
Pretzel Rods
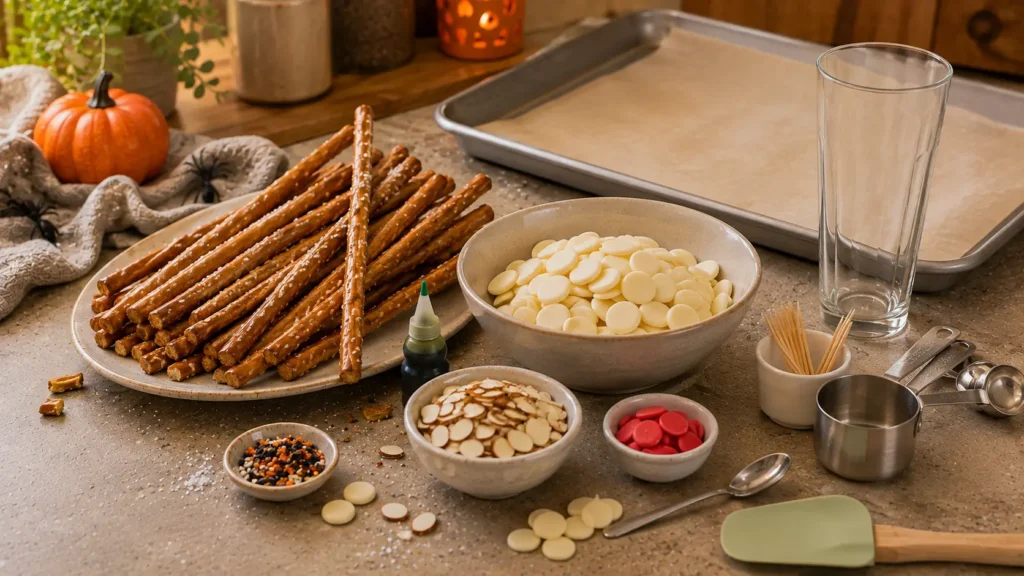
You’ll need approximately 20 pretzel rods.
Choose long, sturdy rods rather than thin pretzel sticks. Inspect the package before beginning and set aside badly broken pieces.
A few slightly crooked pretzels are actually useful here. Witch fingers shouldn’t look perfectly identical.
White Chocolate or White Melting Wafers
Use approximately 12 ounces of white chocolate or white confectionery coating.
Real white chocolate provides a rich, creamy flavor, while melting wafers are generally easier for beginners because they’re designed specifically for melting and dipping.
If using white chocolate, chop bars into small, relatively even pieces before melting.
Green Candy Coloring
If your coating is already green, you don’t need additional coloring.
When tinting white chocolate yourself, use green coloring specifically labeled as suitable for chocolate or fat-based candy applications. Don’t assume that an ordinary liquid food coloring will work simply because it’s food-safe; the formulation matters for melted chocolate.
Add the color gradually. Pale witchy green usually looks more realistic than an extremely bright neon coating.
Sliced Almonds
Sliced almonds make excellent fingernails because they already have a naturally pointed oval shape.
Choose approximately 20 attractive almond slices before you begin dipping.
Some will break, so keep several extras nearby.
Red Candy Melts – Optional
For a creepier version, melt a small amount of red candy coating and place just a tiny amount underneath the almond nail.
The goal isn’t to cover the finger in red. A subtle line around the base of the almond is enough.
Coconut Oil or Shortening – Optional
If your coating is slightly too thick for dipping, a very small amount of neutral shortening or coconut oil can sometimes help thin it.
Don’t automatically add it, though. Start by following the melting directions for the chocolate or confectionery coating you’re actually using.
Halloween Sprinkles – Optional
A few Halloween sprinkles can decorate the serving platter, but I wouldn’t cover the fingers themselves.
The almond nails and knuckle lines are enough to sell the witch-finger effect.
👩🍳 How to Make Witch Finger Pretzel Rods
1. Prepare your work area
Line a large baking sheet with parchment or wax paper.
You’ll need somewhere flat to place the freshly dipped pretzel rods while the coating sets.
2. Sort the pretzels
Choose approximately 20 intact pretzel rods.
Set aside any badly broken ones.
Small imperfections are completely fine.
3. Choose the almond nails
Go through the sliced almonds and select approximately 20 pieces that resemble fingernails.
Look for elongated slices with reasonably pointed ends.
Keep extras nearby in case some break.
4. Prepare the chocolate
If you’re using white chocolate bars, chop them finely and evenly.
Place the chocolate or melting wafers in a clean, completely dry microwave-safe bowl.
Moisture is especially problematic when working with chocolate.
5. Melt slowly
Microwave the coating in short intervals, stirring thoroughly between each one.
Don’t blast it continuously at full power.
Stop heating when only a few small pieces remain, then continue stirring until the residual heat melts them.
6. Add the green color
If you’re starting with white coating, add a small amount of chocolate-compatible green candy coloring.
Stir thoroughly.
Add additional color gradually until you reach a muted witchy green.
7. Check the consistency
Lift your spoon and allow some coating to fall back into the bowl.
It should flow smoothly enough to coat a pretzel without creating an extremely thick shell.
If you’re using confectionery wafers, follow the package directions for thinning if needed.
8. Transfer to a narrow container
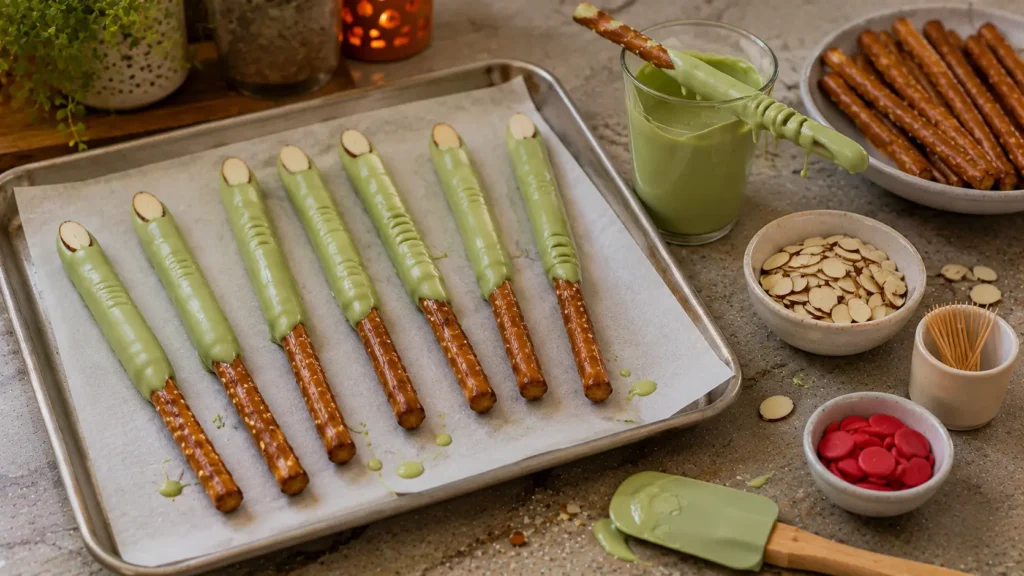
Pour the melted green coating into a tall, narrow glass or heat-safe container.
A narrow vessel makes it easier to coat most of the length of each pretzel rod without requiring an enormous quantity of chocolate.
9. Dip the first pretzel
Hold one end of the pretzel rod and lower the opposite end into the green coating.
Cover approximately two-thirds to three-quarters of the rod.
Leave a portion of the pretzel exposed as a convenient handle.
10. Remove excess coating
Lift the rod slowly.
Allow excess coating to drip back into the container.
Gently tap or rotate the rod if necessary.
The surface does not need to be perfectly smooth.
11. Place on parchment
Lay the coated rod carefully on your prepared baking sheet.
12. Add the almond fingernail
While the coating is still wet, press one sliced almond gently into the coated tip.
Position the pointed end outward.
Don’t push so deeply that the almond disappears.
13. Add optional red detail
If using red candy coating, add the smallest streak or dot underneath the base of the almond.
Keep it subtle.
14. Let the coating partially set
Wait until the green coating is no longer completely liquid but hasn’t hardened.
This is the best moment for adding wrinkles.
15. Create the first knuckle
Use a toothpick or the tip of a small knife to draw 2–3 shallow horizontal lines across the coating.
Don’t cut all the way through to the pretzel.
16. Add another knuckle
Create another small group of lines farther down the pretzel.
Vary their spacing slightly.
Real fingers aren’t perfectly symmetrical—and witch fingers definitely shouldn’t be.
17. Repeat
Continue dipping and decorating the remaining pretzel rods.
Work in small batches if your coating begins setting before you can add the almond nails.
18. Let them set
Leave the pretzels undisturbed until the coating is completely firm.
The exact time depends on the coating and room temperature.
19. Check the nails
Once everything has hardened, gently check that each almond slice is securely attached.
If one falls off, use a tiny dab of melted coating as glue.
20. Arrange for serving
Place the witch fingers irregularly on a dark serving platter, wooden board, or Halloween dessert tray.
Avoid lining them up perfectly. A slightly chaotic pile looks much better.
🍽️ Equipment Needed
You’ll need:
- Baking sheet
- Parchment or wax paper
- Microwave-safe bowl
- Tall narrow dipping glass or container
- Silicone spatula or spoon
- Toothpicks
- Small knife, optional
- Measuring cups
- Microwave or double boiler
Make sure all equipment touching the chocolate is completely dry.
🔁 Variations & Substitutions
Green Candy Melt Witch Fingers
This is the easiest version.
Use pre-colored green melting wafers instead of white chocolate and food coloring.
White Witch Fingers
Skip the green coloring completely.
White-coated pretzels with almond nails can create a ghostly finger appearance.
Purple Witch Fingers
Use purple candy coating instead of green for a different Halloween color scheme.
Bloody Witch Fingers
Add a tiny amount of red candy coating around the almond nail and exposed pretzel end.
Keep it restrained so the treats remain appetizing.
Chocolate Fingernails
If almonds aren’t suitable, create small fingernails from contrasting candy coating.
Extra-Wrinkled Fingers
Once the coating is partially set, add a few additional shallow lines with a toothpick.
Don’t overdo it or the coating can crack off.
💡 Pro Tips for the Best Witch Finger Pretzels
Keep everything dry
Water and melted chocolate are a bad combination.
Dry bowls, spoons, and utensils thoroughly before beginning.
Use the right coloring
If you’re using actual white chocolate, choose coloring intended for chocolate/fat-based applications. The FDA notes that color additives have formulation-dependent properties, including water or oil solubility, and only approved colors should be used for their permitted applications.
Don’t overheat the chocolate
Short heating intervals are safer.
Stirring distributes the heat and can melt remaining pieces without additional microwaving.
Pick the almond nails first
Trying to search through a bag of sliced almonds while your chocolate-coated pretzel is setting is unnecessarily stressful.
Select them before melting anything.
Embrace imperfect fingers
Different lengths, crooked nails, uneven wrinkles, and irregular coating make these look more convincing, not less.
Add the nails immediately
If the coating sets first, the almond won’t adhere.
Don’t make the coating too thick
A thick shell hides the pretzel shape and can make the fingers look bulky rather than creepy.
🧊 Storage & Make-Ahead Instructions
These witch finger pretzels are a convenient make-ahead Halloween treat because the main ingredients are shelf-stable.
Once the coating has completely hardened, place the pretzels in an airtight container with parchment between layers.
Keep them in a cool, dry place away from direct sunlight and heat. USDA storage guidance similarly recommends keeping shelf-stable foods in cool, clean, dry conditions to preserve quality.
For the best texture and appearance, I recommend making them within several days of serving. Always follow any specific storage directions on the chocolate or confectionery coating you use.
Should I refrigerate them?
Usually, refrigeration isn’t necessary for plain pretzels coated in shelf-stable confectionery coating.
A very humid refrigerator can also create condensation when the treats return to room temperature.
If your specific coating requires refrigeration, however, follow its package instructions.
Can I freeze witch finger pretzels?
I don’t recommend it.
Pretzels can lose some of their crisp texture, and condensation can affect the appearance of the coating.
❓ Frequently Asked Questions
What are Witch Finger Pretzel Rods?
They’re Halloween treats made by coating pretzel rods in colored chocolate or candy coating and decorating them to resemble creepy witch fingers.
Can I use regular food coloring in white chocolate?
Not necessarily.
If the coloring contains water, it can cause melted chocolate to seize. Use a product specifically formulated and labeled for use with chocolate or fat-based candy coatings.
Why did my white chocolate become thick and grainy?
Moisture or incompatible coloring is one possible cause.
Overheating can also damage chocolate.
Can I use green candy melts instead?
Yes—and that’s probably the easiest option for beginners.
You won’t need to tint the coating yourself.
What can I use for witch fingernails?
Sliced almonds are ideal because their shape naturally resembles pointed fingernails.
Can I make these without almonds?
Yes.
Use a small contrasting piece of candy coating or another allergy-appropriate edible decoration.
How far should I dip the pretzels?
Approximately two-thirds to three-quarters of the rod works well.
Leaving part exposed gives you somewhere to hold the pretzel.
How do I make the knuckle lines?
Allow the coating to partially set, then gently draw several shallow horizontal creases with a toothpick.
Why are my almond nails falling off?
They were probably added after the coating had already started hardening.
Attach them immediately after dipping.
If necessary, glue loose almonds back on with a tiny amount of melted coating.
Can I make Witch Finger Pretzels ahead?
Yes.
They’re actually a good make-ahead party treat because there’s no cake or frosting that needs to stay fresh overnight.
🎃 Build an Easy Halloween Party Spread
These witch fingers are even more fun when they’re part of a larger spooky Halloween table.
For something savory, serve them alongside Easy Mummy Pretzel Dogs. Both recipes use pretzels but in completely different ways—the mummy dogs provide the warm savory snack while the witch fingers handle dessert.
Add Creamy Spider Web Buffalo Chicken Dip as the centerpiece of the appetizer side of the table. Guests can scoop the warm dip with chips and vegetables before moving on to the sweets.
For another colorful dessert, add Candy Corn Sugar Cookie Bars. Their orange, yellow, and white candy pieces work naturally with the creepy green witch fingers and give guests a soft baked dessert alongside the crunchy pretzels.
You could finish the table with an autumn drink such as Easy Iced Pumpkin Cream Cold Brew for a Halloween gathering with adults.
That gives you a complete mix of savory + spicy + crunchy + sweet rather than a party table made entirely from candy.
📊 Approximate Nutrition
Per pretzel rod, assuming 20 treats:
Calories: approximately 130–160
Protein: approximately 2 g
Carbohydrates: approximately 21–25 g
Fat: approximately 5–7 g
Sugar: approximately 12–16 g
Sodium: approximately 100–160 mg
Nutrition will vary considerably depending on the pretzel brand, coating used, and thickness of each chocolate layer.
Spooky Witch Finger Pretzel Rods
Ingredients
Method
- Line a large baking sheet with parchment or wax paper.
- Select 20 intact pretzel rods and approximately 20 attractive sliced almonds for the fingernails.
- If using white chocolate bars, chop the chocolate into small, relatively even pieces.
- Place the white chocolate or confectionery coating in a completely dry microwave-safe bowl.
- Microwave in short intervals, stirring thoroughly between each interval, until smooth.
- If necessary, add a small amount of green candy coloring specifically formulated for chocolate or fat-based coatings.
- Stir until the coating reaches a muted witchy green.
- Transfer the melted coating to a tall, narrow dipping container.
- Dip approximately two-thirds to three-quarters of one pretzel rod into the green coating.
- Lift slowly and allow excess coating to drip back into the container.
- Place the coated pretzel on the prepared baking sheet.
- Immediately press one sliced almond into the coated tip to create a fingernail.
- If desired, add a tiny amount of melted red candy coating beneath the almond.
- Allow the green coating to partially set.
- Use a toothpick to draw 2–3 shallow horizontal lines across the coating to form a knuckle.
- Add another small group of creases farther down the finger.
- Repeat with the remaining pretzel rods.
- Leave the decorated pretzels undisturbed until the coating is completely firm.
- If any almond nail becomes loose, attach it again using a tiny amount of melted coating.
- Transfer the finished witch fingers to a serving platter or store them in an airtight container until needed.