Airy Ghost Meringue Cookies — Easy Halloween Treat
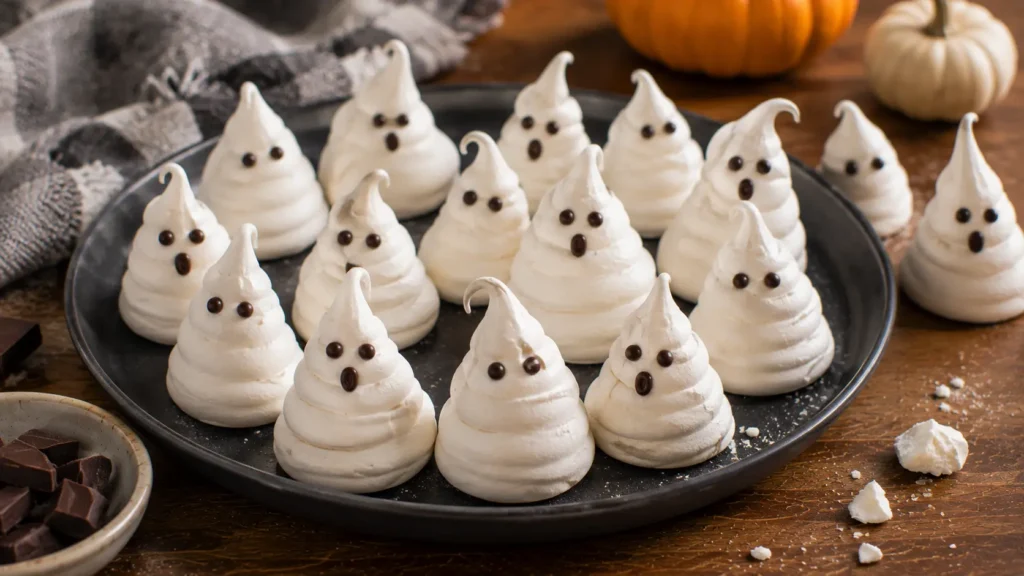
Light, crisp, and almost too cute to eat, these Ghost Meringue Cookies are an easy Halloween treat made with a handful of simple ingredients. Each little ghost has a crisp exterior, a delicate melt-in-your-mouth center, and a pair of tiny chocolate eyes that bring it to life.
Unlike elaborate Halloween desserts, these spooky meringues don’t require specialty molds or complicated decorating. The meringue is simply piped into tall, slightly imperfect ghost shapes before being slowly baked until dry.
They’re naturally white, so there’s no need for artificial white frosting or complicated coatings. Add tiny chocolate faces and suddenly a basic French meringue becomes an adorable Halloween dessert.
If you’re putting together a larger spooky dessert table, serve these alongside our Halloween Graveyard Dirt Cups for two very different textures: creamy chocolate pudding cups and light, crispy meringue ghosts.
Easy Ghost Meringue Cookies for Halloween
Meringue cookies are made primarily from egg whites and sugar, but the technique matters more than the ingredient list.
Whipping egg whites incorporates thousands of tiny air bubbles. Sugar gradually stabilizes those bubbles, creating a glossy mixture stiff enough to hold its shape when piped.
Instead of piping traditional meringue kisses, we’ll pipe the mixture upward into little ghost-shaped swirls.
The cookies are then baked at a very low temperature. We’re essentially drying the meringue rather than baking it like an ordinary cookie.
That slow process is what gives the ghosts their delicate crisp texture while helping them stay pale instead of turning deeply browned.
⭐ Why You’ll Love These Ghost Meringue Cookies
Only a few ingredients: Egg whites and sugar do most of the work.
Perfect Halloween appearance: Their natural white color makes meringue ideal for little ghosts.
Light and crispy: They’re a nice contrast to richer Halloween brownies and cookies.
Easy faces: You don’t need advanced decorating skills.
Make-ahead friendly: Properly stored meringues stay crisp for several days.
Great for Halloween parties: Make a whole tray of ghosts with slightly different expressions.
And if you want something richer on the same dessert table, our Spooky Mummy Brownies with Candy Eyes make a fun chocolate counterpart.
🛒 Ingredients
Egg Whites — 3 Large
Room-temperature egg whites generally whip more easily than refrigerator-cold whites.
Be extremely careful when separating them. Even a small amount of egg yolk can interfere with whipping.
Granulated Sugar — ¾ Cup
Regular granulated sugar works well when added very gradually.
The sugar stabilizes the meringue and creates its crisp texture.
Cream of Tartar — ¼ Teaspoon
Cream of tartar helps stabilize the whipped egg whites and makes the meringue more forgiving.
Vanilla Extract — ½ Teaspoon
A small amount gives the cookies a subtle vanilla flavor.
Use clear vanilla if maintaining the brightest possible white color is important, but ordinary vanilla works too.
Fine Salt — Tiny Pinch
A very small pinch balances the sweetness.
Dark Chocolate — About 1 oz (28 g)
Melted dark or semi-sweet chocolate creates the eyes and mouths after the meringues have completely cooled.
You only need a small amount.
👩🍳 How to Make Ghost Meringue Cookies
1. Preheat the Oven
Preheat your oven to 200°F (95°C).
Meringues need low, gentle heat.
2. Prepare the Baking Sheet
Line a large metal baking sheet with parchment paper.
Avoid greasing the parchment.
3. Prepare Your Equipment
Make sure your mixing bowl and whisk attachment are completely clean and dry.
Any residual grease can prevent egg whites from whipping properly.
4. Separate the Eggs
Carefully separate three eggs.
Place the whites in your mixing bowl, making sure no yolk gets into them.
5. Begin Whipping
Beat the egg whites on medium speed until they become foamy.
6. Add Cream of Tartar
Add the cream of tartar and tiny pinch of salt.
Continue whipping until soft peaks begin to form.
7. Begin Adding Sugar
Increase to medium-high speed.
Add the sugar one tablespoon at a time.
Don’t dump it in all at once.
8. Continue Whipping
Allow several seconds between each addition so the sugar has time to dissolve.
9. Add Vanilla
Once most of the sugar has been incorporated, add the vanilla.
10. Whip to Stiff Peaks
Continue beating until the meringue becomes thick, glossy, and holds stiff peaks.
Rub a tiny amount between two fingers.
It should feel mostly smooth rather than obviously gritty.
11. Prepare the Piping Bag
Fit a piping bag with a large round piping tip.
Transfer the meringue into the bag.
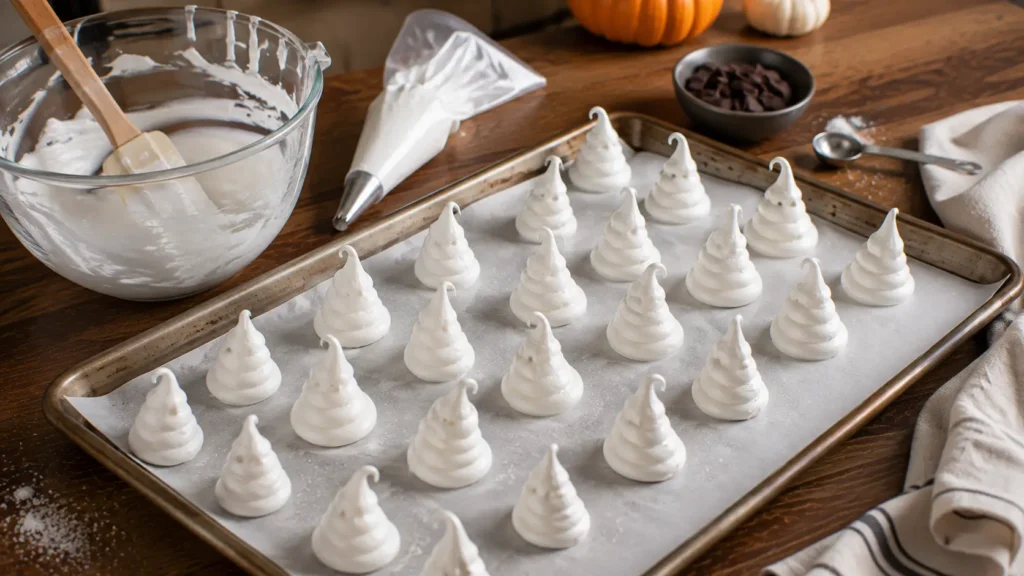
12. Pipe the Ghost Bodies
Hold the piping bag vertically above the parchment.
Pipe a wider base, then gradually lift upward while reducing pressure to create a tapered ghost shape.
13. Embrace Imperfection
Don’t make every ghost identical.
Some can lean slightly, some can be taller, and others can have crooked tips.
That variation makes the finished cookies much more charming.
14. Leave Space
Leave approximately 1 inch between the ghosts.
They won’t spread significantly, but airflow helps them dry.
15. Bake Slowly
Bake for approximately 1 hour 15 minutes.
The meringues should feel dry on the outside and lift relatively easily from the parchment.
16. Turn Off the Oven
Turn the oven off but leave the meringues inside.
17. Cool Gradually
Leave the oven door slightly cracked and let the ghosts cool inside for approximately 45–60 minutes.
This gradual cooling helps reduce cracking.
18. Melt the Chocolate
Once the ghosts are completely cool, melt the chocolate gently.
19. Create the Faces
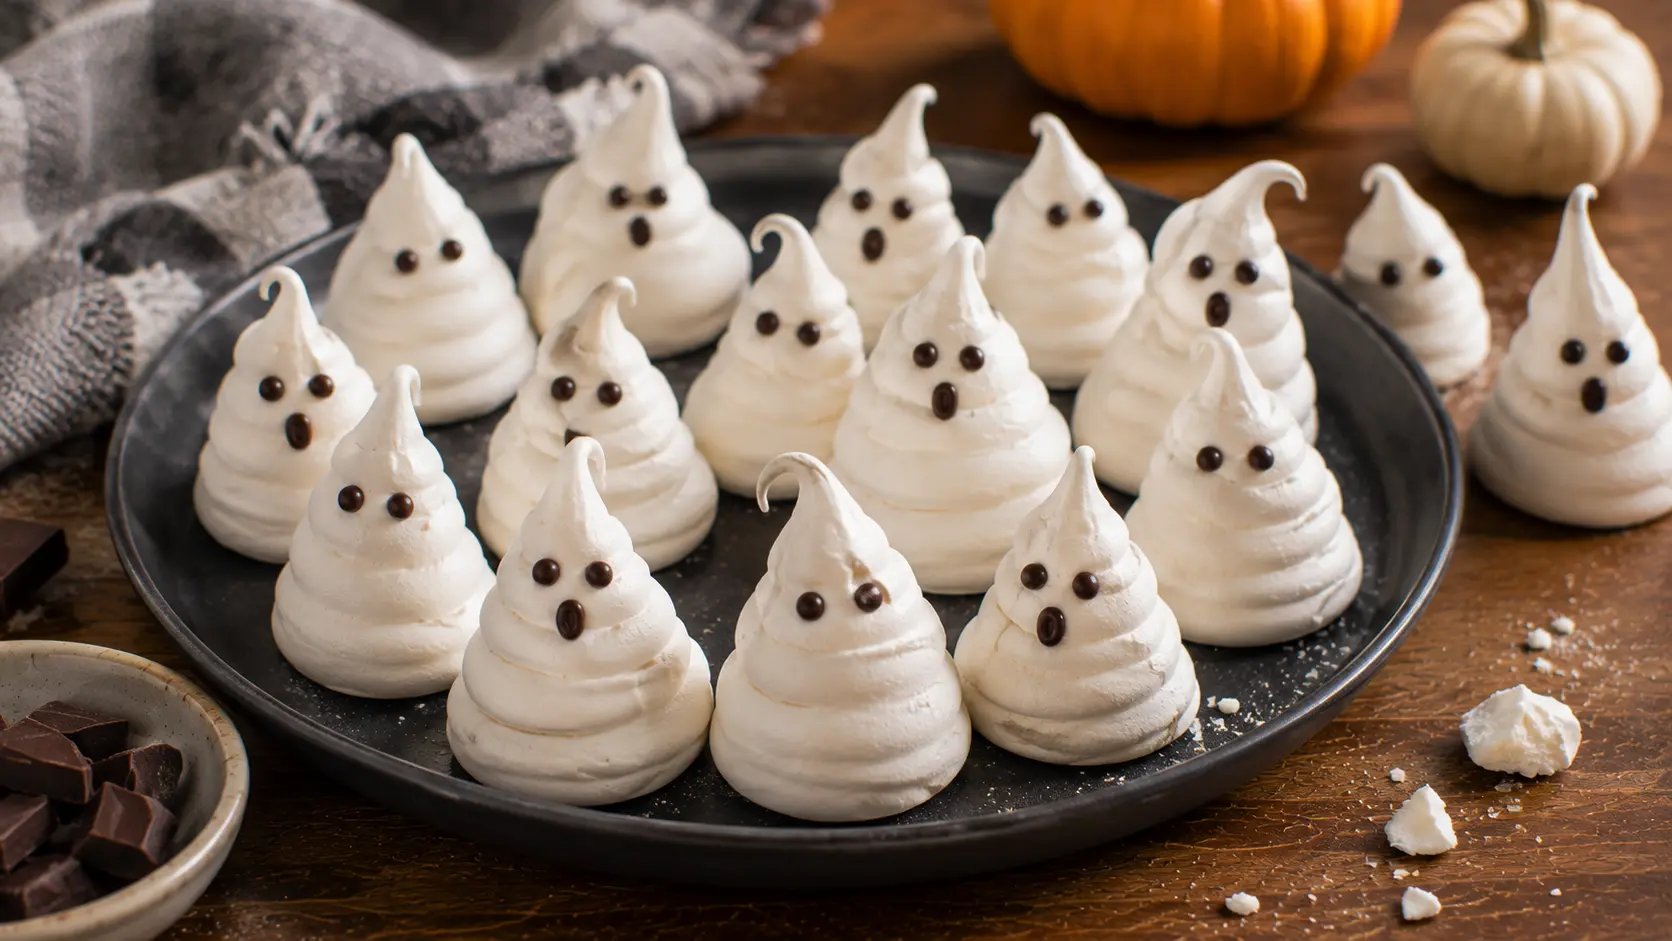
Use a toothpick, very small piping bag, or fine decorating tool to add two small chocolate eyes.
Add a tiny oval mouth to some ghosts if desired.
Different expressions make the batch more playful.
20. Let the Chocolate Set
Allow the chocolate faces to firm before transferring or storing the cookies.
🍳 Equipment
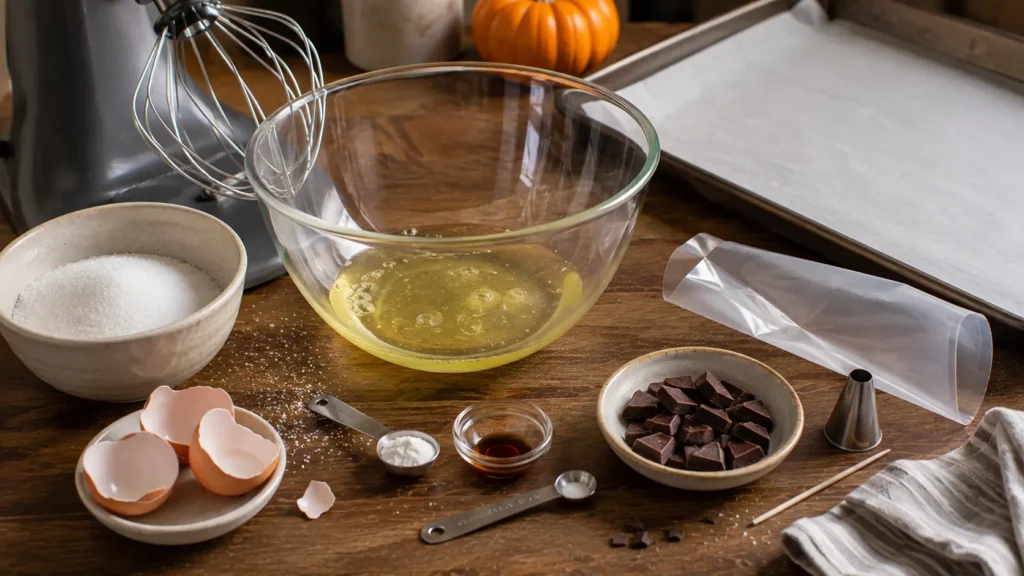
You’ll need a large metal baking sheet, parchment paper, electric stand mixer or hand mixer, completely clean mixing bowl, whisk attachment or beaters, piping bag, large round piping tip, rubber spatula, measuring cups and spoons, and a toothpick or small piping bag for decorating.
A stand mixer is convenient because the egg whites need several minutes of continuous whipping, but a hand mixer works too.
🔄 Variations
Chocolate Ghost Meringues
Fold a very small amount of sifted cocoa powder through part of the finished meringue for a swirled chocolate effect.
Mini Ghosts
Pipe smaller ghosts for bite-sized Halloween treats.
Reduce the drying time accordingly.
Different Expressions
Give some ghosts round mouths, others tiny smiles, and some only eyes.
Small differences make a platter much more interesting.
Ghost Meringue Pops
Pipe ghosts around oven-safe paper sticks to create meringue pops.
Add Sprinkles
A tiny amount of Halloween sprinkles can be added before baking, although keeping the ghosts plain white usually creates the strongest visual effect.
Make a Halloween Dessert Board
Combine these meringues with our Spooky Halloween Monster Cookies and Spooky Peanut Butter Spider Cookies for a dessert board with several different shapes, colors, and textures.
💡 Pro Tips
Keep everything grease-free. Fat is one of meringue’s biggest enemies.
Separate eggs individually. That way, one broken yolk doesn’t ruin all your whites.
Add sugar slowly. Gradual incorporation creates a smoother, more stable meringue.
Whip to genuine stiff peaks. The ghosts need enough structure to remain upright.
Use low oven heat. High temperatures cause browning and cracking.
Don’t rush cooling. Gradual cooling helps the meringues stay intact.
Decorate only when completely cool. Warm meringues can be fragile.
Humidity matters. Meringues absorb moisture from the air, so they’re best made on a relatively dry day when possible.
🧊 Storage
Allow the meringues to cool completely before storing.
Place them in an airtight container at room temperature for up to about 5 days.
Keep the container away from heat and moisture.
Don’t refrigerate the cookies. Refrigerator humidity can make their crisp exteriors sticky and soft.
If you’re stacking them, place parchment paper between layers and handle the delicate tips carefully.
❓ Frequently Asked Questions
Why Are My Meringues Chewy?
They may need additional drying time, or they may have absorbed moisture from humid air.
Return undecorated meringues to a low oven briefly if necessary.
Why Did My Ghosts Spread?
The meringue may not have been whipped to stiff enough peaks.
Properly whipped meringue should hold the piped ghost shape.
Why Are My Meringues Brown?
Your oven may be running hotter than its displayed temperature.
Meringues need very gentle heat to remain pale.
Why Did My Meringues Crack?
Rapid temperature changes are a common cause.
Allowing them to cool gradually inside the switched-off oven helps.
Can I Make Ghost Meringues Ahead?
Yes.
They’re actually an excellent make-ahead Halloween treat when stored in an airtight container.
Can I Use Carton Egg Whites?
Fresh egg whites are the most reliable option for this recipe.
Some pasteurized carton whites don’t whip as effectively.
How Do I Know When Meringues Are Done?
They should feel dry and lift easily from the parchment.
The exact time depends on their size and your oven.
🍽️ How to Serve Ghost Meringue Cookies
Pile the little ghosts loosely on a simple dark serving platter so their white shapes stand out.
For a Halloween party, combine them with Halloween Graveyard Dirt Cups, Spooky Mummy Brownies with Candy Eyes, and Spooky Halloween Monster Cookies to create a dessert table with a mix of chocolate, cookies, creamy desserts, and crisp meringues.
They can also be packaged carefully in clear treat bags for classroom parties, Halloween gatherings, or homemade party favors.
Because they’re delicate, avoid overcrowding them with heavy desserts that could crush their pointed tops.
📊 Approximate Nutrition
Based on approximately 24 small ghost cookies:
Calories: ~35
Carbohydrates: ~8 g
Protein: ~0.5 g
Fat: ~0.5 g
Sugar: ~8 g
Sodium: ~5 mg
Nutrition is an estimate and varies according to ghost size and the amount of chocolate used.
Airy Ghost Meringue Cookies
Ingredients
Method
- Preheat oven to 200°F (95°C).
- Line a large baking sheet with parchment paper.
- Make sure the mixing bowl and beaters are completely clean and grease-free.
- Beat egg whites on medium speed until foamy.
- Add cream of tartar and salt.
- Beat until soft peaks form.
- Increase speed to medium-high.
- Add sugar one tablespoon at a time while continuously beating.
- Add vanilla.
- Continue beating until glossy stiff peaks form and the mixture feels mostly smooth.
- Transfer meringue to a piping bag fitted with a large round tip.
- Pipe approximately 24 tapered ghost shapes onto the parchment.
- Bake for about 1 hour 15 minutes.
- Turn off the oven and crack the door slightly.
- Leave meringues inside for 45–60 minutes.
- Remove and cool completely.
- Melt the chocolate.
- Add small chocolate eyes and optional mouths.
- Allow chocolate to set.
- Store in an airtight container.